LucidLink
Intro
LucidLink is a cloud storage solution that enables users to access their data from any location and device via an Internet connection. It uses file system virtualization technology and the S3 protocol to provide real-time access to files, eliminating the need to manually synchronize or transfer data between devices. LucidLink allows for quick and reliable access to large files. The solution is available as both a public cloud service and an on-premise installation, allowing businesses to choose the storage configuration that best suits their needs.
Prerequisites
To set up LucidLink with Cubbit, you first need to obtain access and secret keys from the Cubbit Web Console or https://console.[your-tenant].cubbit.eu. You can follow the instructions provided to create a new Cubbit account and generate these keys. It is also highly recommended to create a new empty bucket.
Installation
You can install the LucidLink desktop client directly from the official website.
Configuration
After installing the client, you need to register and log in to the LucidLink website https://www.lucidlink.com.
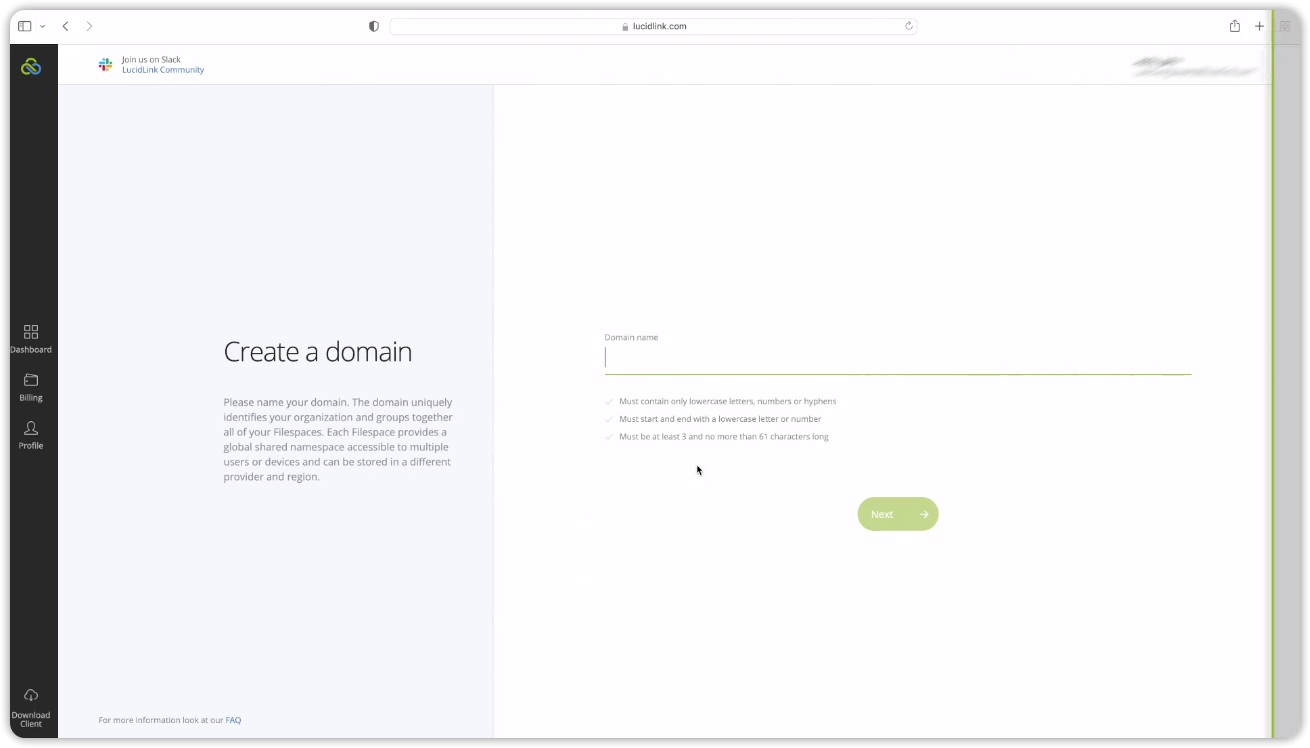
As a first step, create a domain as shown in the following image.
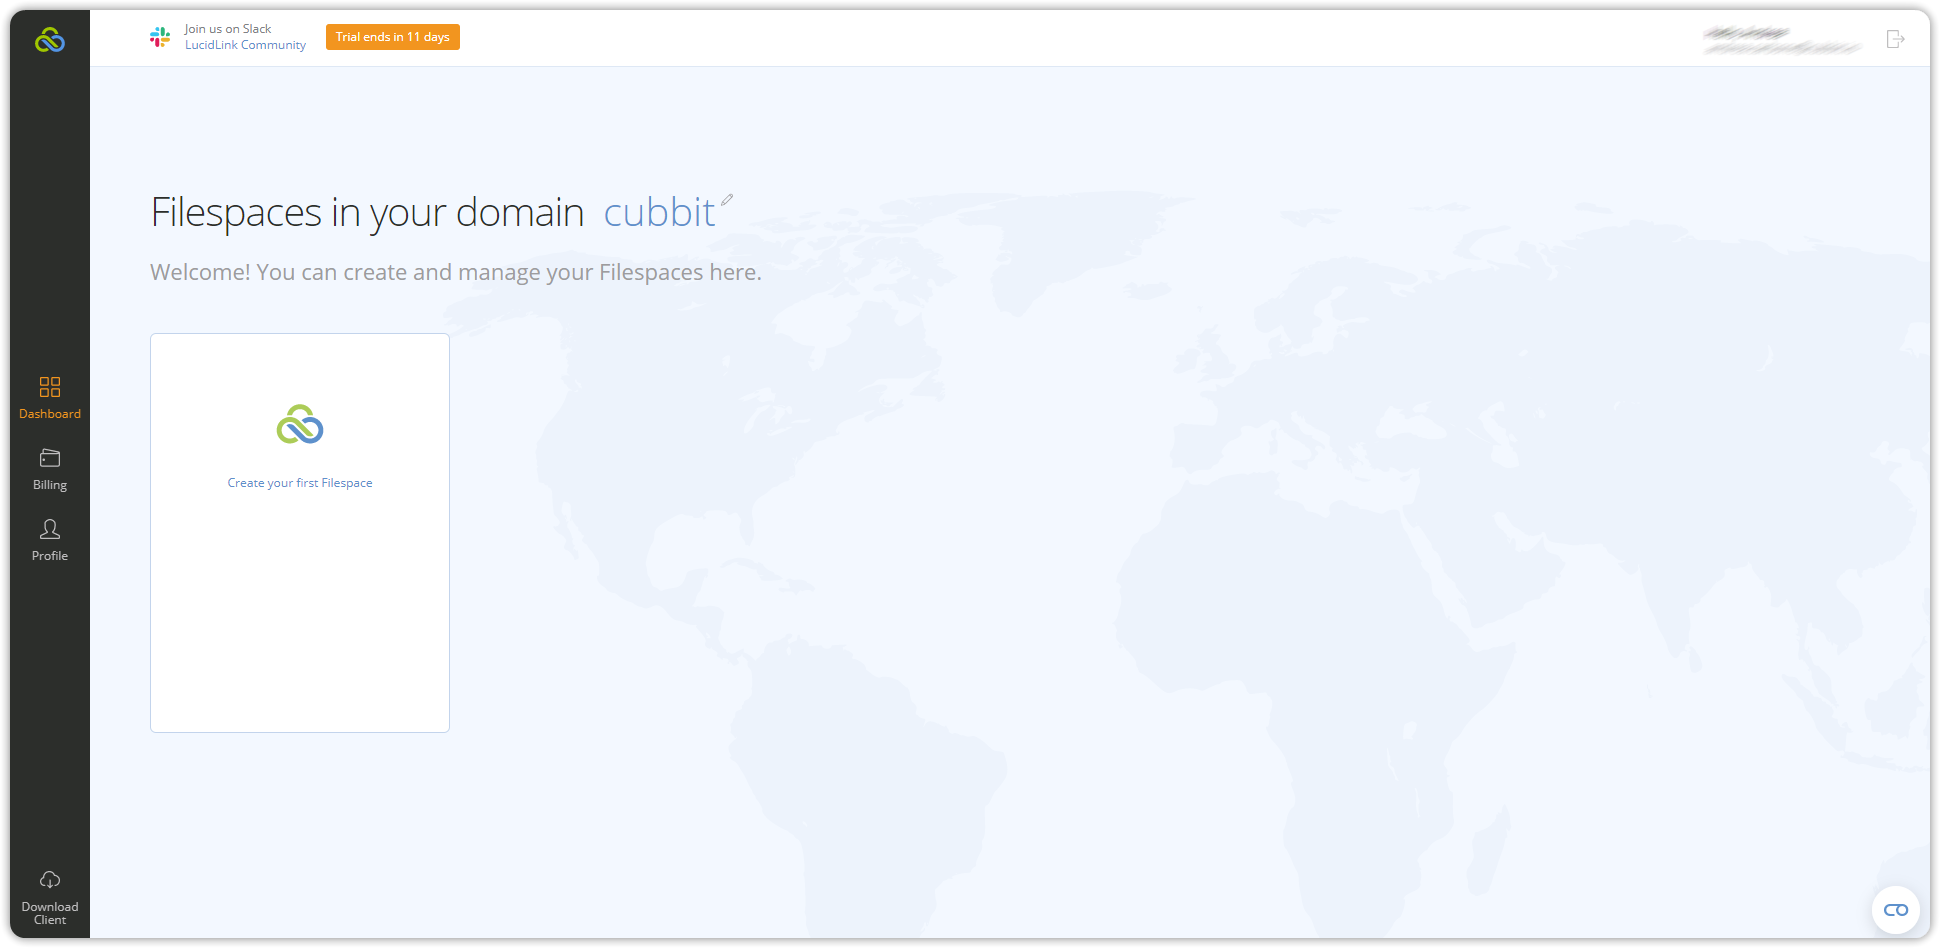
After creating the domain you can now create the first filespace within it. Press Next.
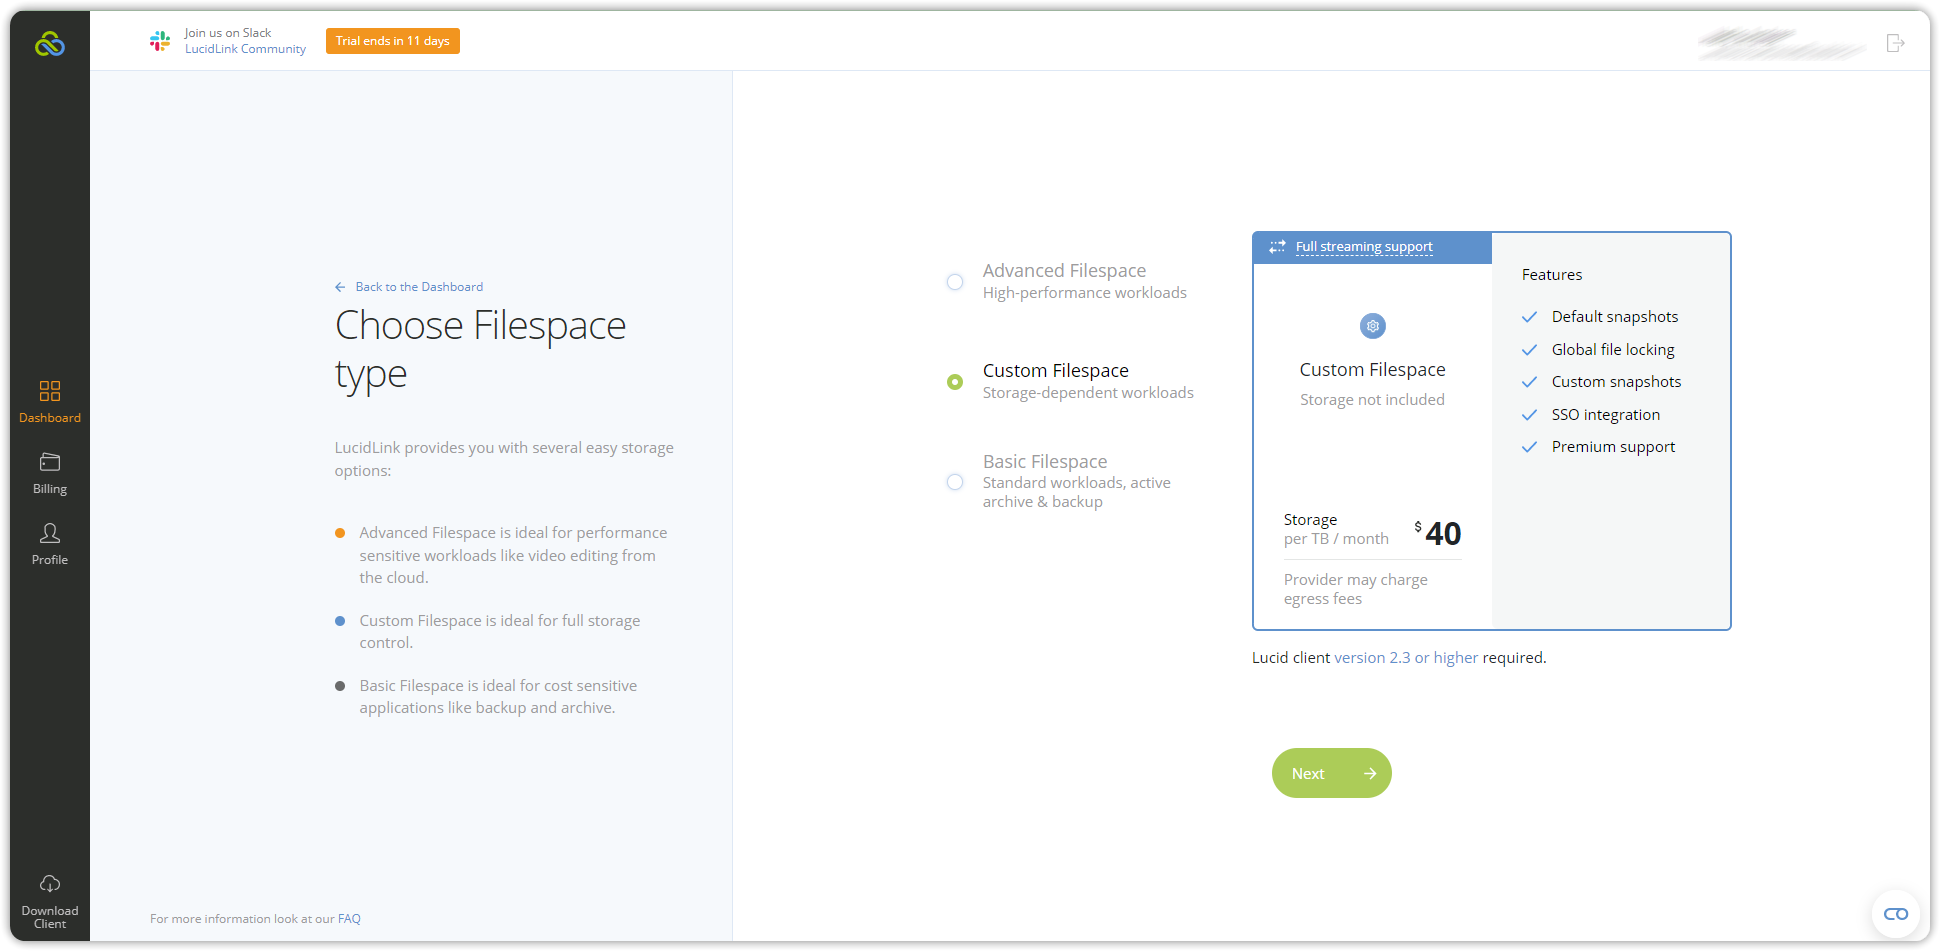
Select Custom Filespace and press Next. Name the filespace and proceed.
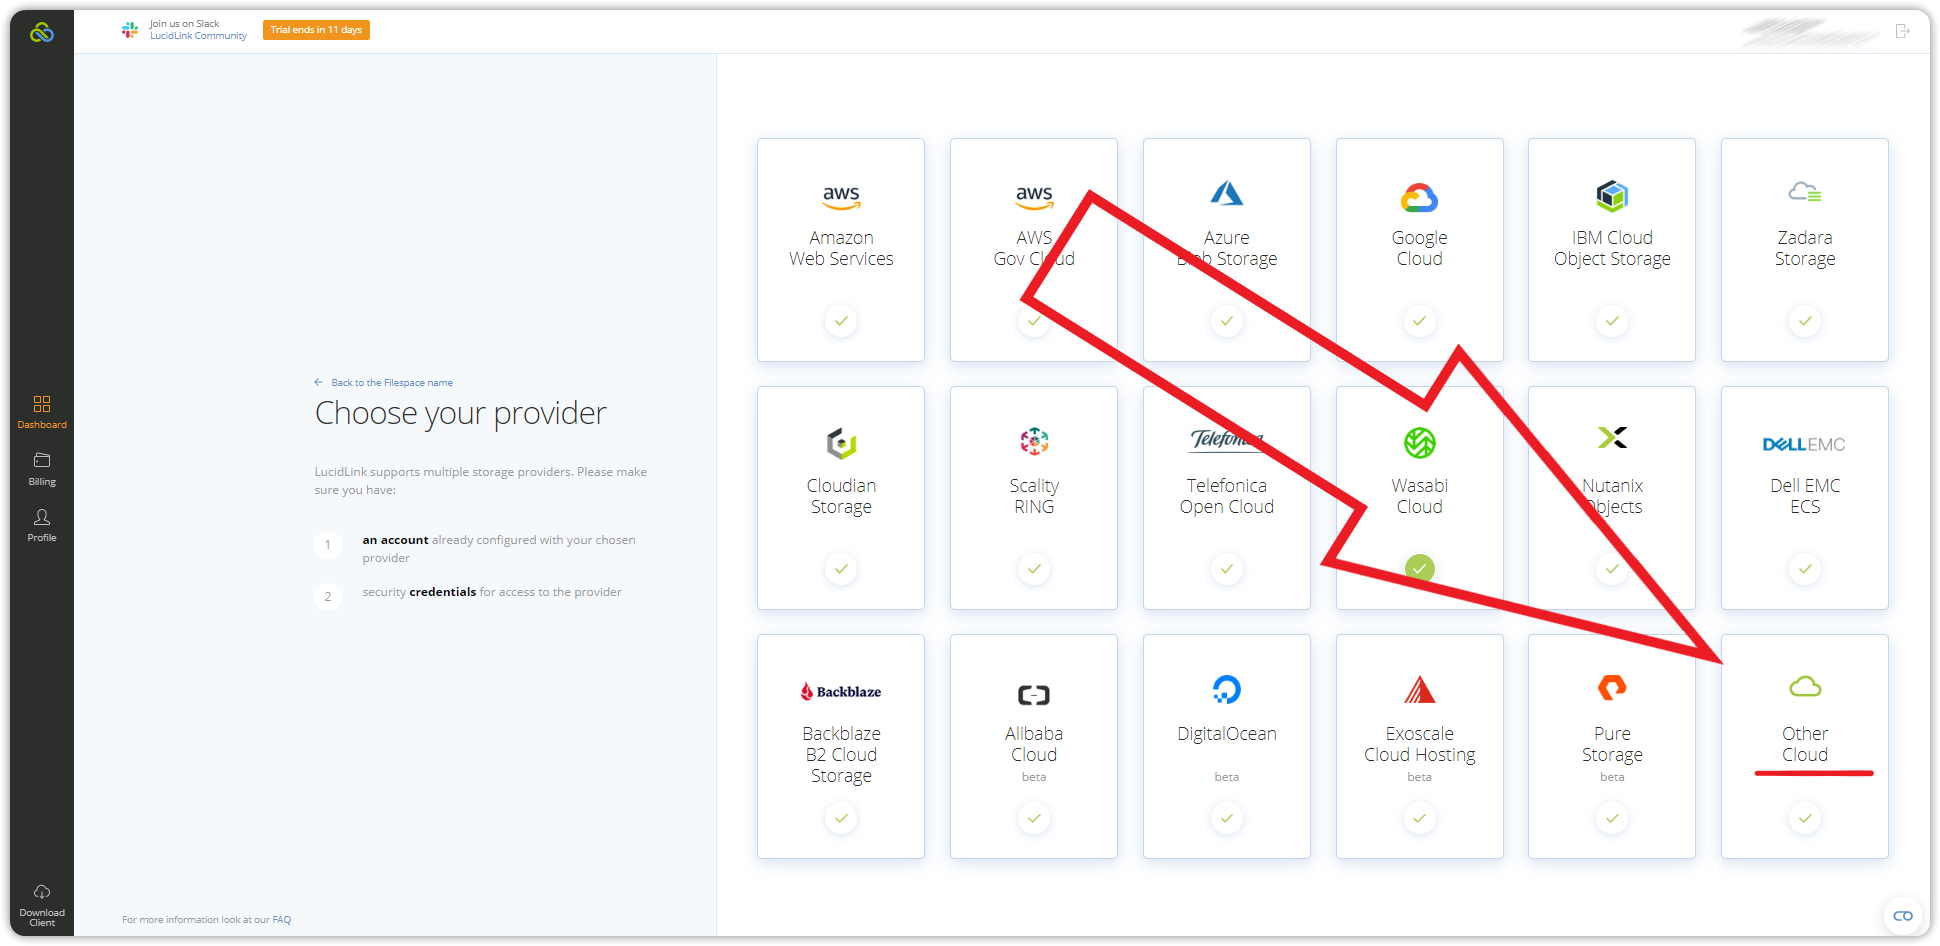
In the list of storage providers, select Other Cloud.
On Endpoint URL enter https://s3.cubbit.eu or https://s3.[your-tenant].cubbit.eu if you have a custom tenant and on the Region name enter eu-west-1. Check the Configure advanced settings box and press Next.
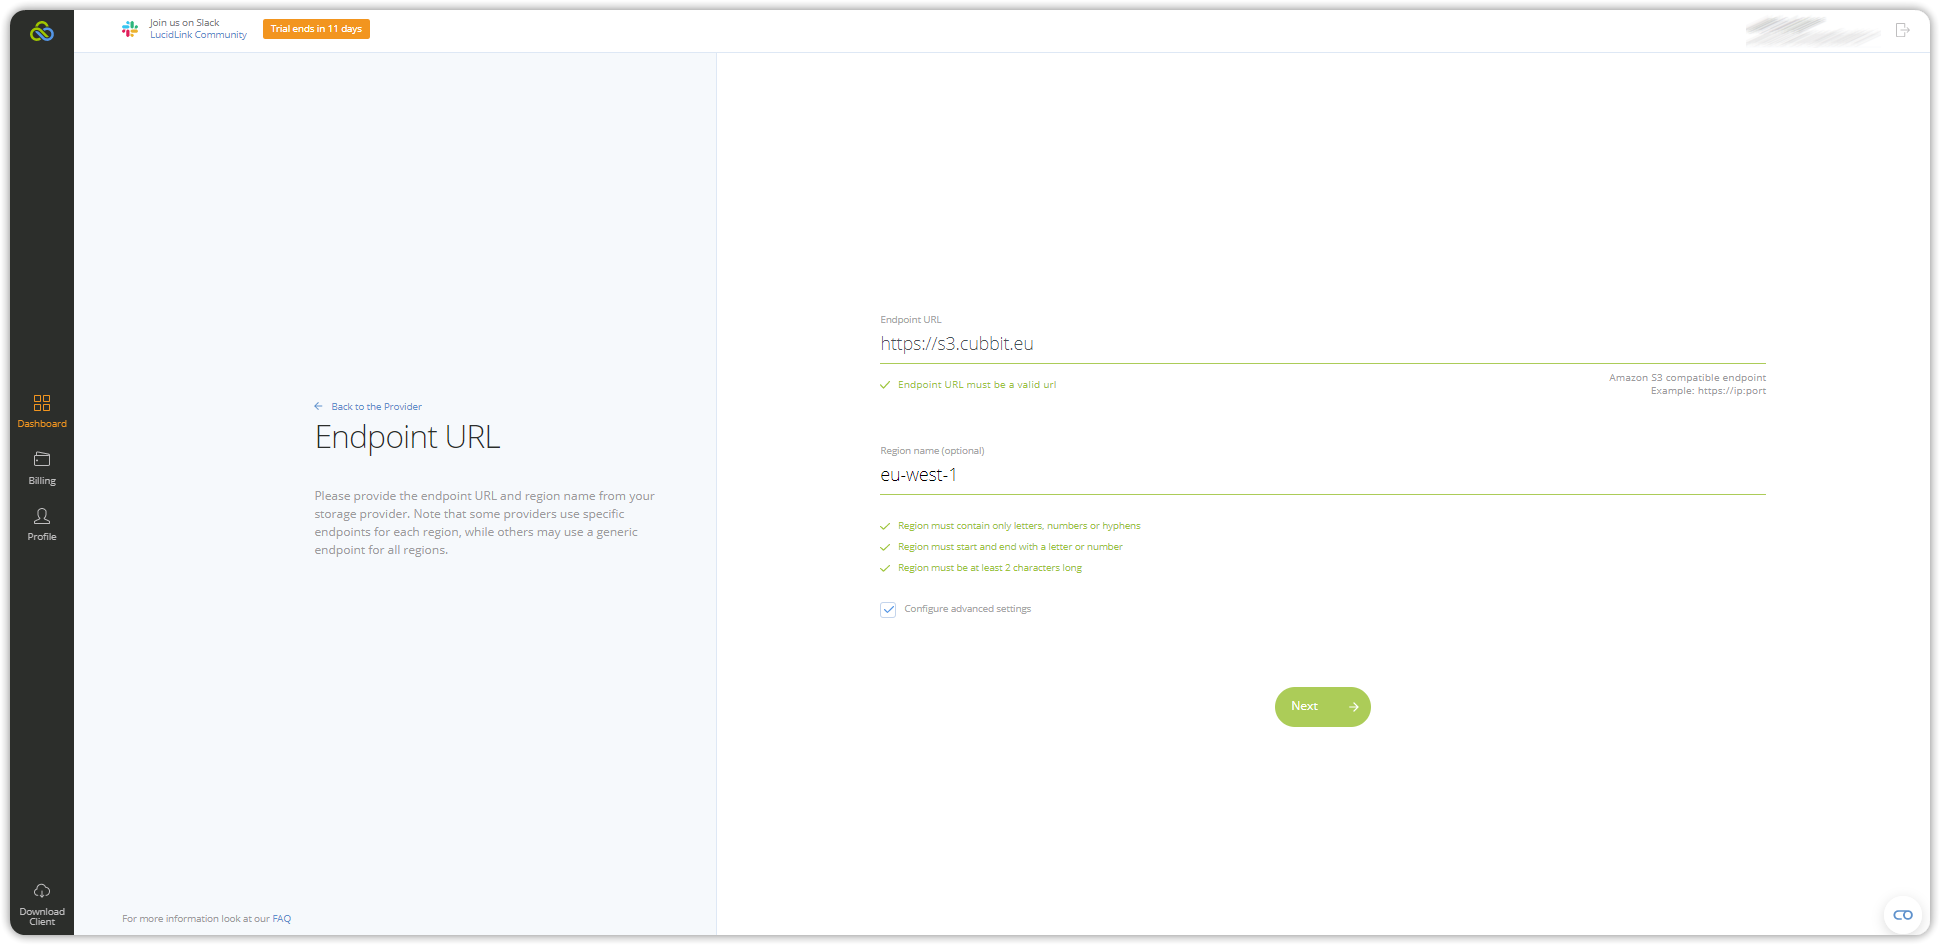
Enter the name of the bucket that was previously created in the Prerequisites section and set the block size according to your needs. The larger the average size of the files we intend to upload to the filespace, the larger the block size value will be. Press Next to review the configuration parameters on the next screen and finally click Create.
More information on block size can be found in the relevant support article.

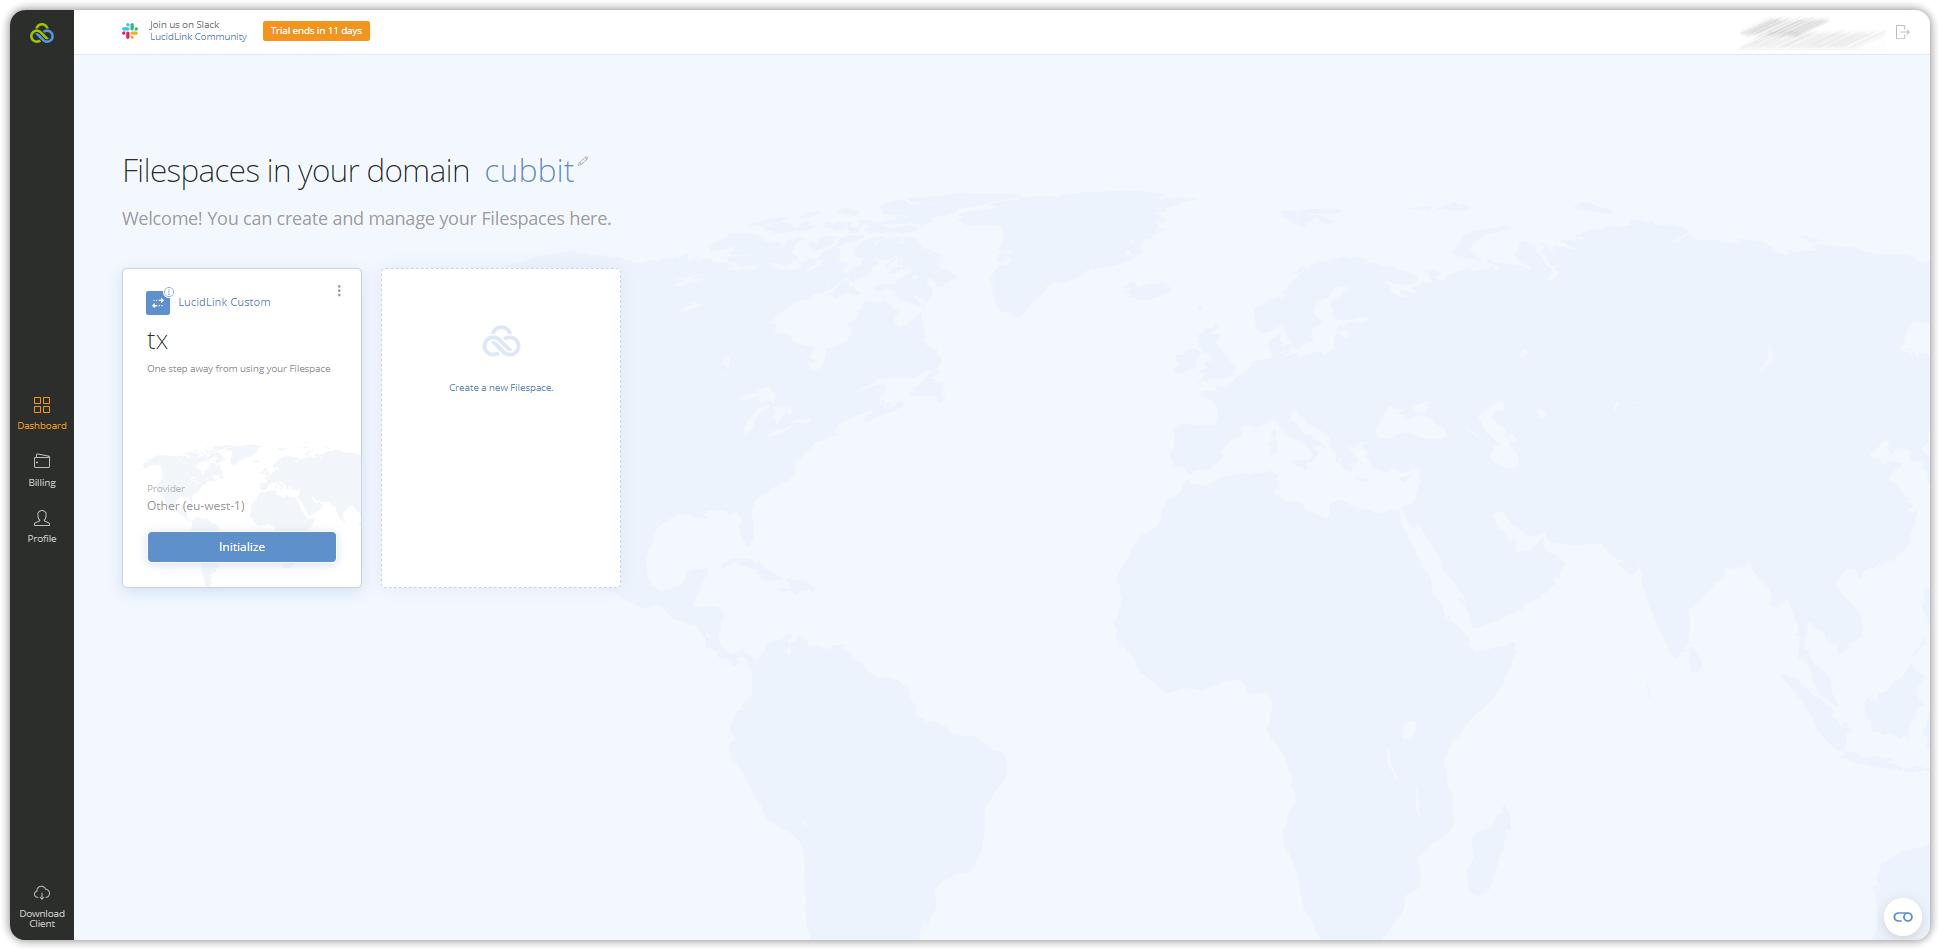
At this point, the filespace has been successfully created and you can notice it on the left as shown in the following image. Click on Initialize.
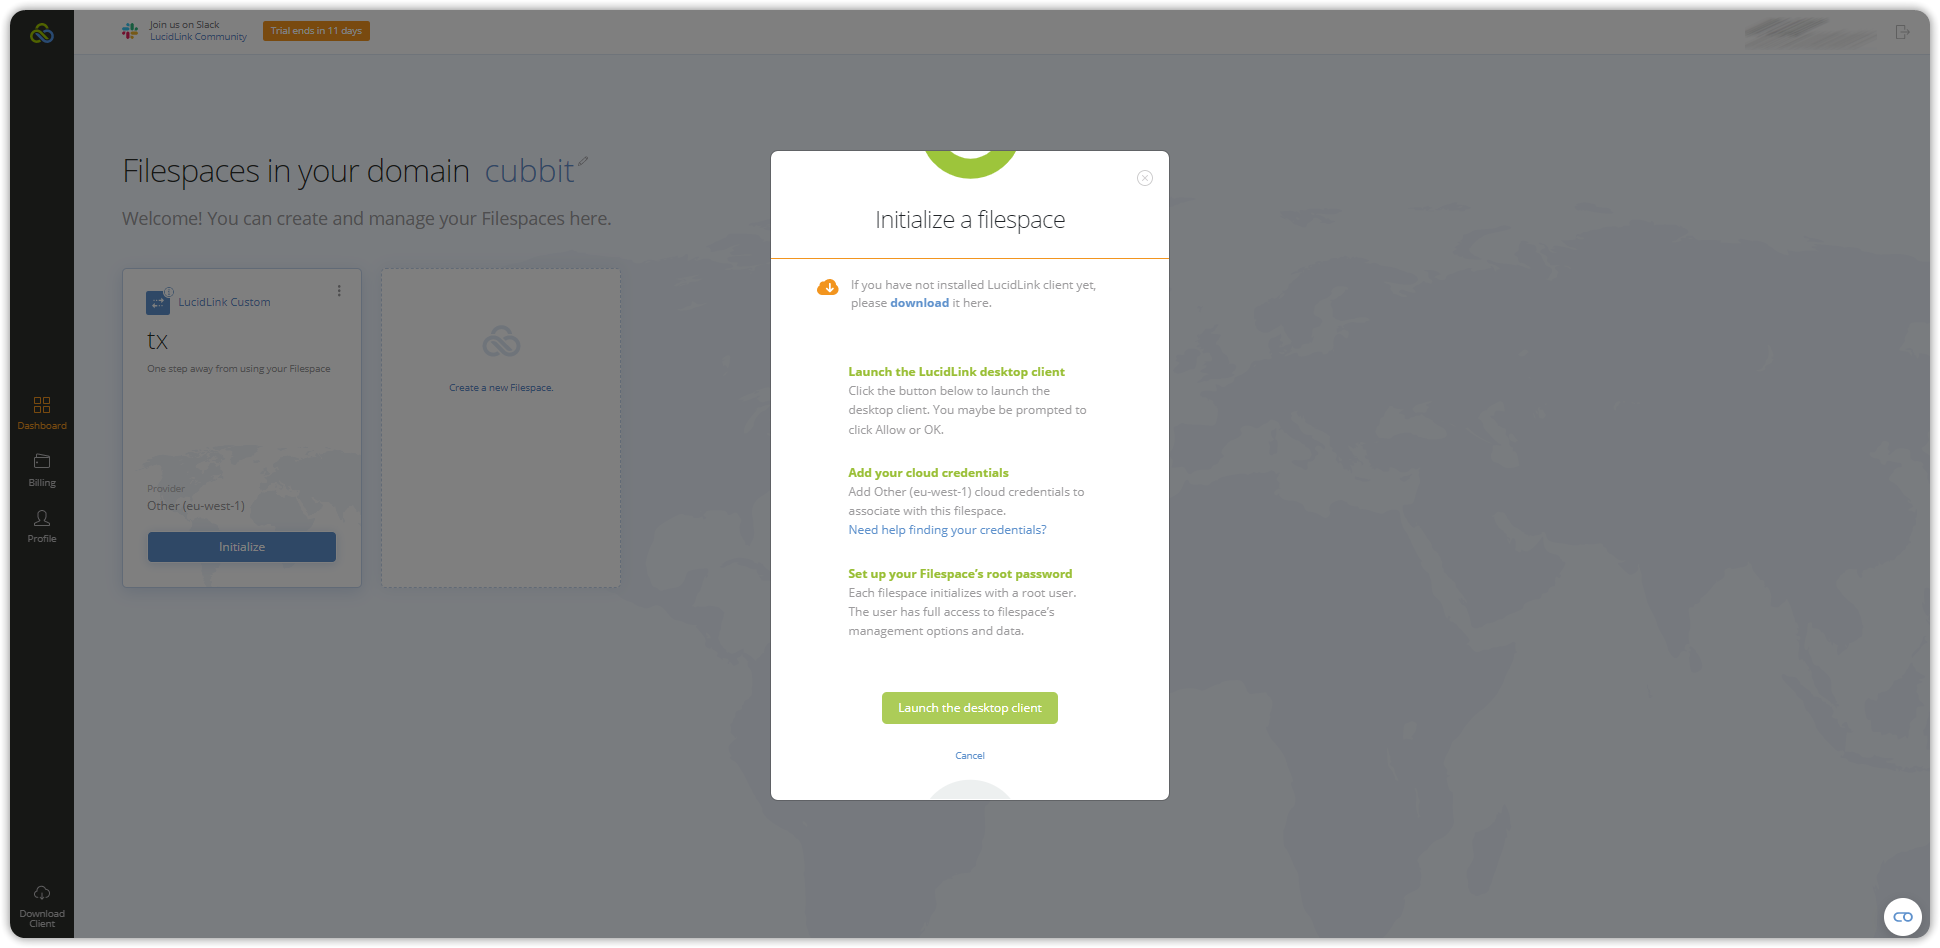
A screen will appear asking you to install the client desktop. If it has not been done previously it is now mandatory to install it. Select Launch the desktop client.
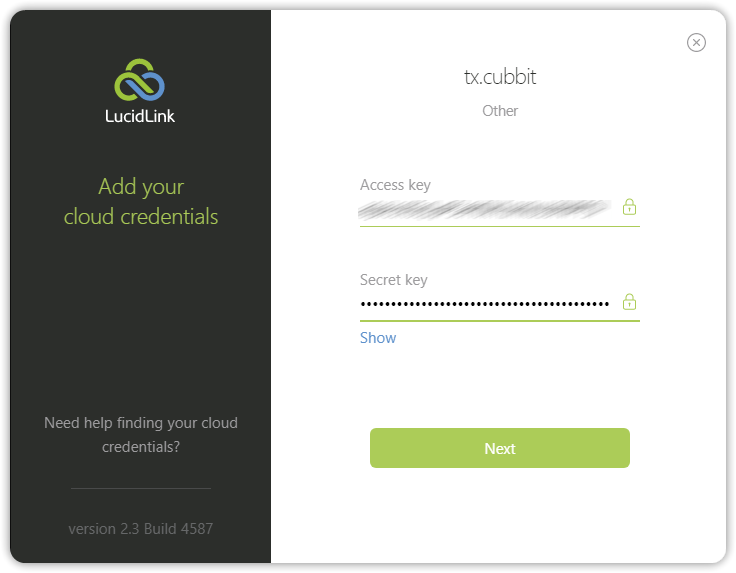
Enter the access key and secret key previously generated from the Cubbit Web Console and press Next. The system will now ask you to create a new password for the root user. Press next after creating it.
The configuration is now completed.
How to
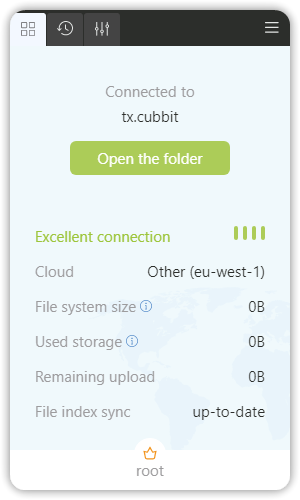
To use the service simply press Open the folder. A file explorer window will open, pointing to the virtual disk L: (default letter) that was mounted by LucidLink.
It is now possible to use it as a regular local disk. All the data contained within it will be managed in blocks by the LucidLink ecosystem and uploaded as objects to the Cubbit DS3 service.
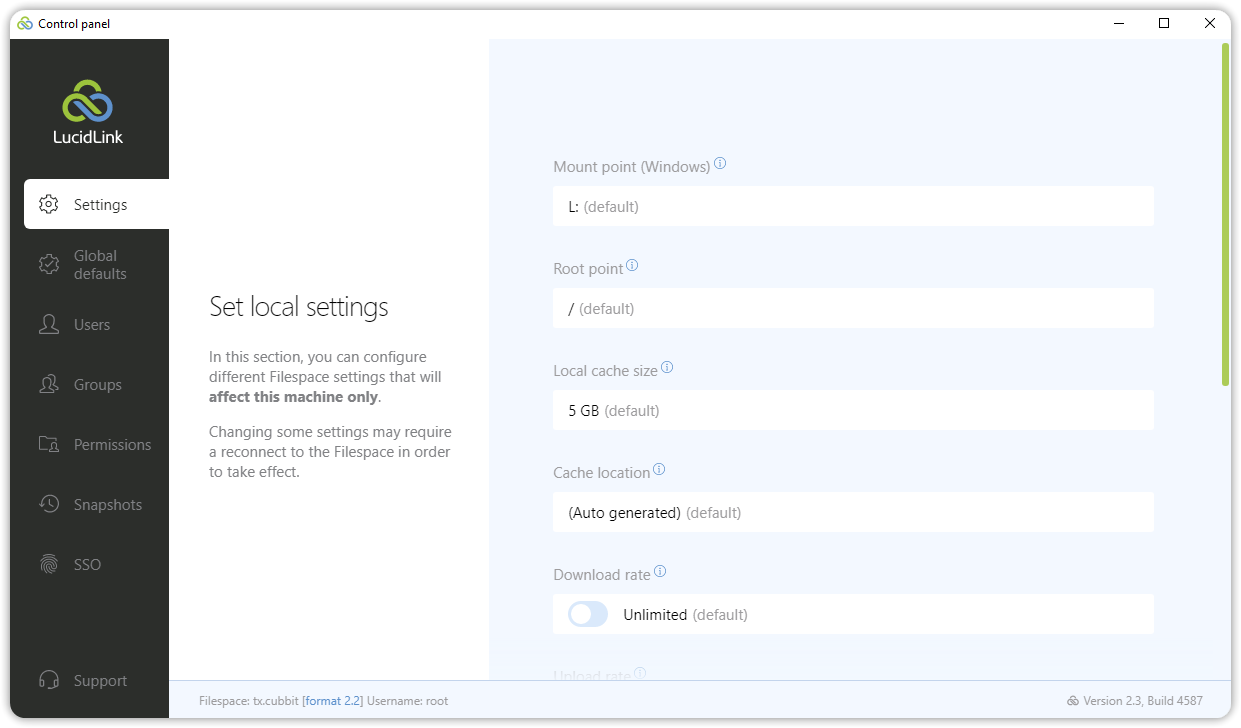
It will be possible to change and manage all the parameters related to LucidLink's Filespace directly from the control panel of the desktop application we installed earlier, which will always be visible on the taskbar at the bottom.
For more information on using LucidLink you can refer to the official documentation.