Acronis
Intro
Acronis is an infrastructure solution that offers a highly reliable, secure, and scalable data storage and management solution for virtualized and cloud environments. This platform allows users to efficiently manage and protect their data, providing advanced features such as data replication, deduplication, compression, and data encryption. It also supports integration with existing infrastructures and offers an intuitive user interface to simplify system management and monitoring.
Prerequisites
First, you need to obtain access keys and secret keys from the Cubbit Web Console or https://console.[your-tenant].cubbit.eu. You can follow these instructions on how to get started with a Cubbit account and generate these keys.
Installation
To get started, you need to register, login into your Acronis Account and access the Cyber Protect Console.
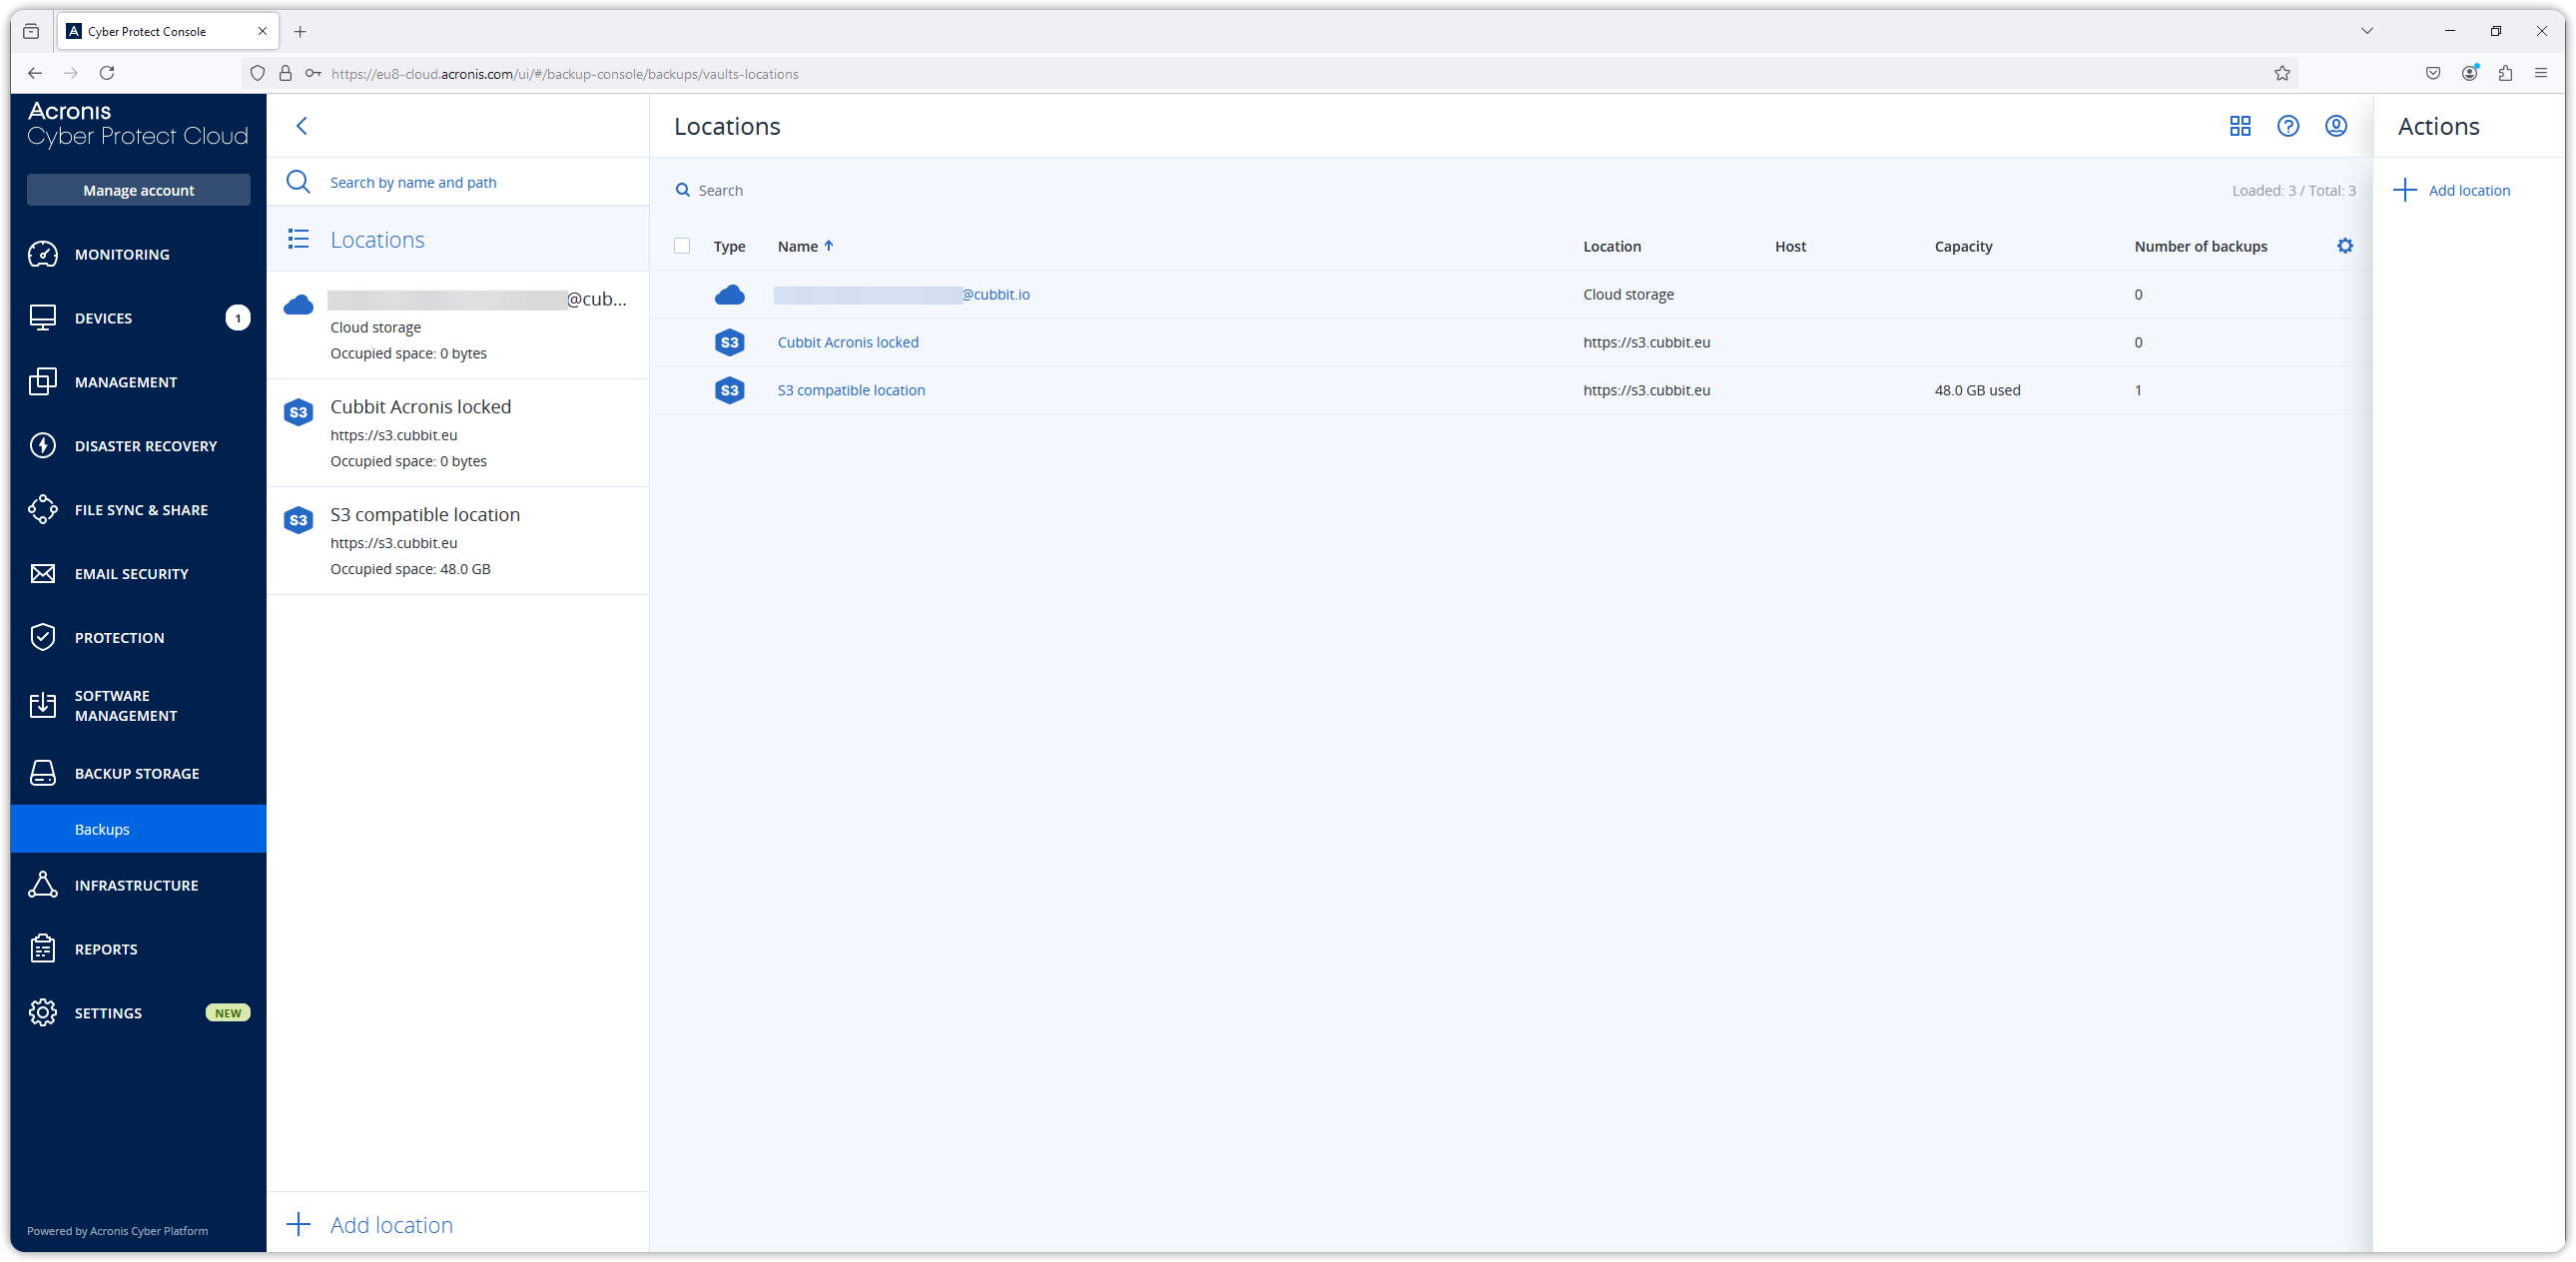
Creating Cubbit DS3 backup storage
To create the backup storage that points to Cubbit DS3, click on "Backup Storage > Backups", and then on "Add location". Click on Public cloud and select S3 Compatible from the dropdown list. Click Connect to continue.
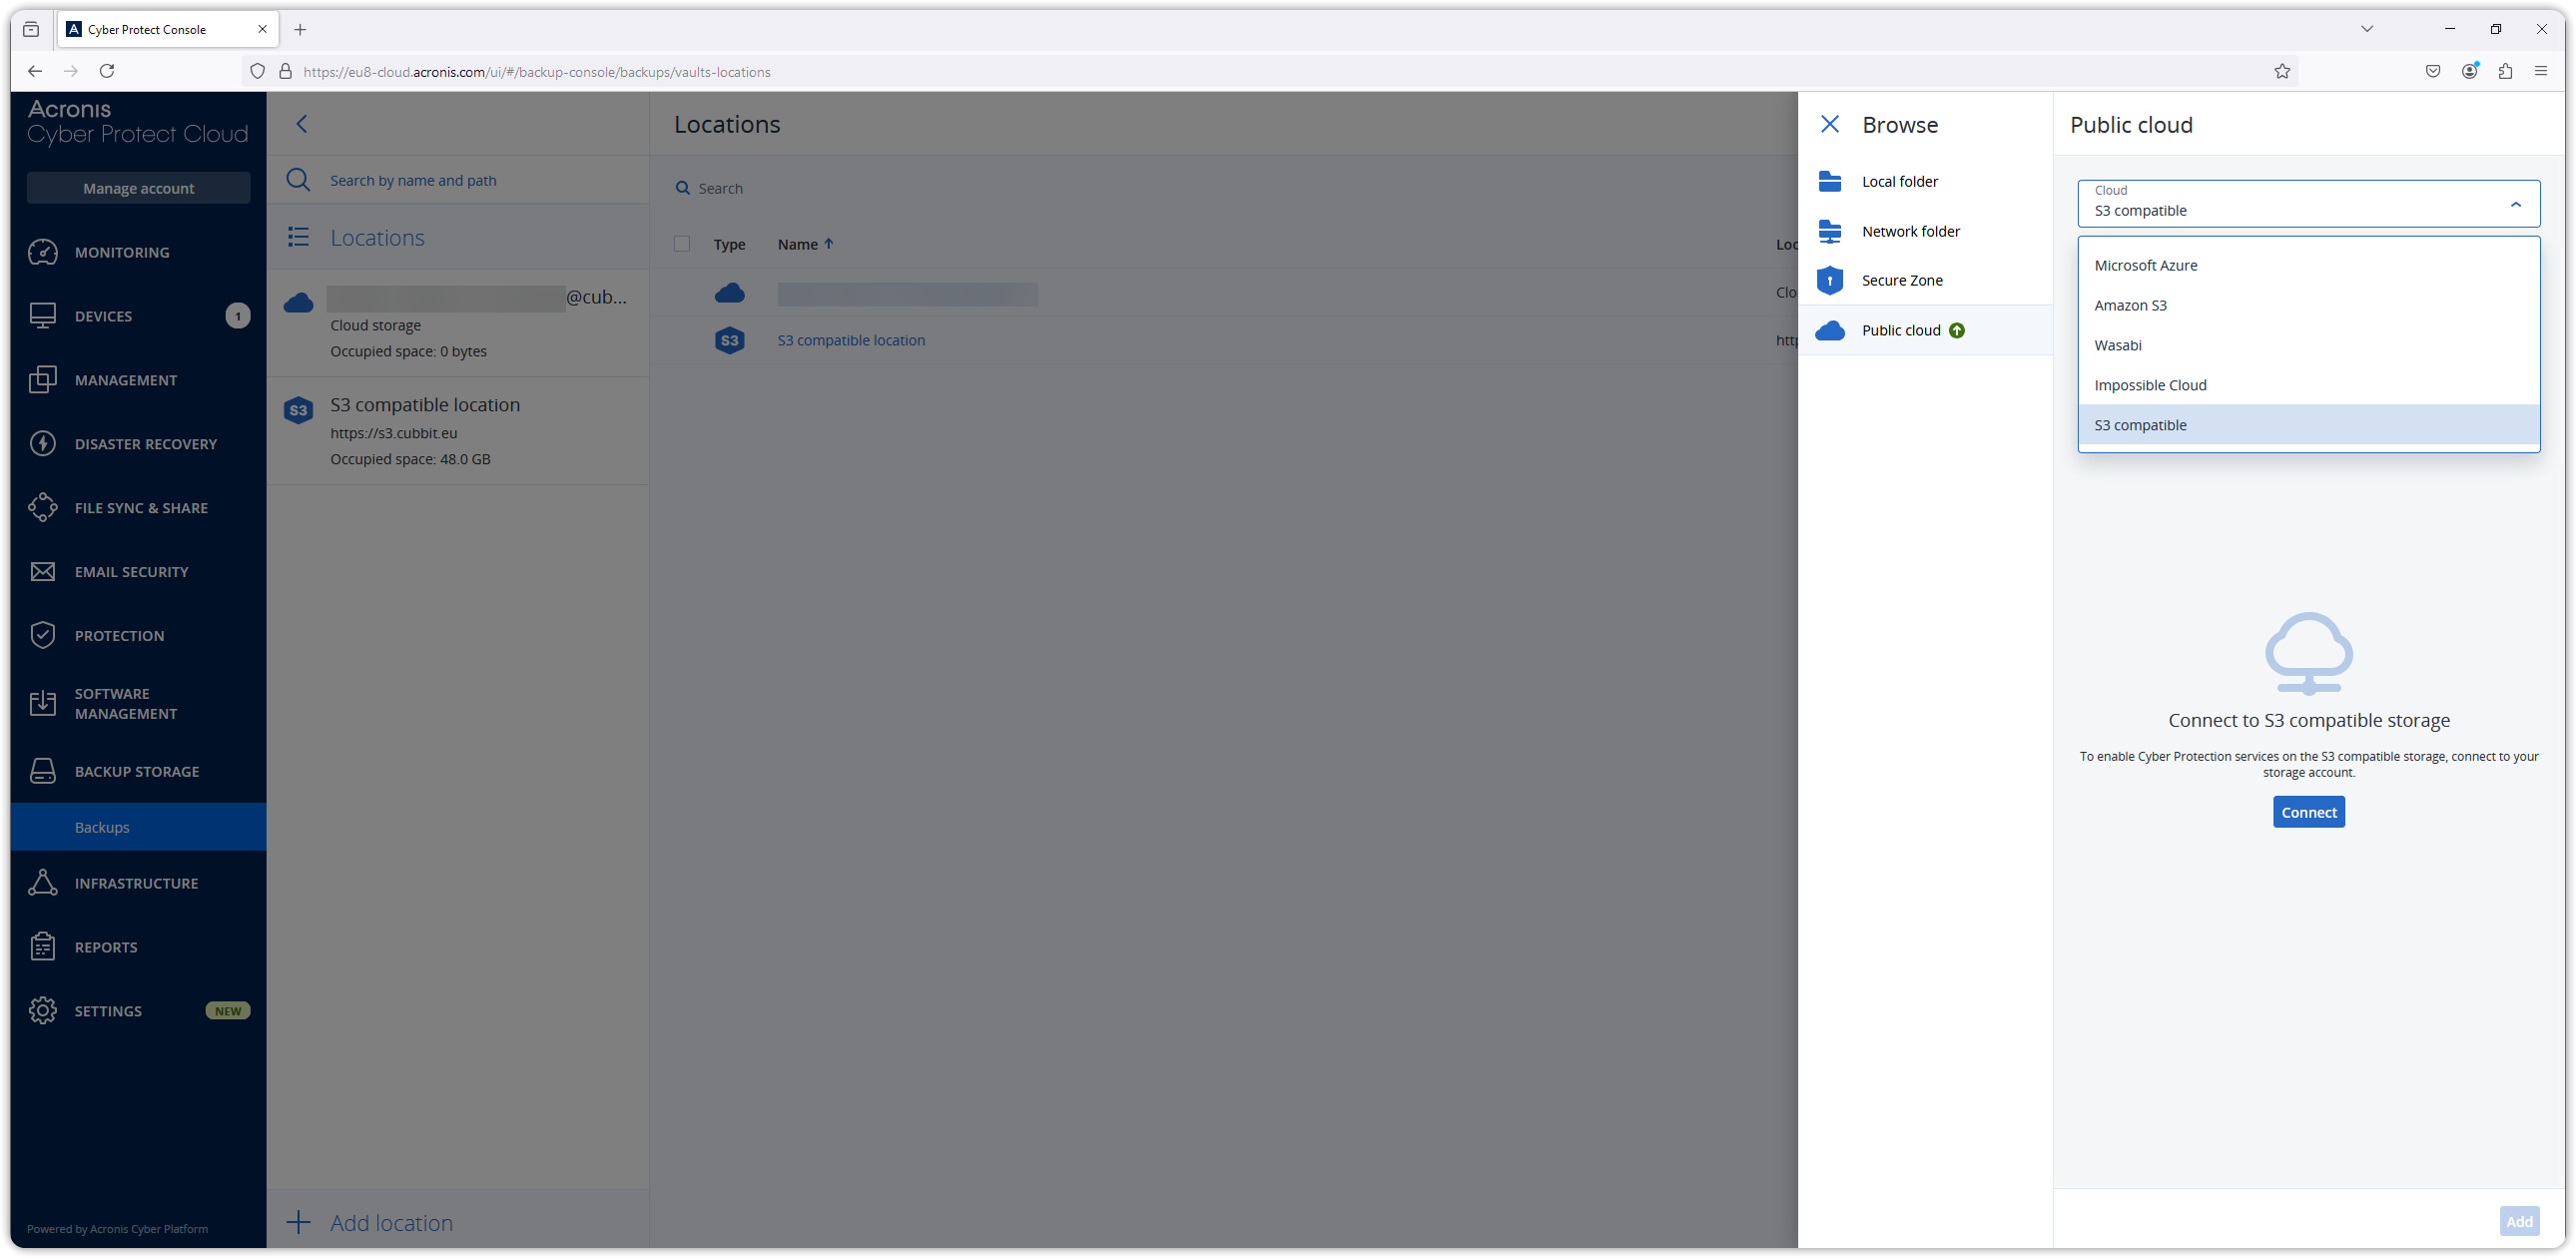
In the first entry: Management agent, select the acronis agent installed on your infrastructure.
There are several Acronis agents available, select the one that best suits your needs. For further support please follow the Acronis documentation here:.
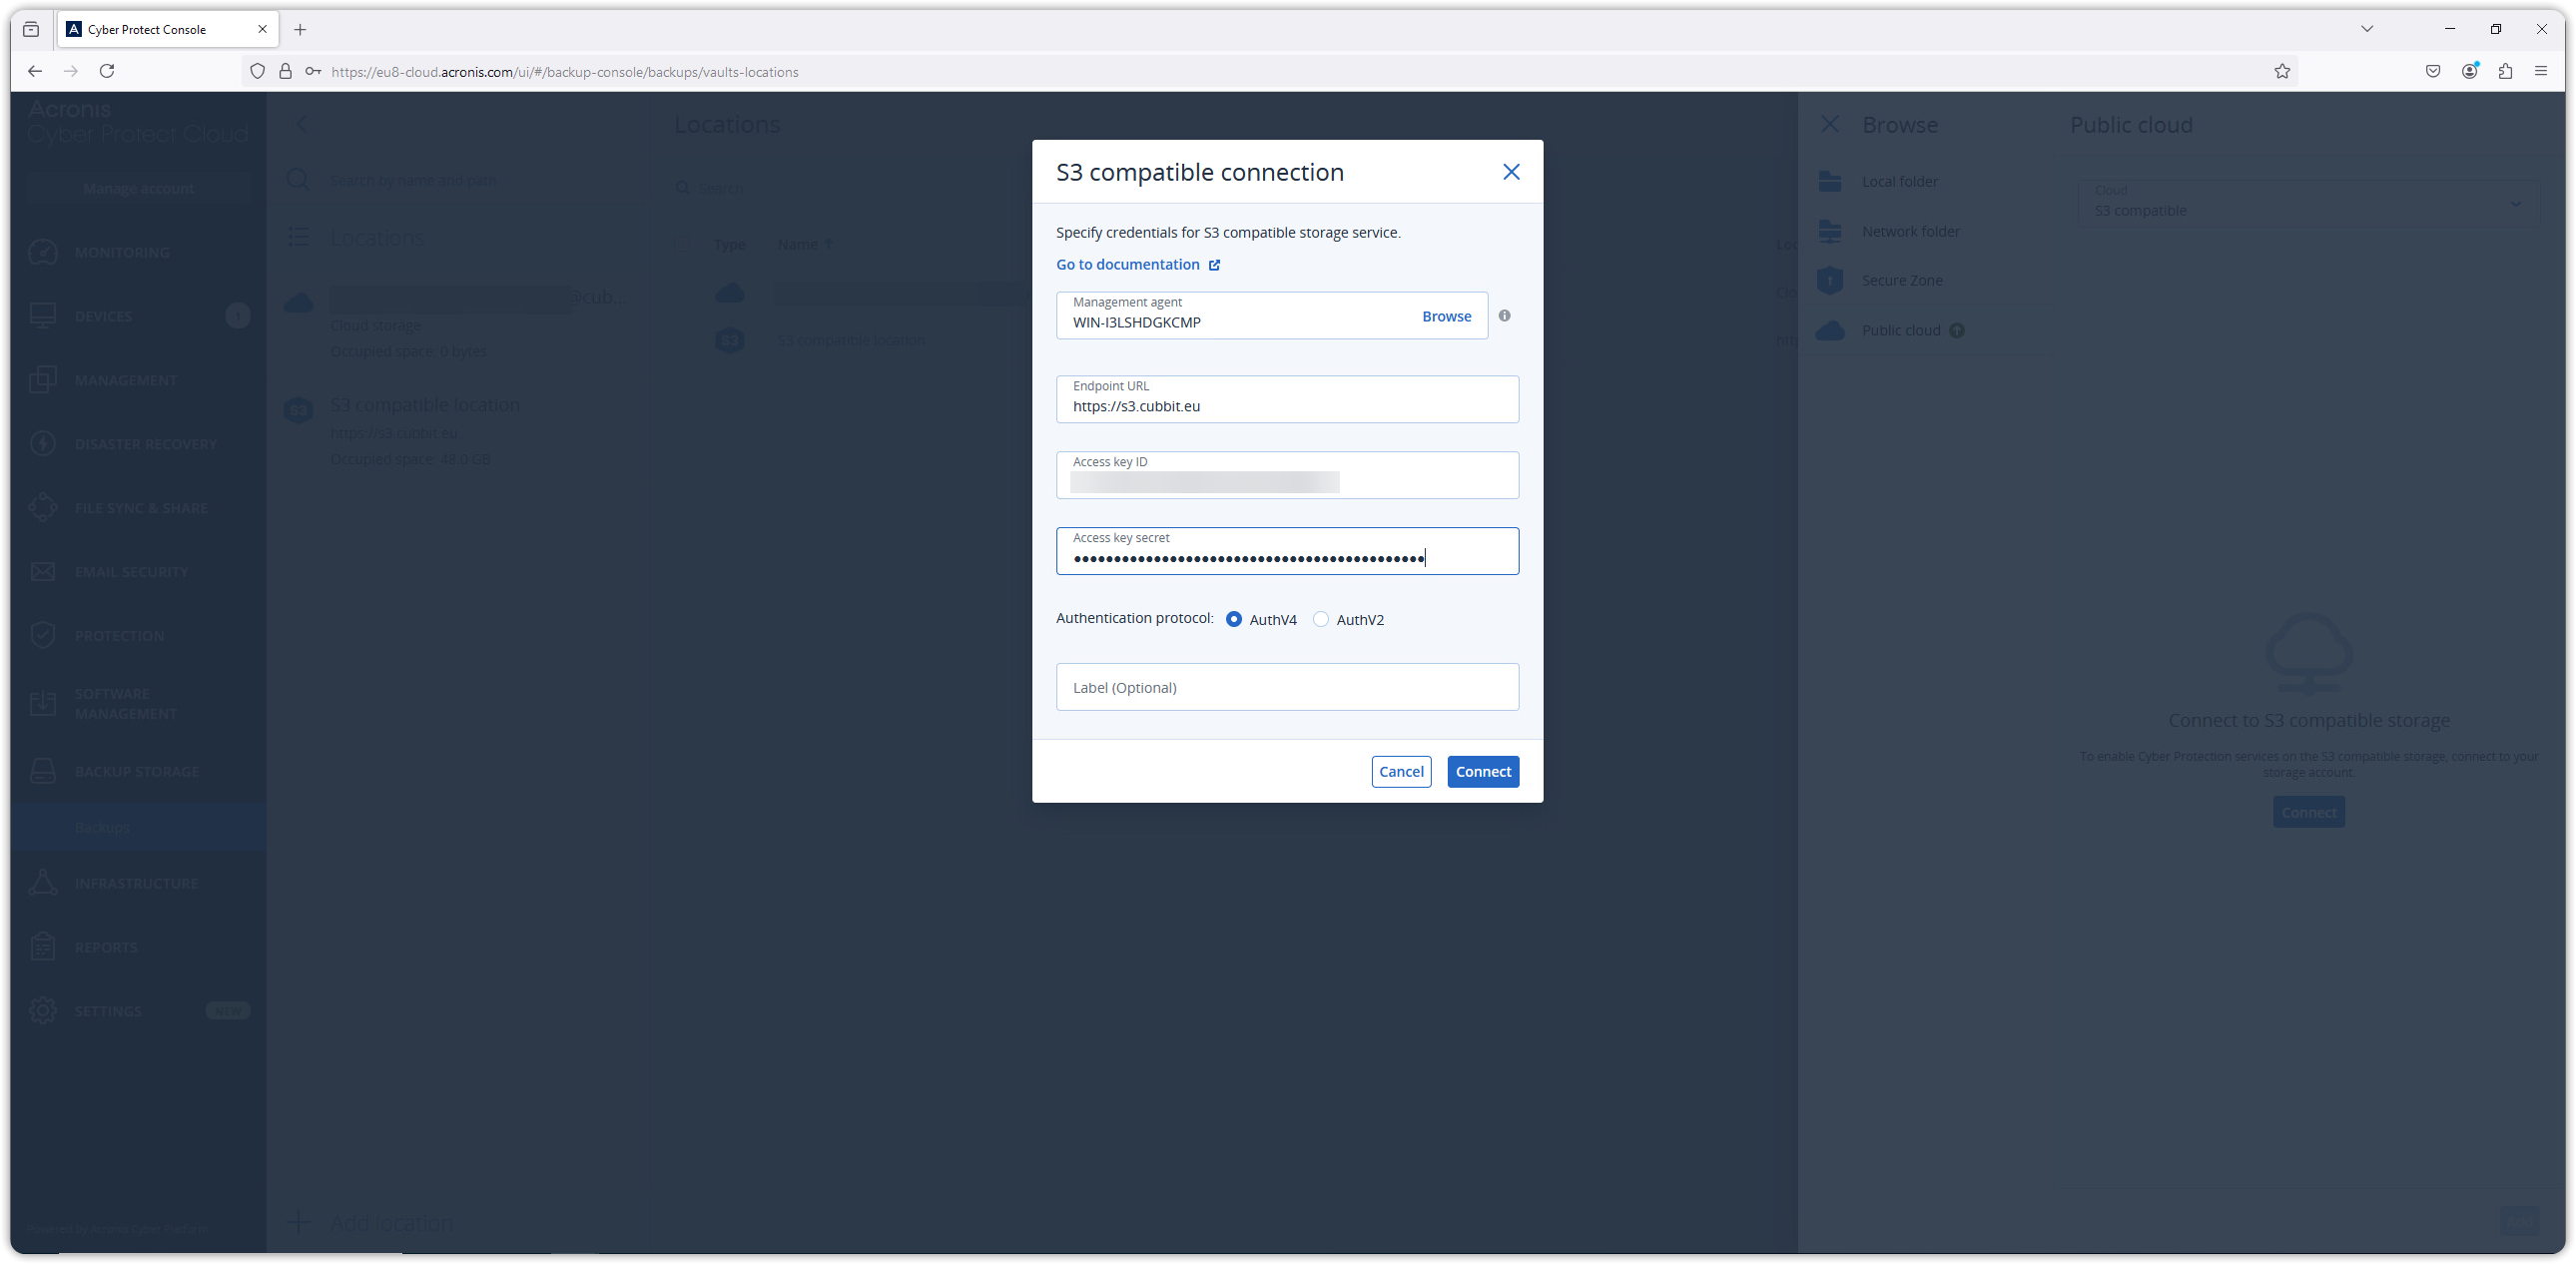
Fill in the required parameters as shown in the image:
- Endpoint URL:
https://s3.cubbit.euor if you have a custom tenanthttps://s3.[your-tenant].cubbit.eu - Access key ID: access key generated from Cubbit console
- Secret key ID: secret key generated from Cubbit console
- Authentication protocol: AuthV4
Click connect to continue.
Type a location name and select a bucket and any available Immutability options. Then click on add.
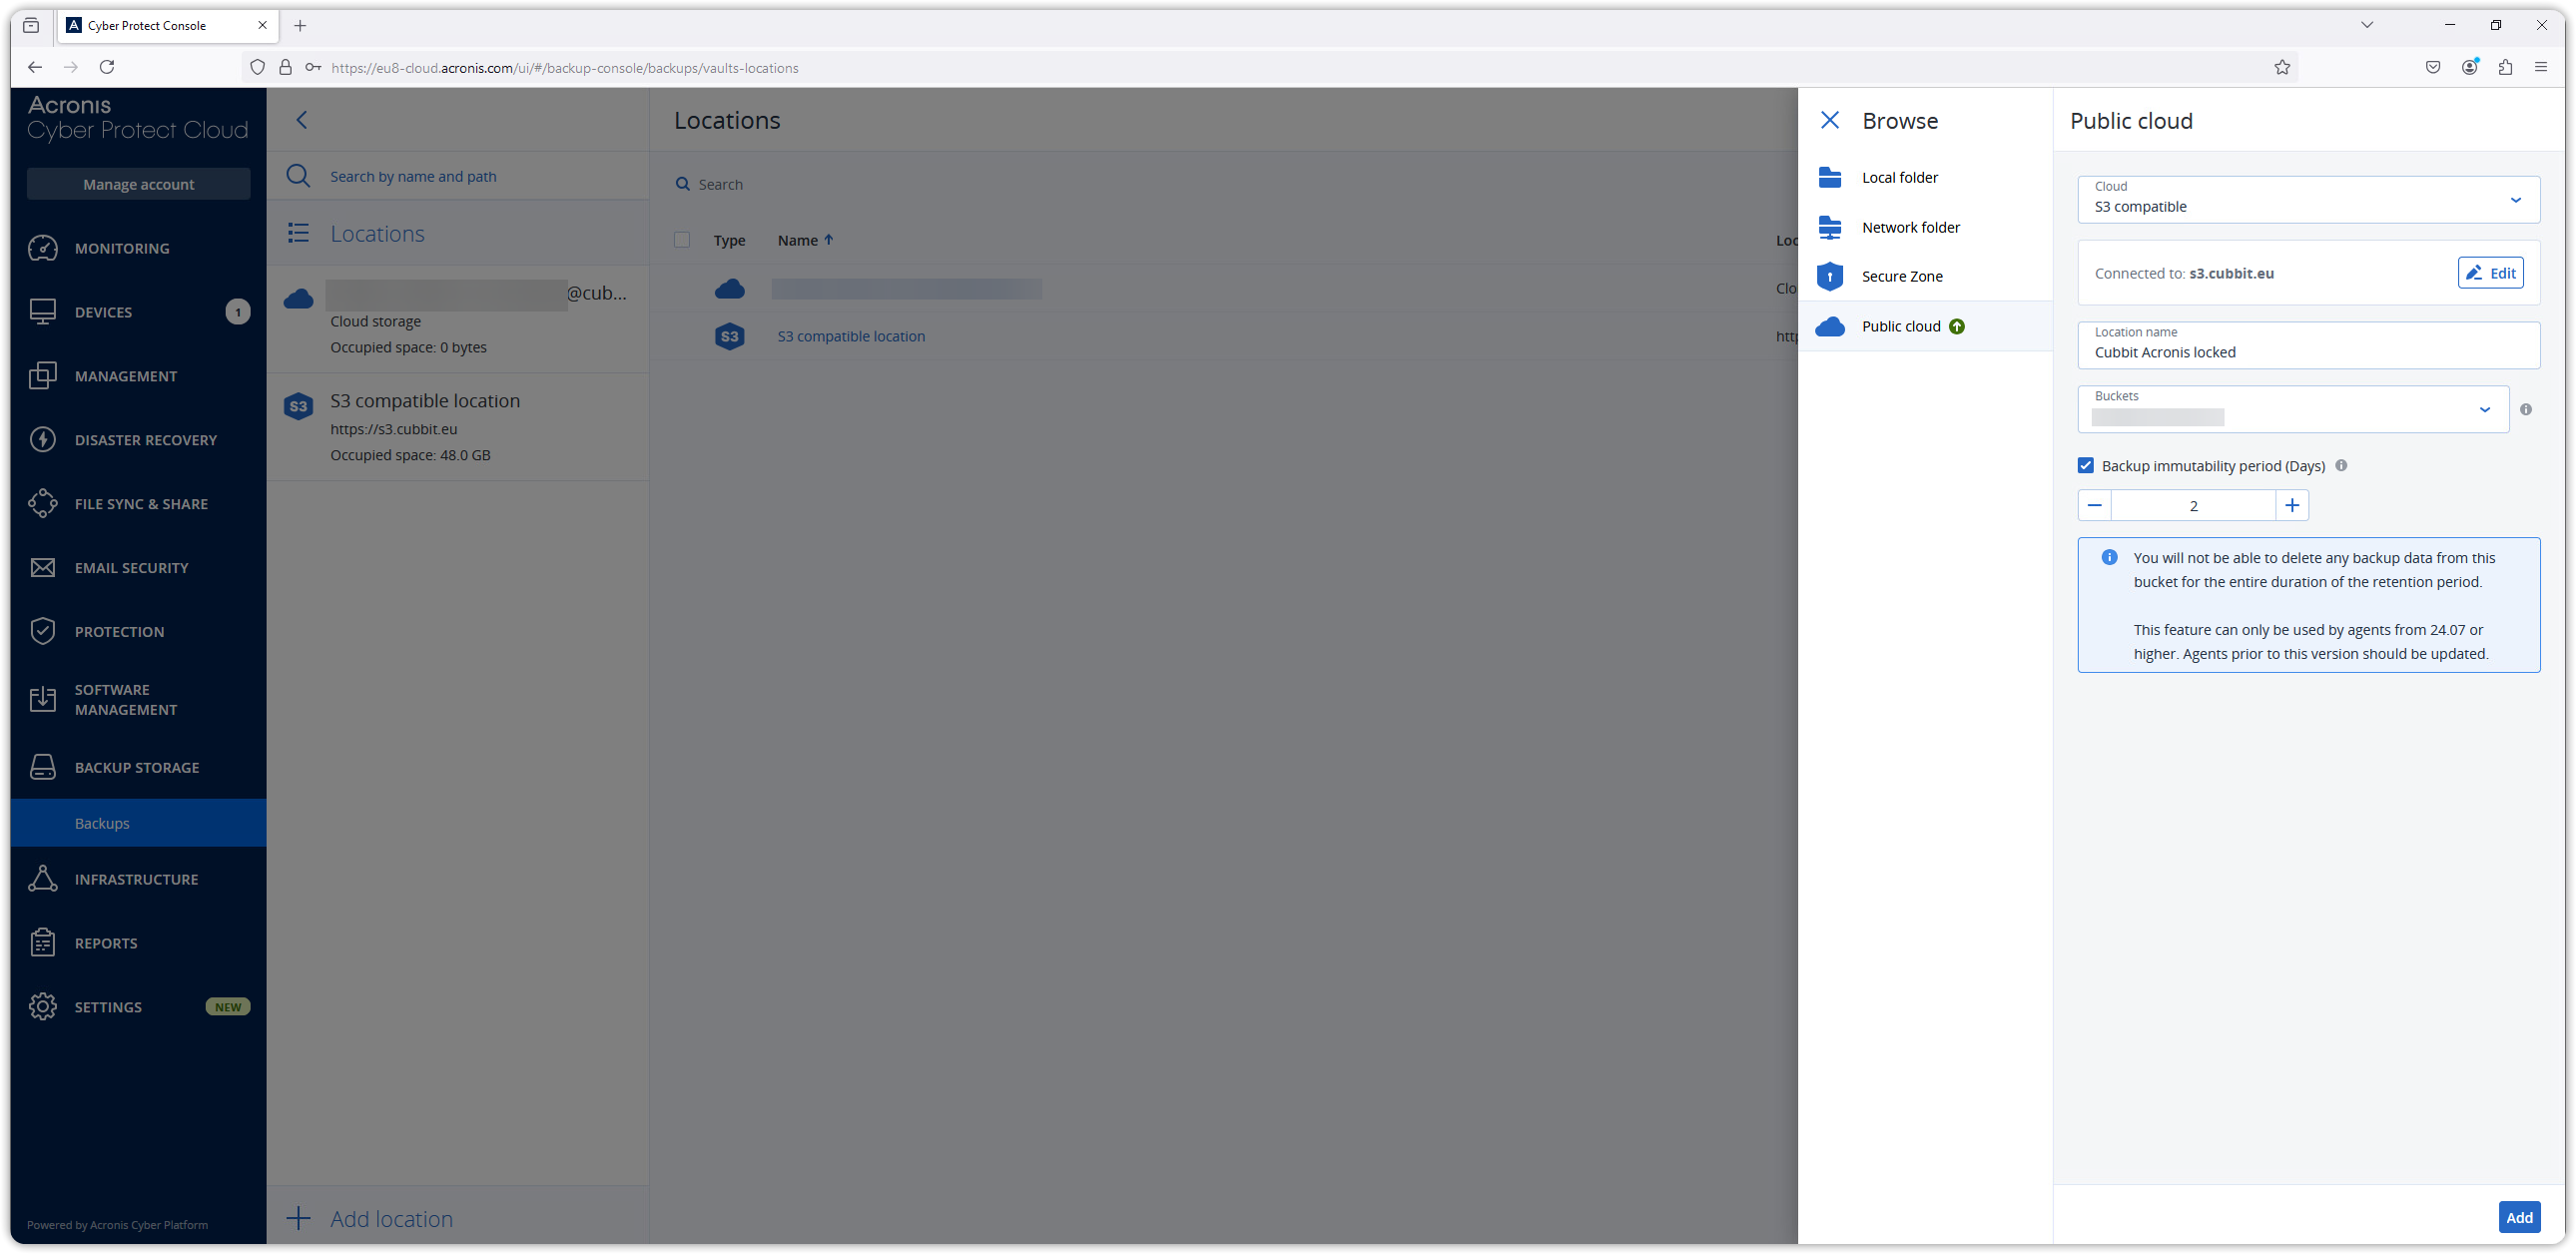
Congratulations! Cubbit DS3 is now available for use on the Acronis Protect ecosystem.
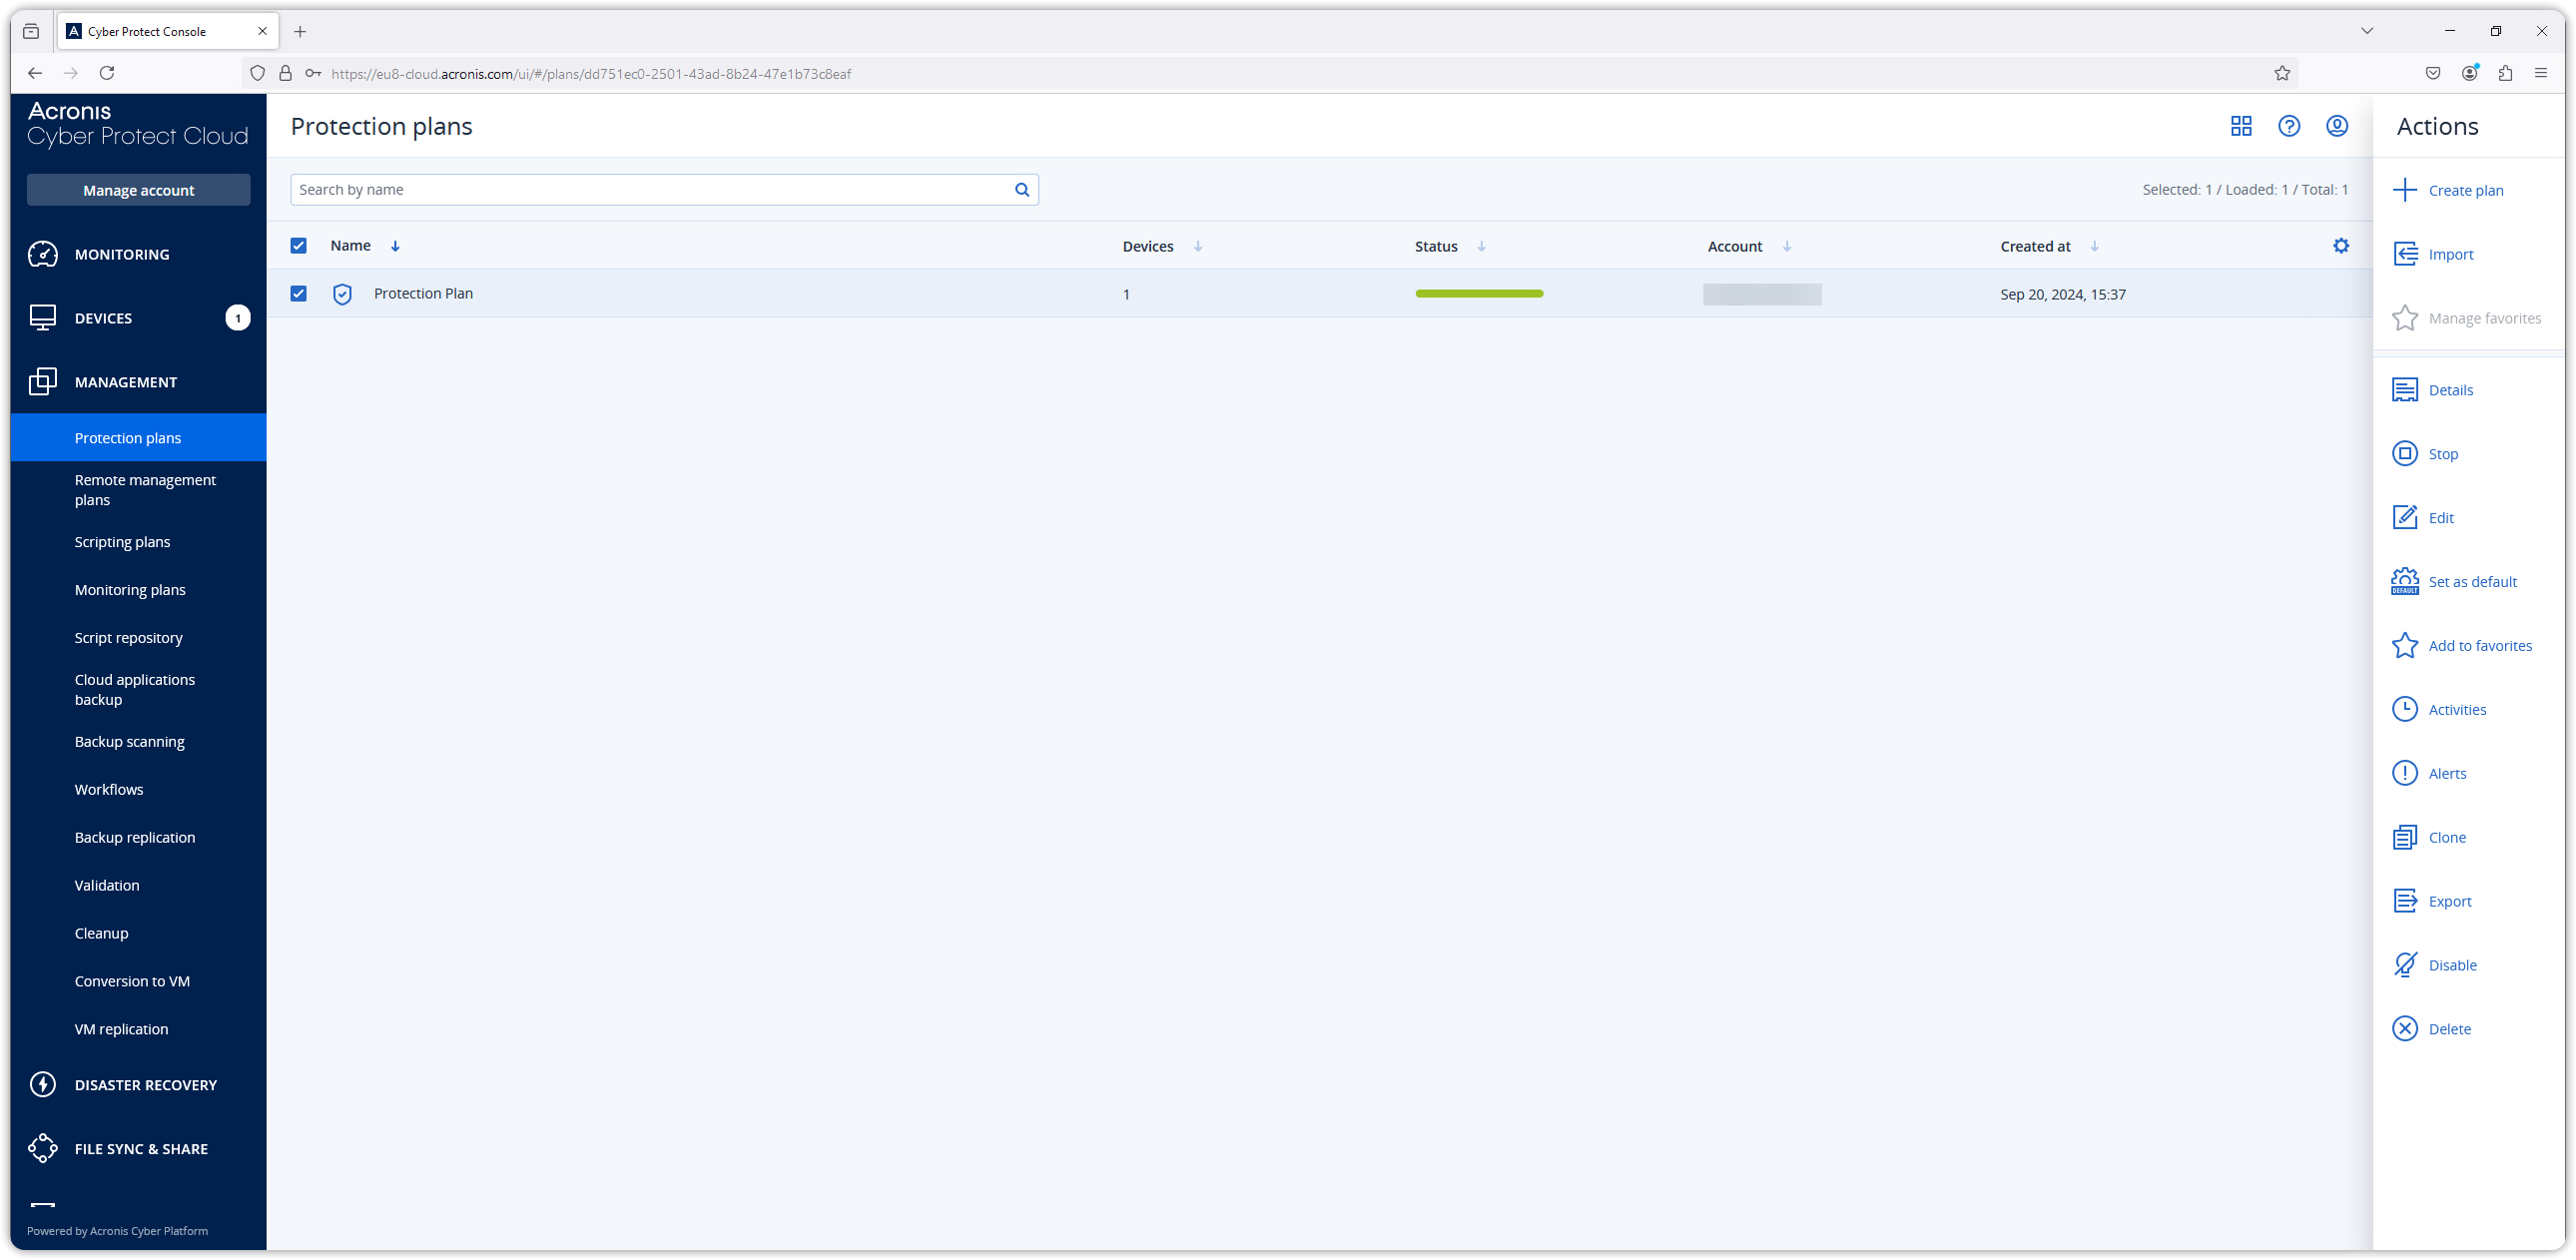
Set Cubbit DS3 as destination in a protection plan
Before proceeding with backups to the Cubbit DS3 backup storage created in the previous step, you need to add the Cubbit DS3 backup storage from the Cyber Protect Cloud management console to a protection plan. To do this, select Management from the left-hand menu and then Protection Plans. Click on the desired protection plan and click on edit.
If you need any support, please follow the Acronis documentation here:.
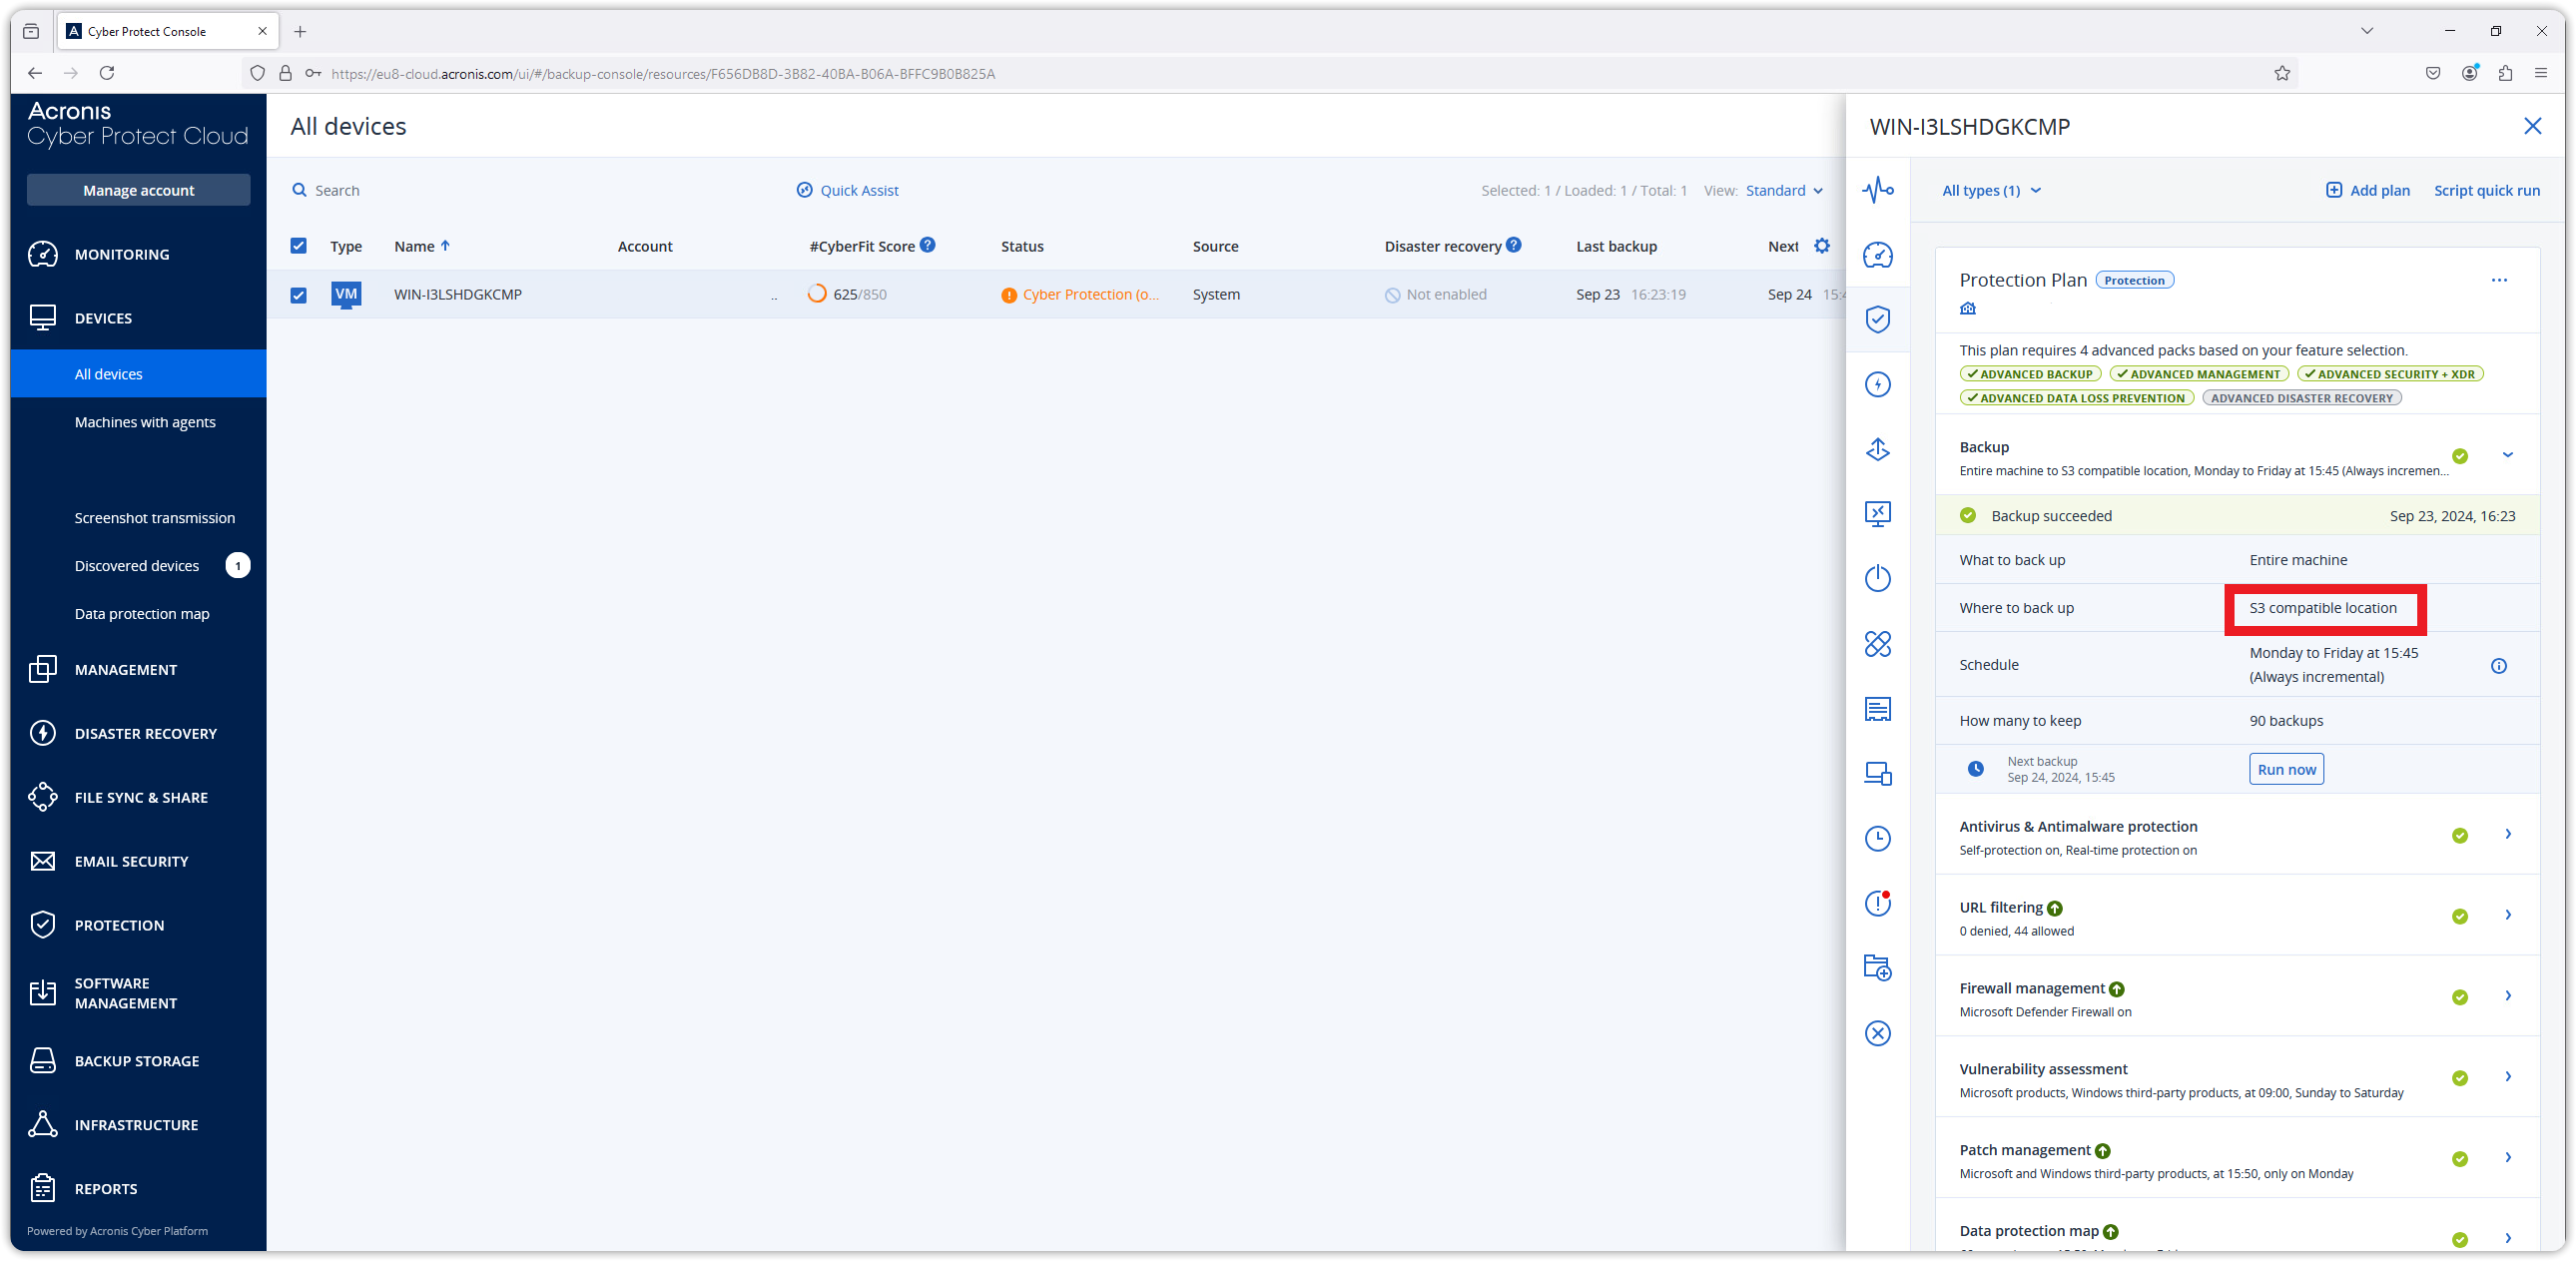
Next, click on the 'Where to back up' to select the previously created Cubbit DS3 location. Click save to complete the procedure.
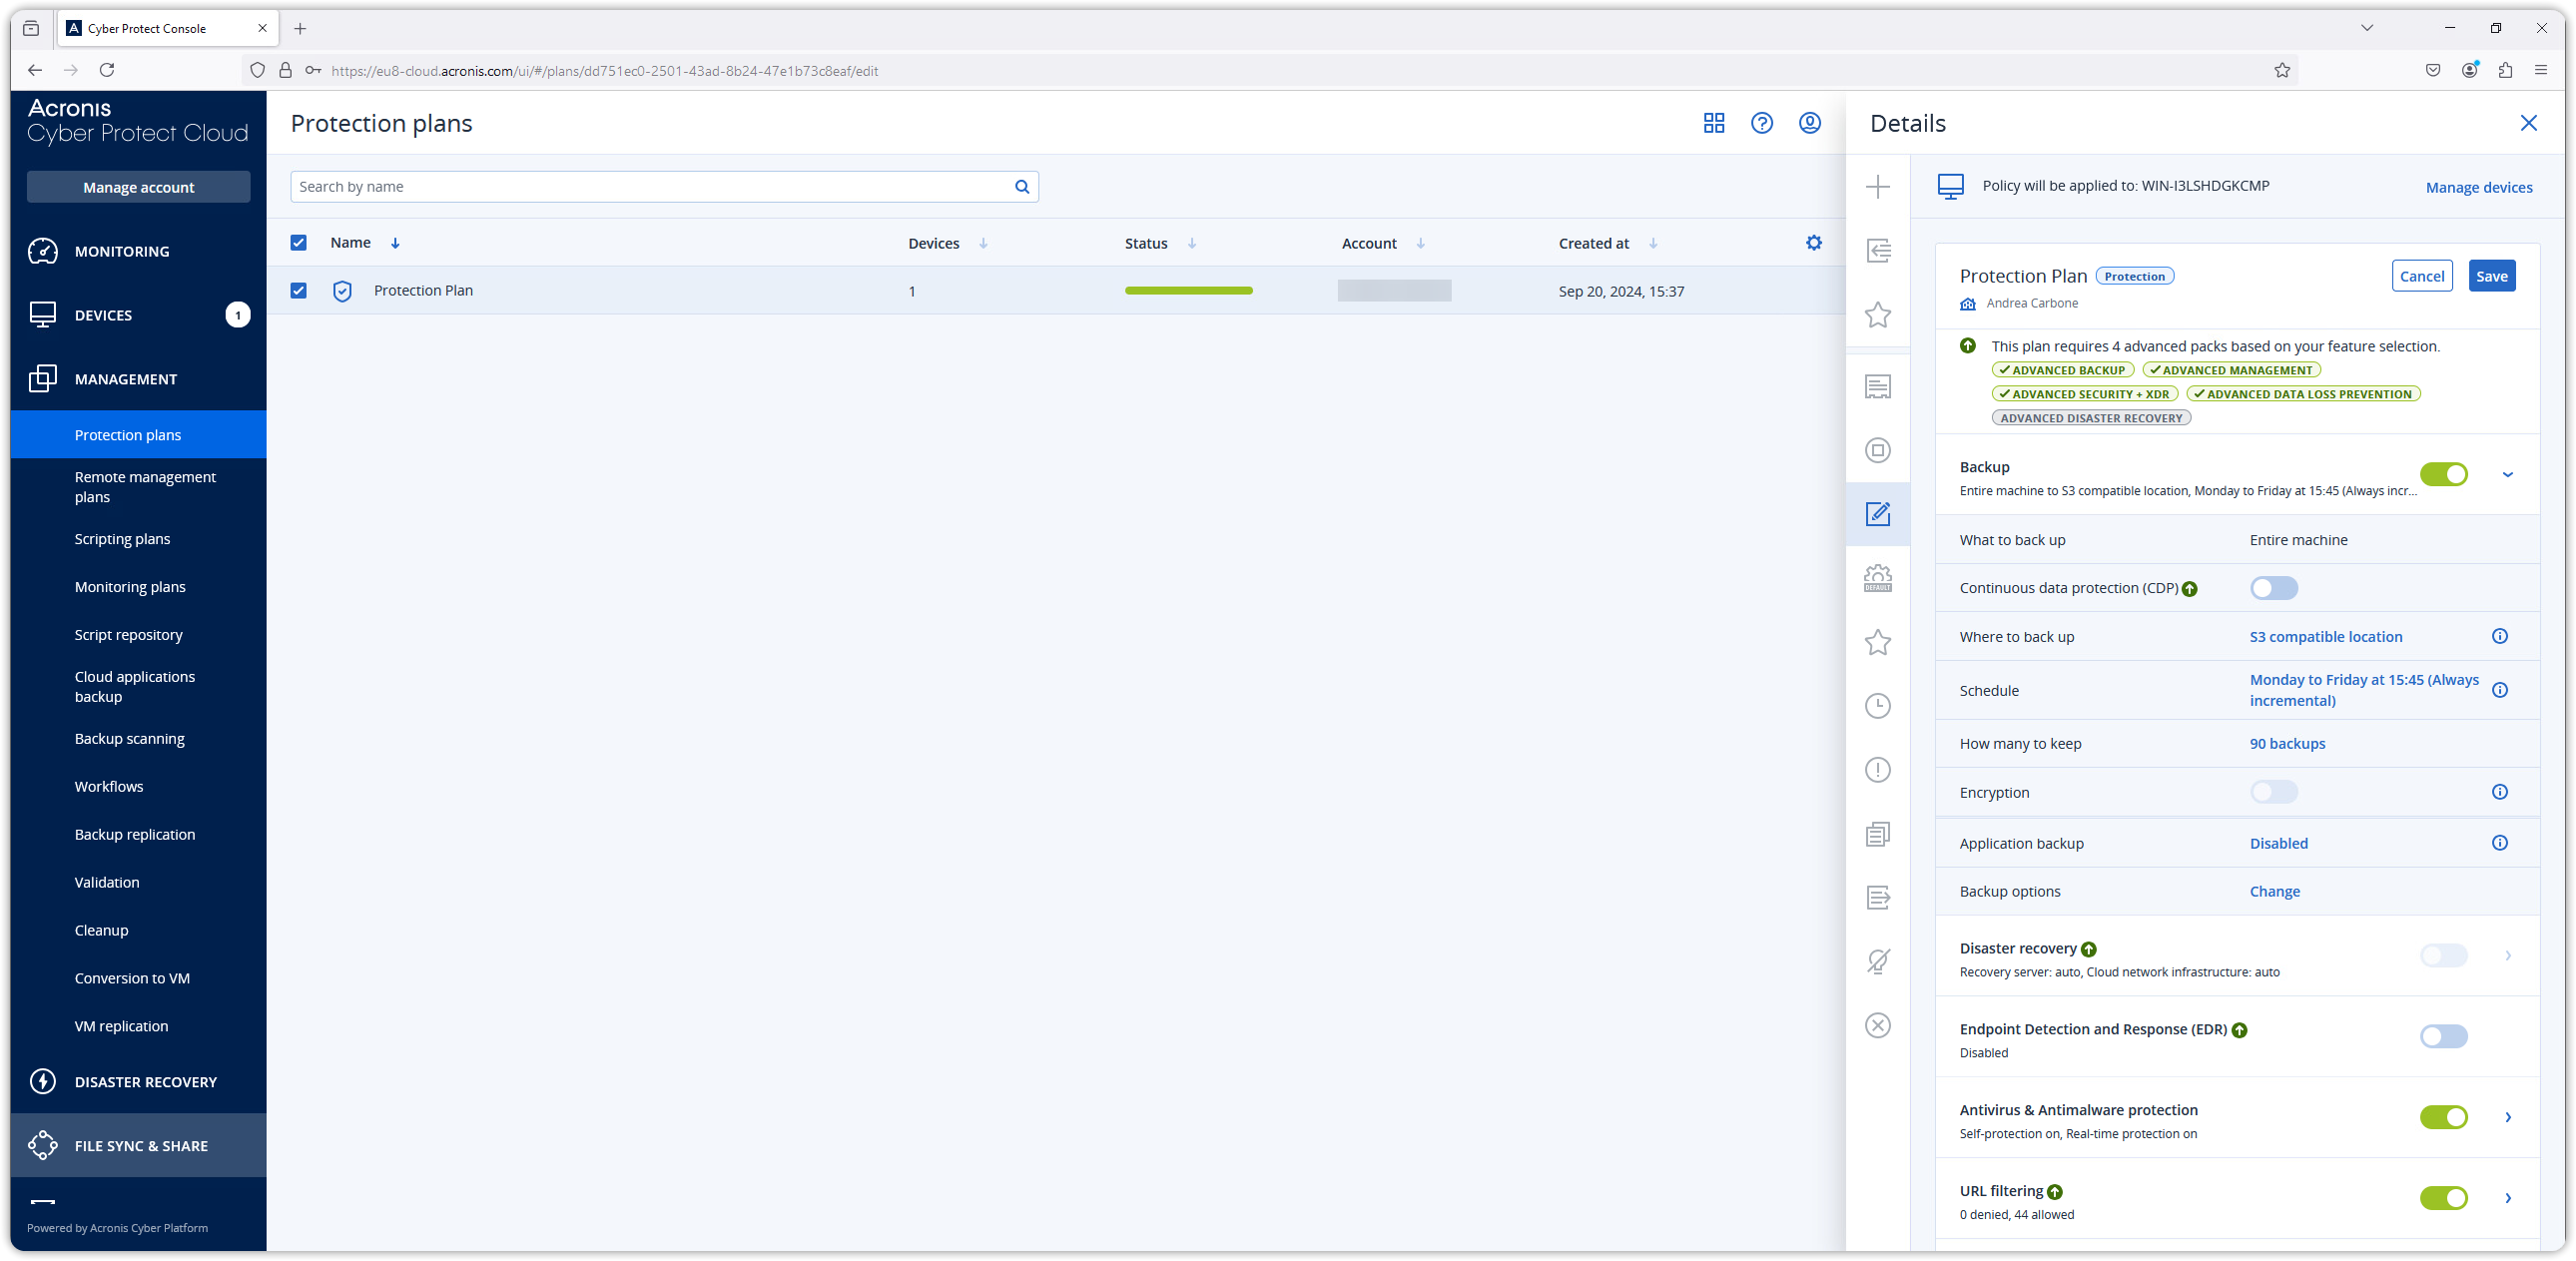
From now on cloud backups from Acronis Cyber Protect Console for this protection plan will be made to Cubbit DS3 Object Storage.
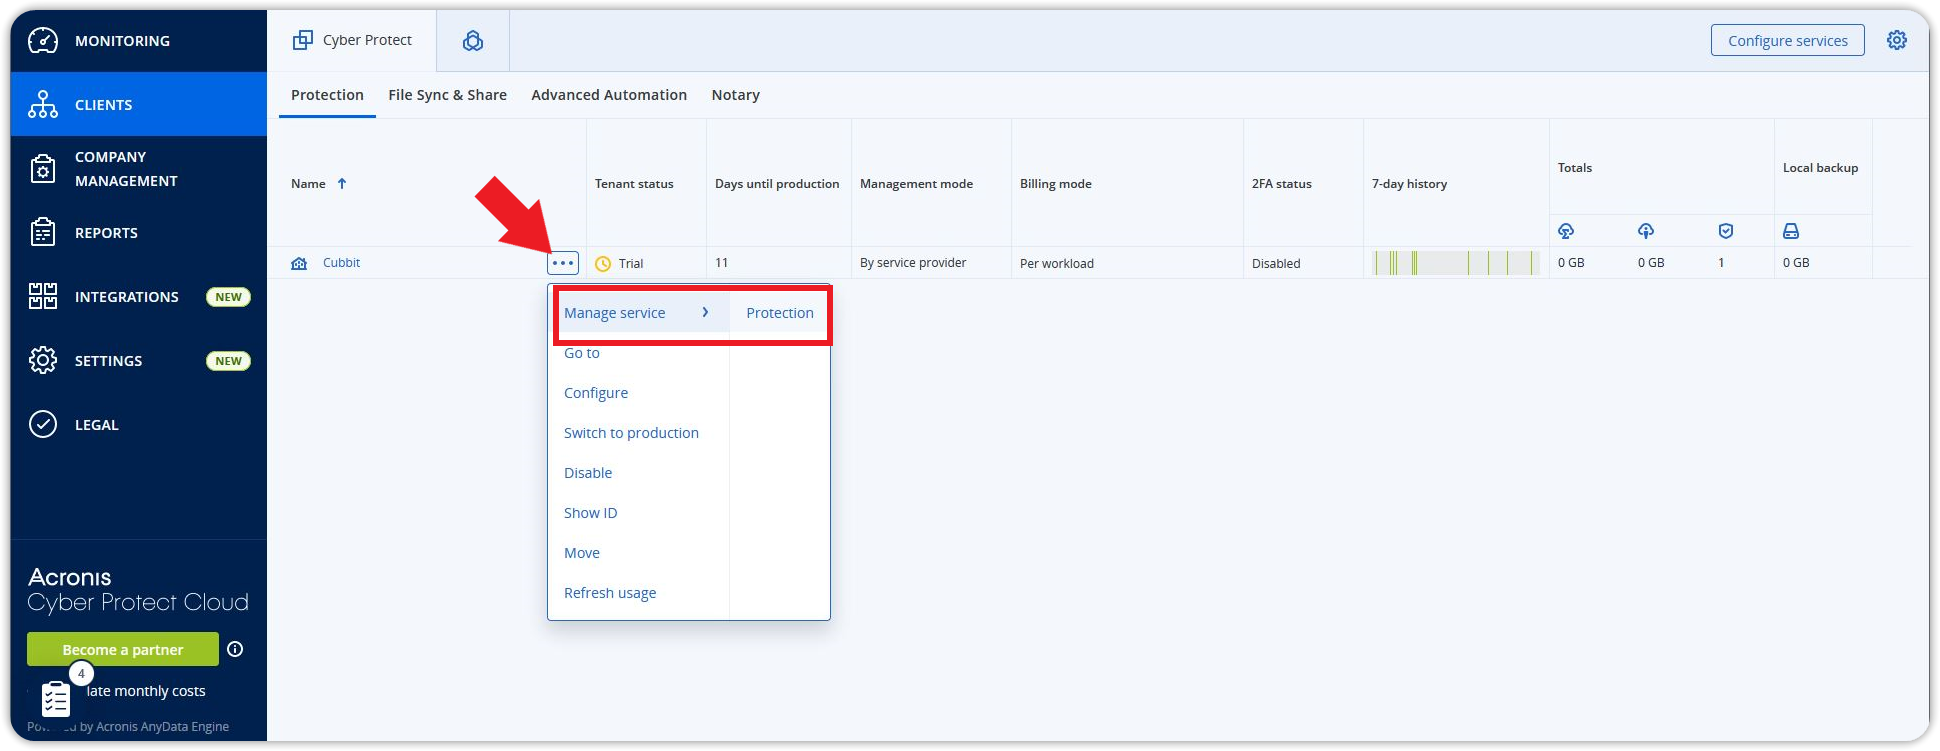
How to
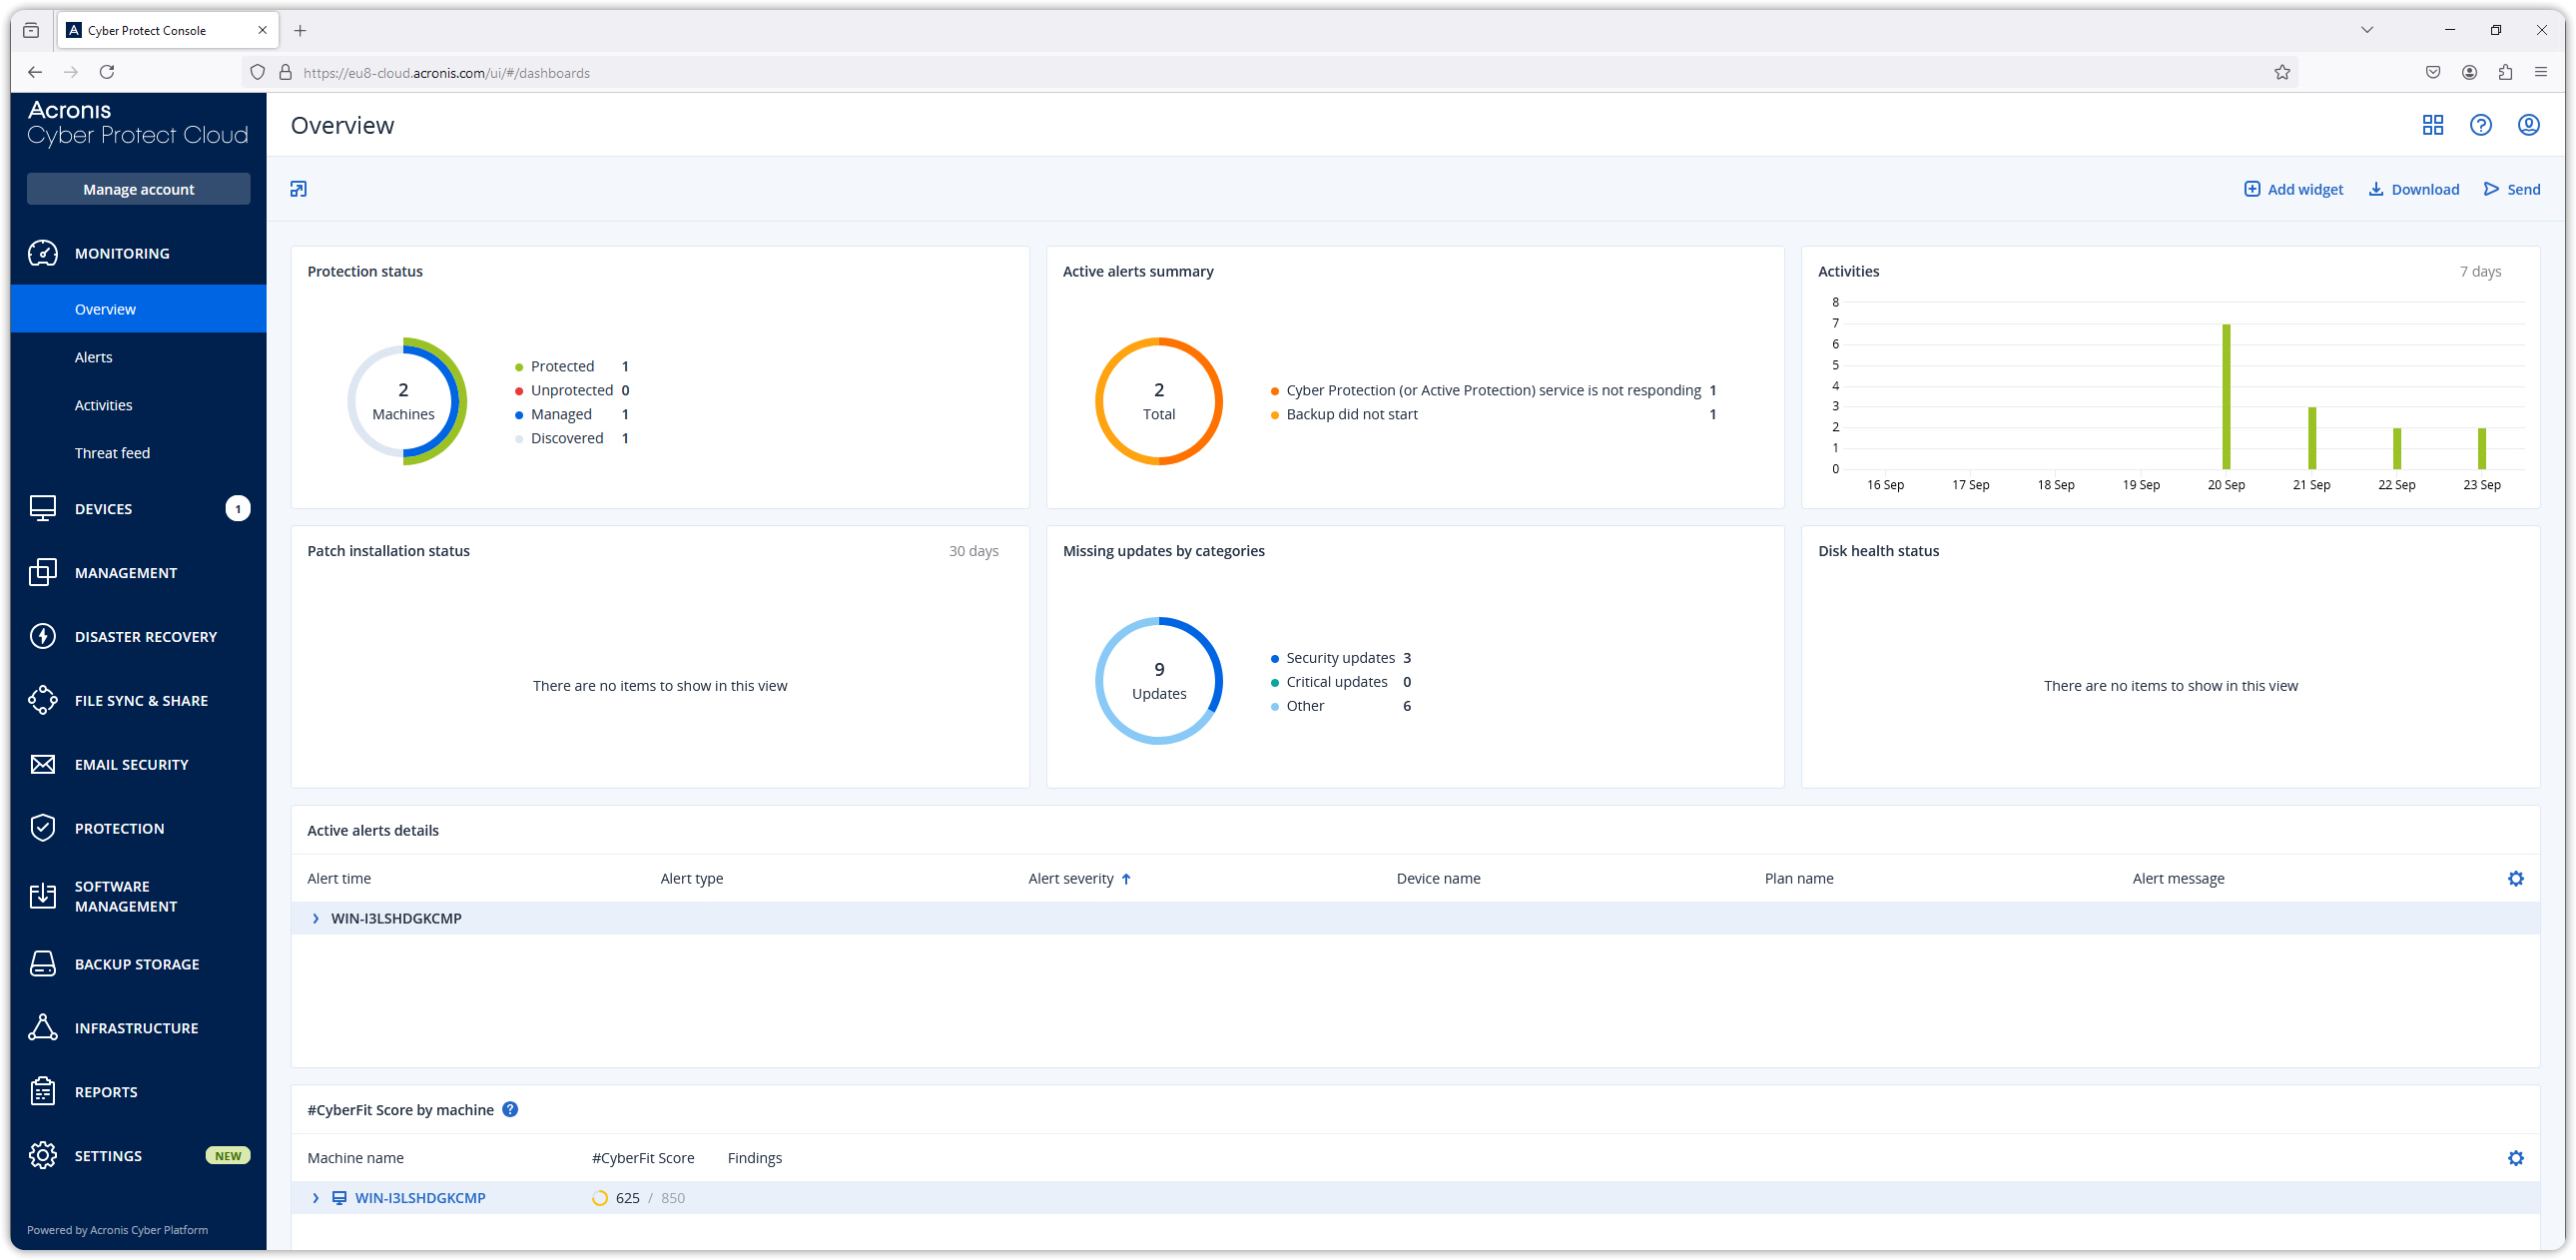
To start using Acronis backup protection features, you need to enter the Cyber Protect Console. Click on the three dots next to the tenant, select Manage Service and then Protection.
Backup
Select one or more machine to back up and click on Protect.
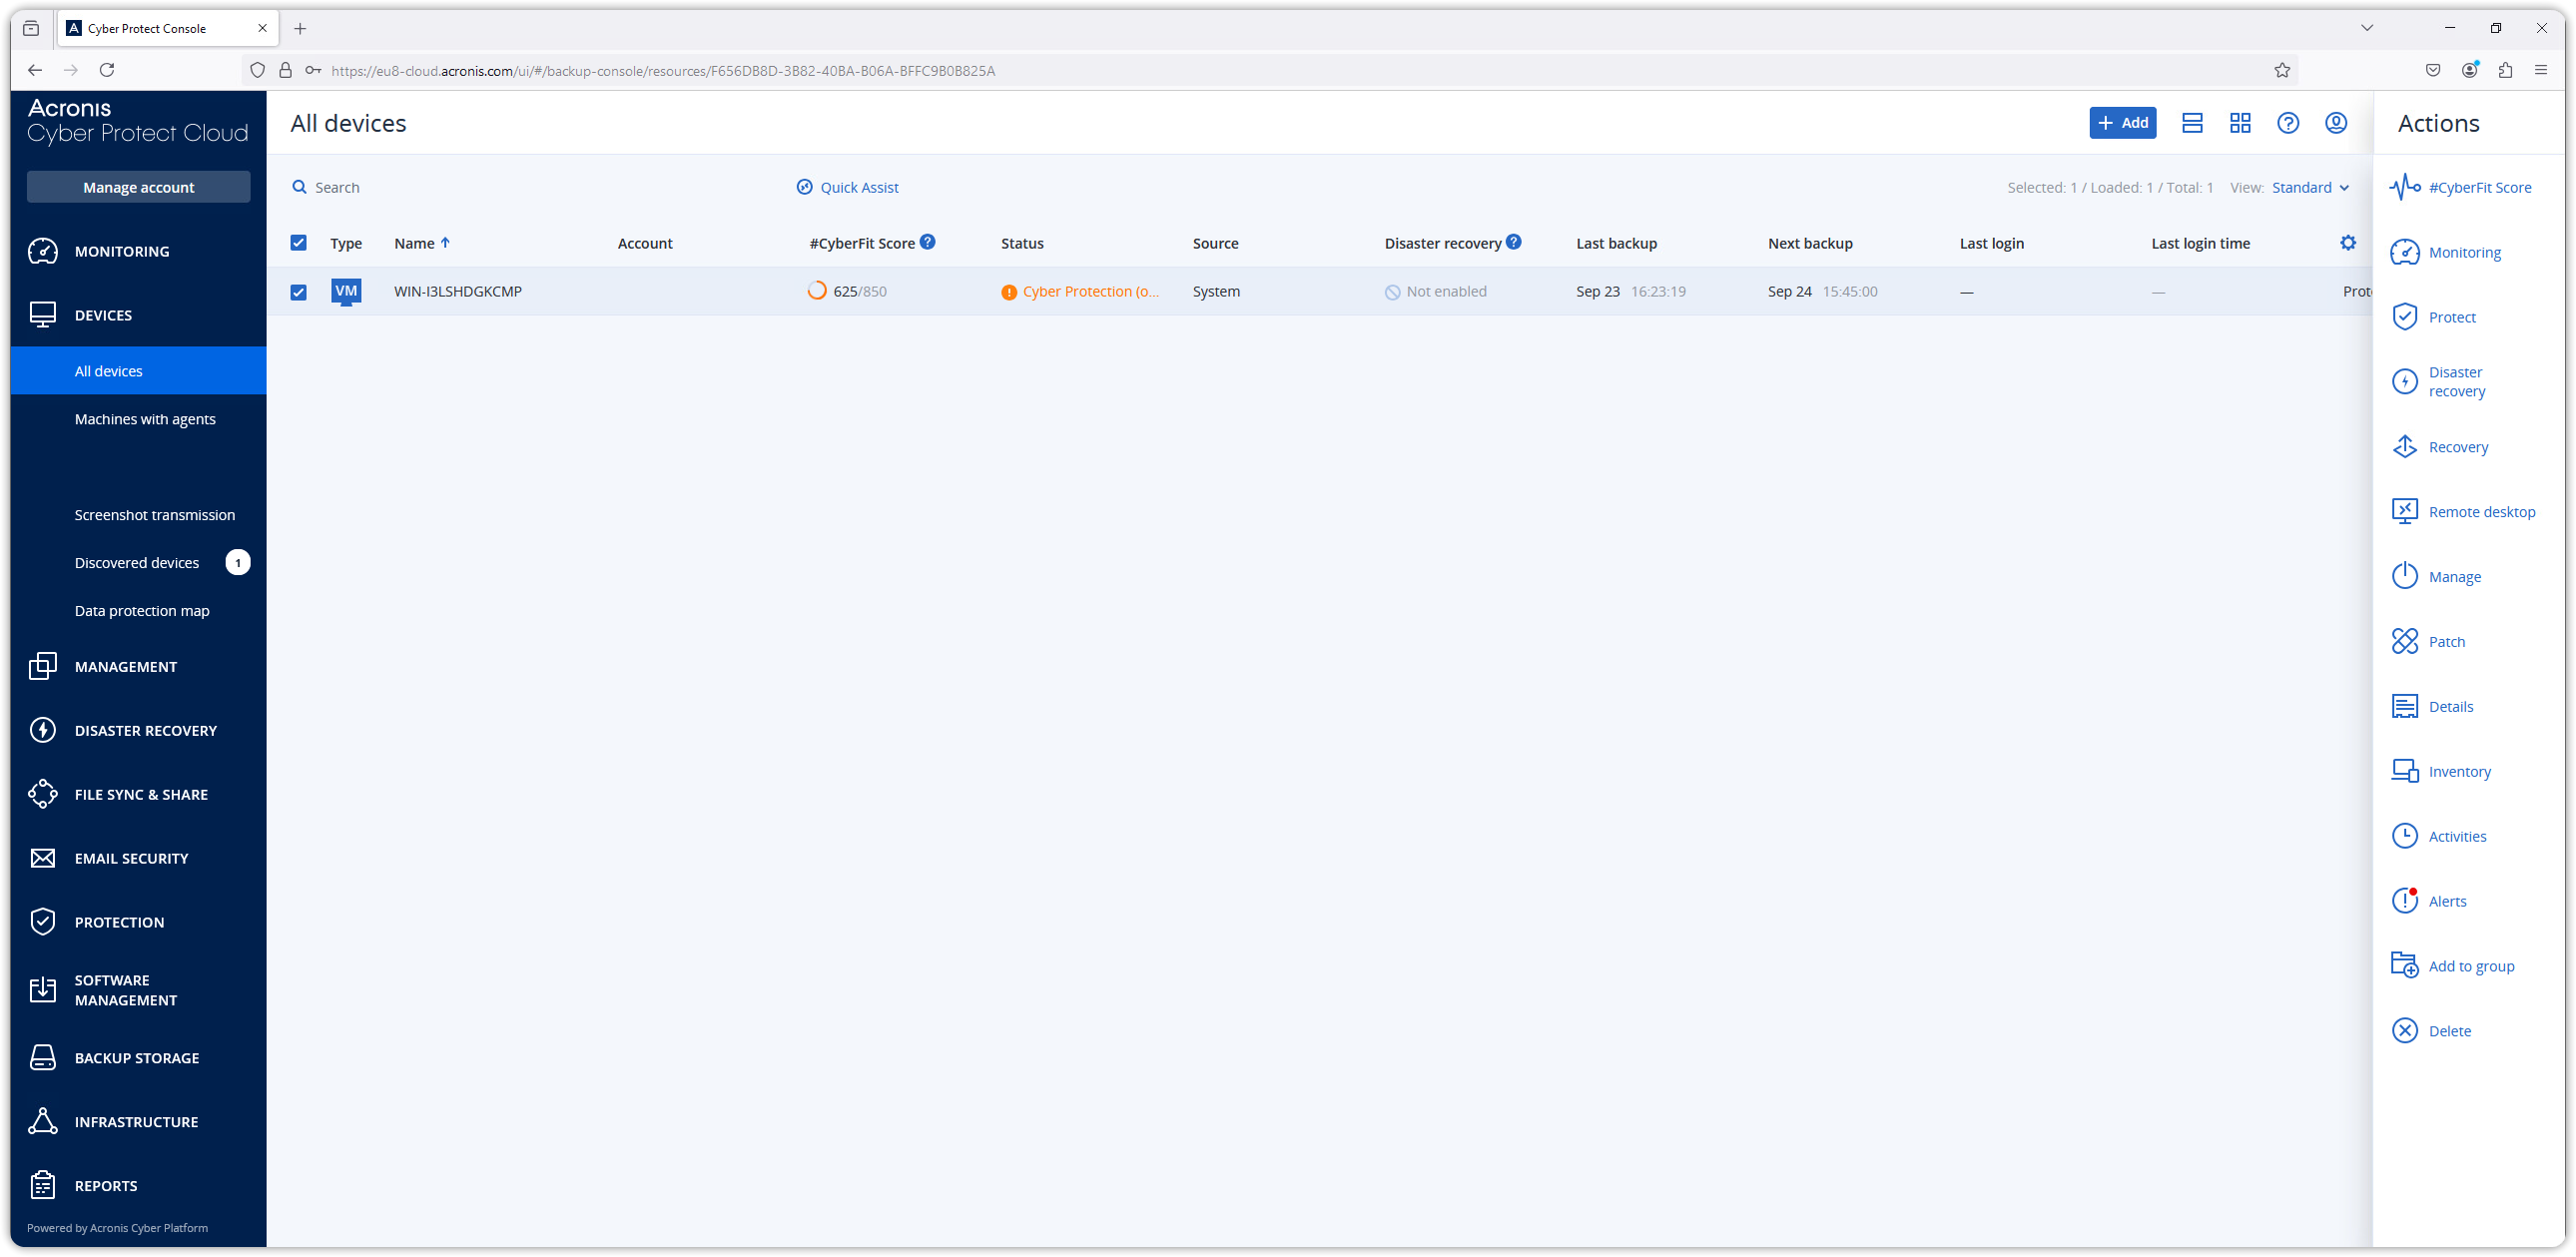
Apply a the previously edited Backup Plan containing the Cubbit DS3 as destination target.
The "Where to backup" parameter must be set to S3 compatible location.
Wait for the scheduler to start or force start the backup with the Run Now button.
Click on Monitoring and Activities to monitor the backup process in progress.
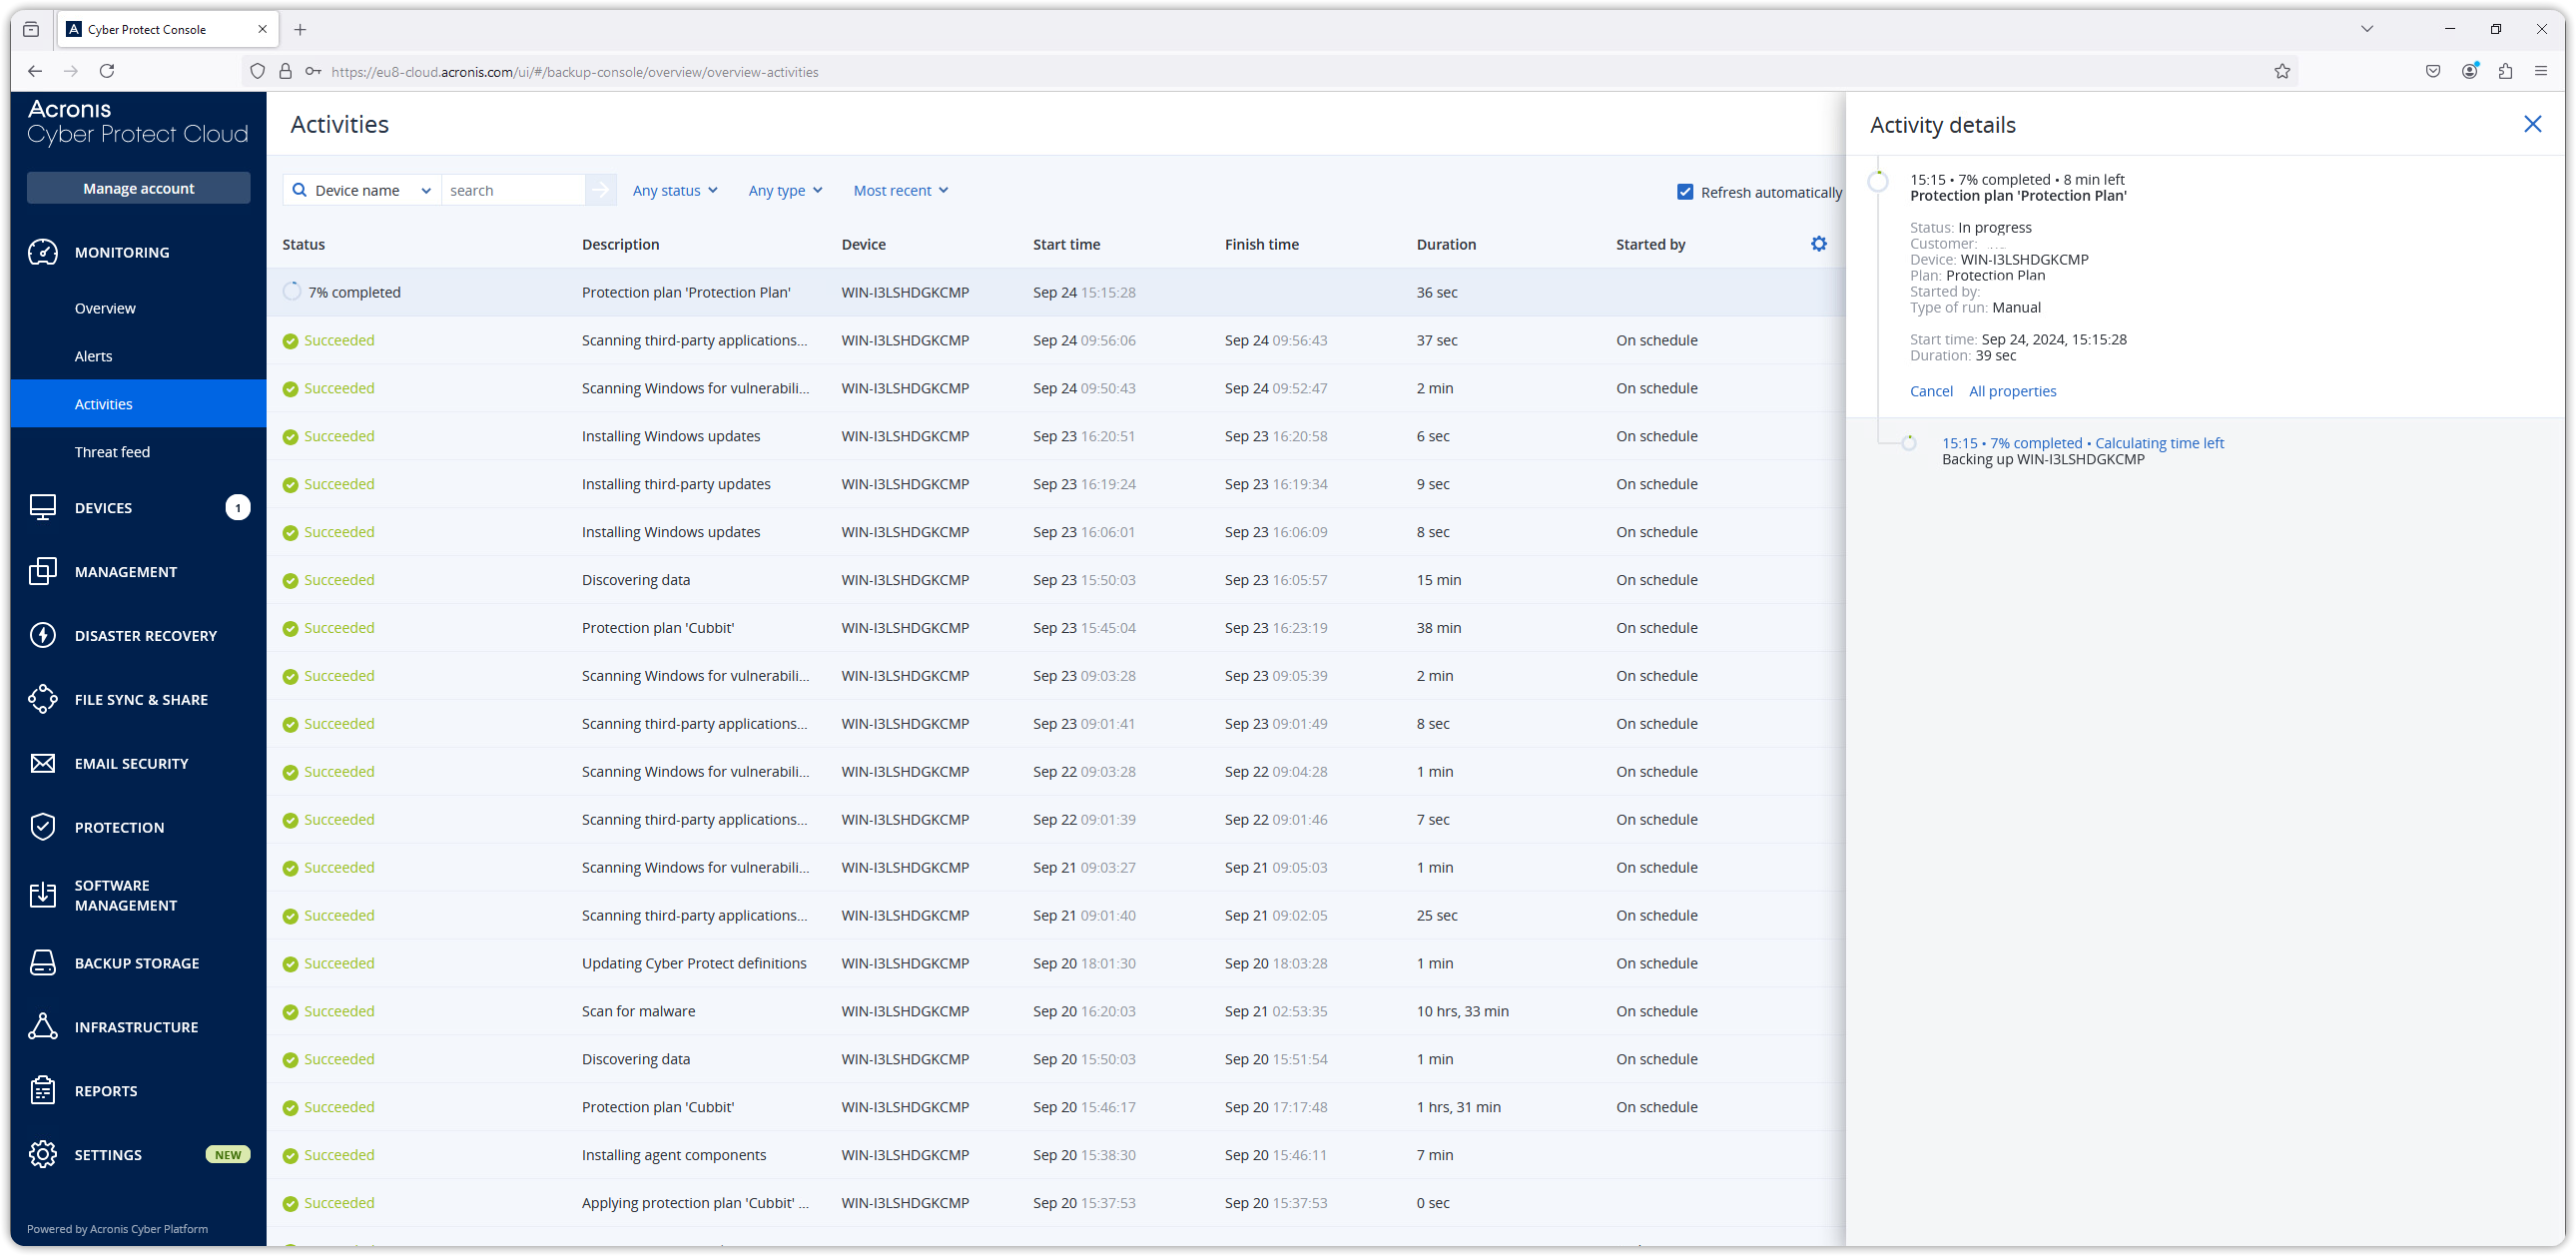
Congratulations, your secure geo-distributed backup to Cubbit DS3 has been successfully started with Acronis Cyber Protect Cloud!
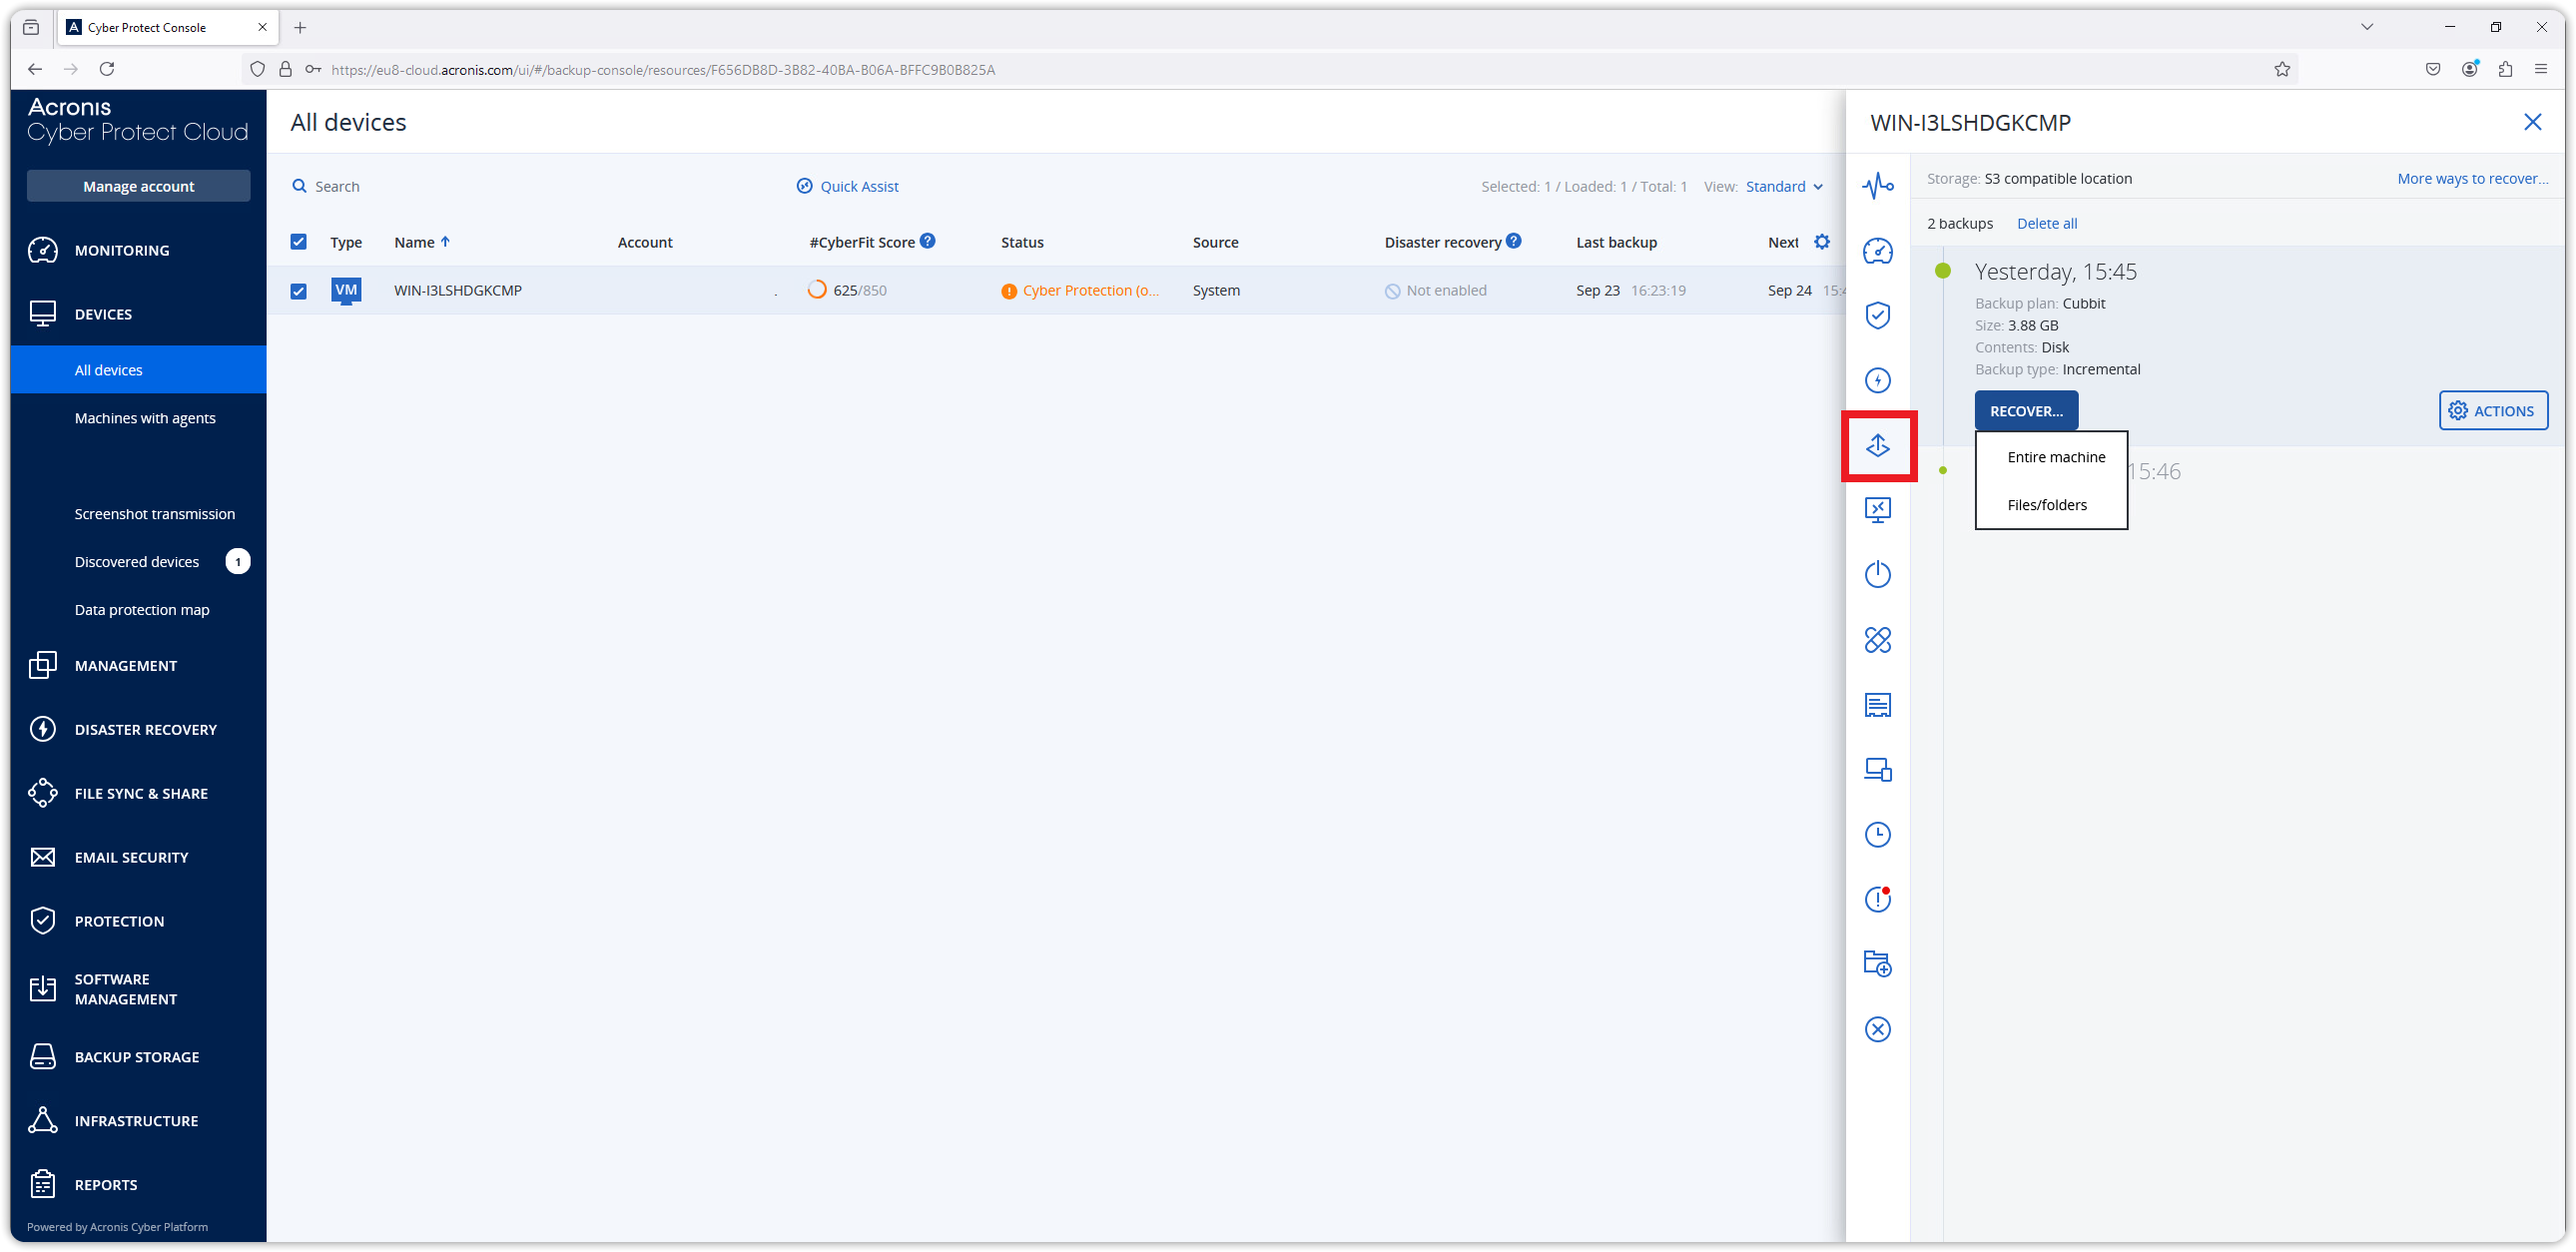
Recovery
In the same way, it is possible to recover one or more machine and decide whether to restore the entire machine or specific files/folders.
For more information on using Acronis Cyber Protect, please refer to the official Knowledge base Acronis.