Nakivo
Intro
Nakivo is a solution that allows you to backup computers and virtual machines like VMware, Hyper-V and others directly to object storage clouds like Cubbit DS3. It also features immutability to take advantage of object lock giving you protection against ransomware attacks and accidental deletion.
Prerequisites
To set up Nakivo with Cubbit, you first need to get your access and secret keys from the Cubbit Web Console or https://console.[your-tenant].cubbit.eu. You can follow the instructions provided to create a new Cubbit account and generate these keys. It is also highly recommended to create a new empty bucket.
You will then need Nakivo Backup & Replication version 10.8 or higher.
Configuration
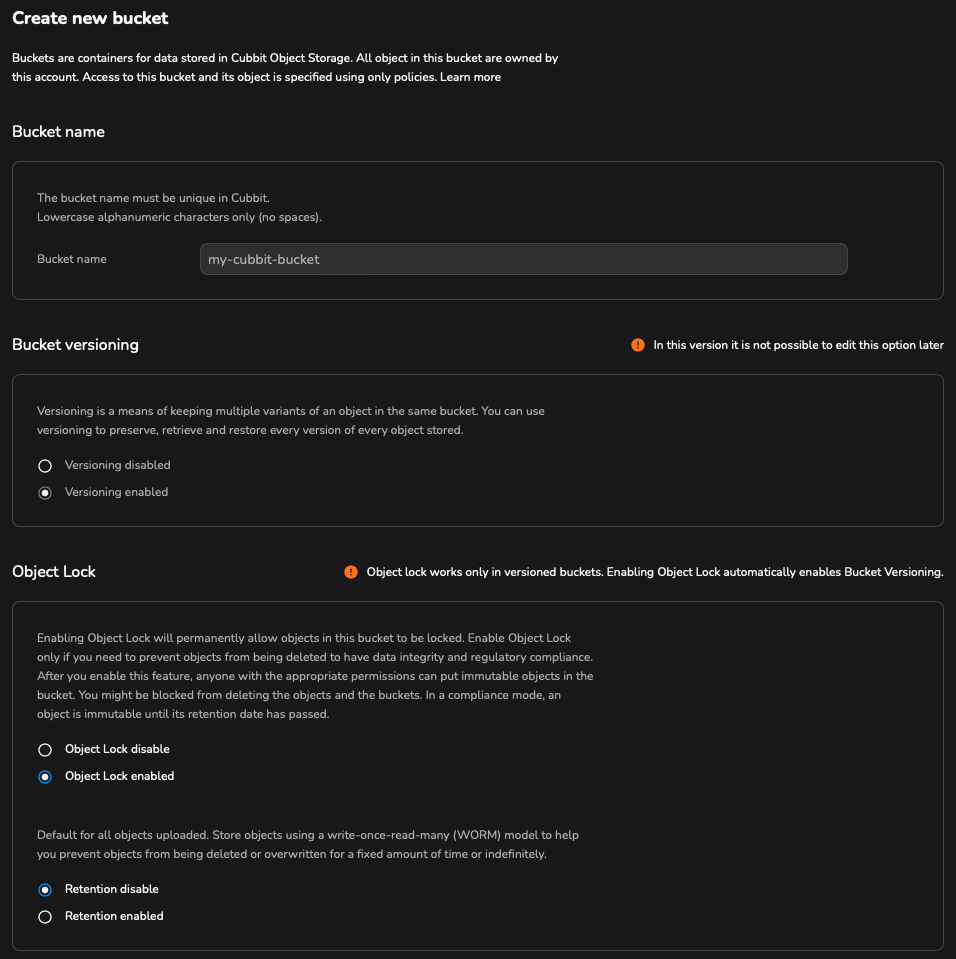
After activating the S3 Object Lock on bucket creation, it is necessary to set the retention to disabled as per the following image. Nakivo will then manage the retention policy and configure it. Also, in the case of backups to Object Storage via Nakivo, the use of S3 Versioning without activating S3 Object Lock (immutability) must be avoided. Without immutability, both the operations required for deletion and the total space used are multiplied, to the total disadvantage of the customer.
Inventory
Open the Nakivo Backup & Replication configuration page, go to Settings, Inventory and click the plus button to add a new inventory item with the data to be backed up.
For example, to add a VMware server follow these steps:
- Select the Virtual platform;
- Choose the VMware vCenter or ESXi host type;
- Here enter the name, IP address and credentials of your ESXi server.
After clicking the Finish button the new item should be in the list.
S3 Repository
To add the Cubbit S3 repository, from Settings go to Repositories, click the plus button as before and follow these steps:
- Select the Cloud & S3-Compatible Storage type;
- As vendor, choose Generic S3-compatible Storage;
- Leave the Assigned transporter with default values (Onboard transporter) and click the link Add new account, which will open a new tab.
In the new tab that will automatically open:
- As vendor, choose Storage;
- Choose the Generic S3-compatible Storage type;
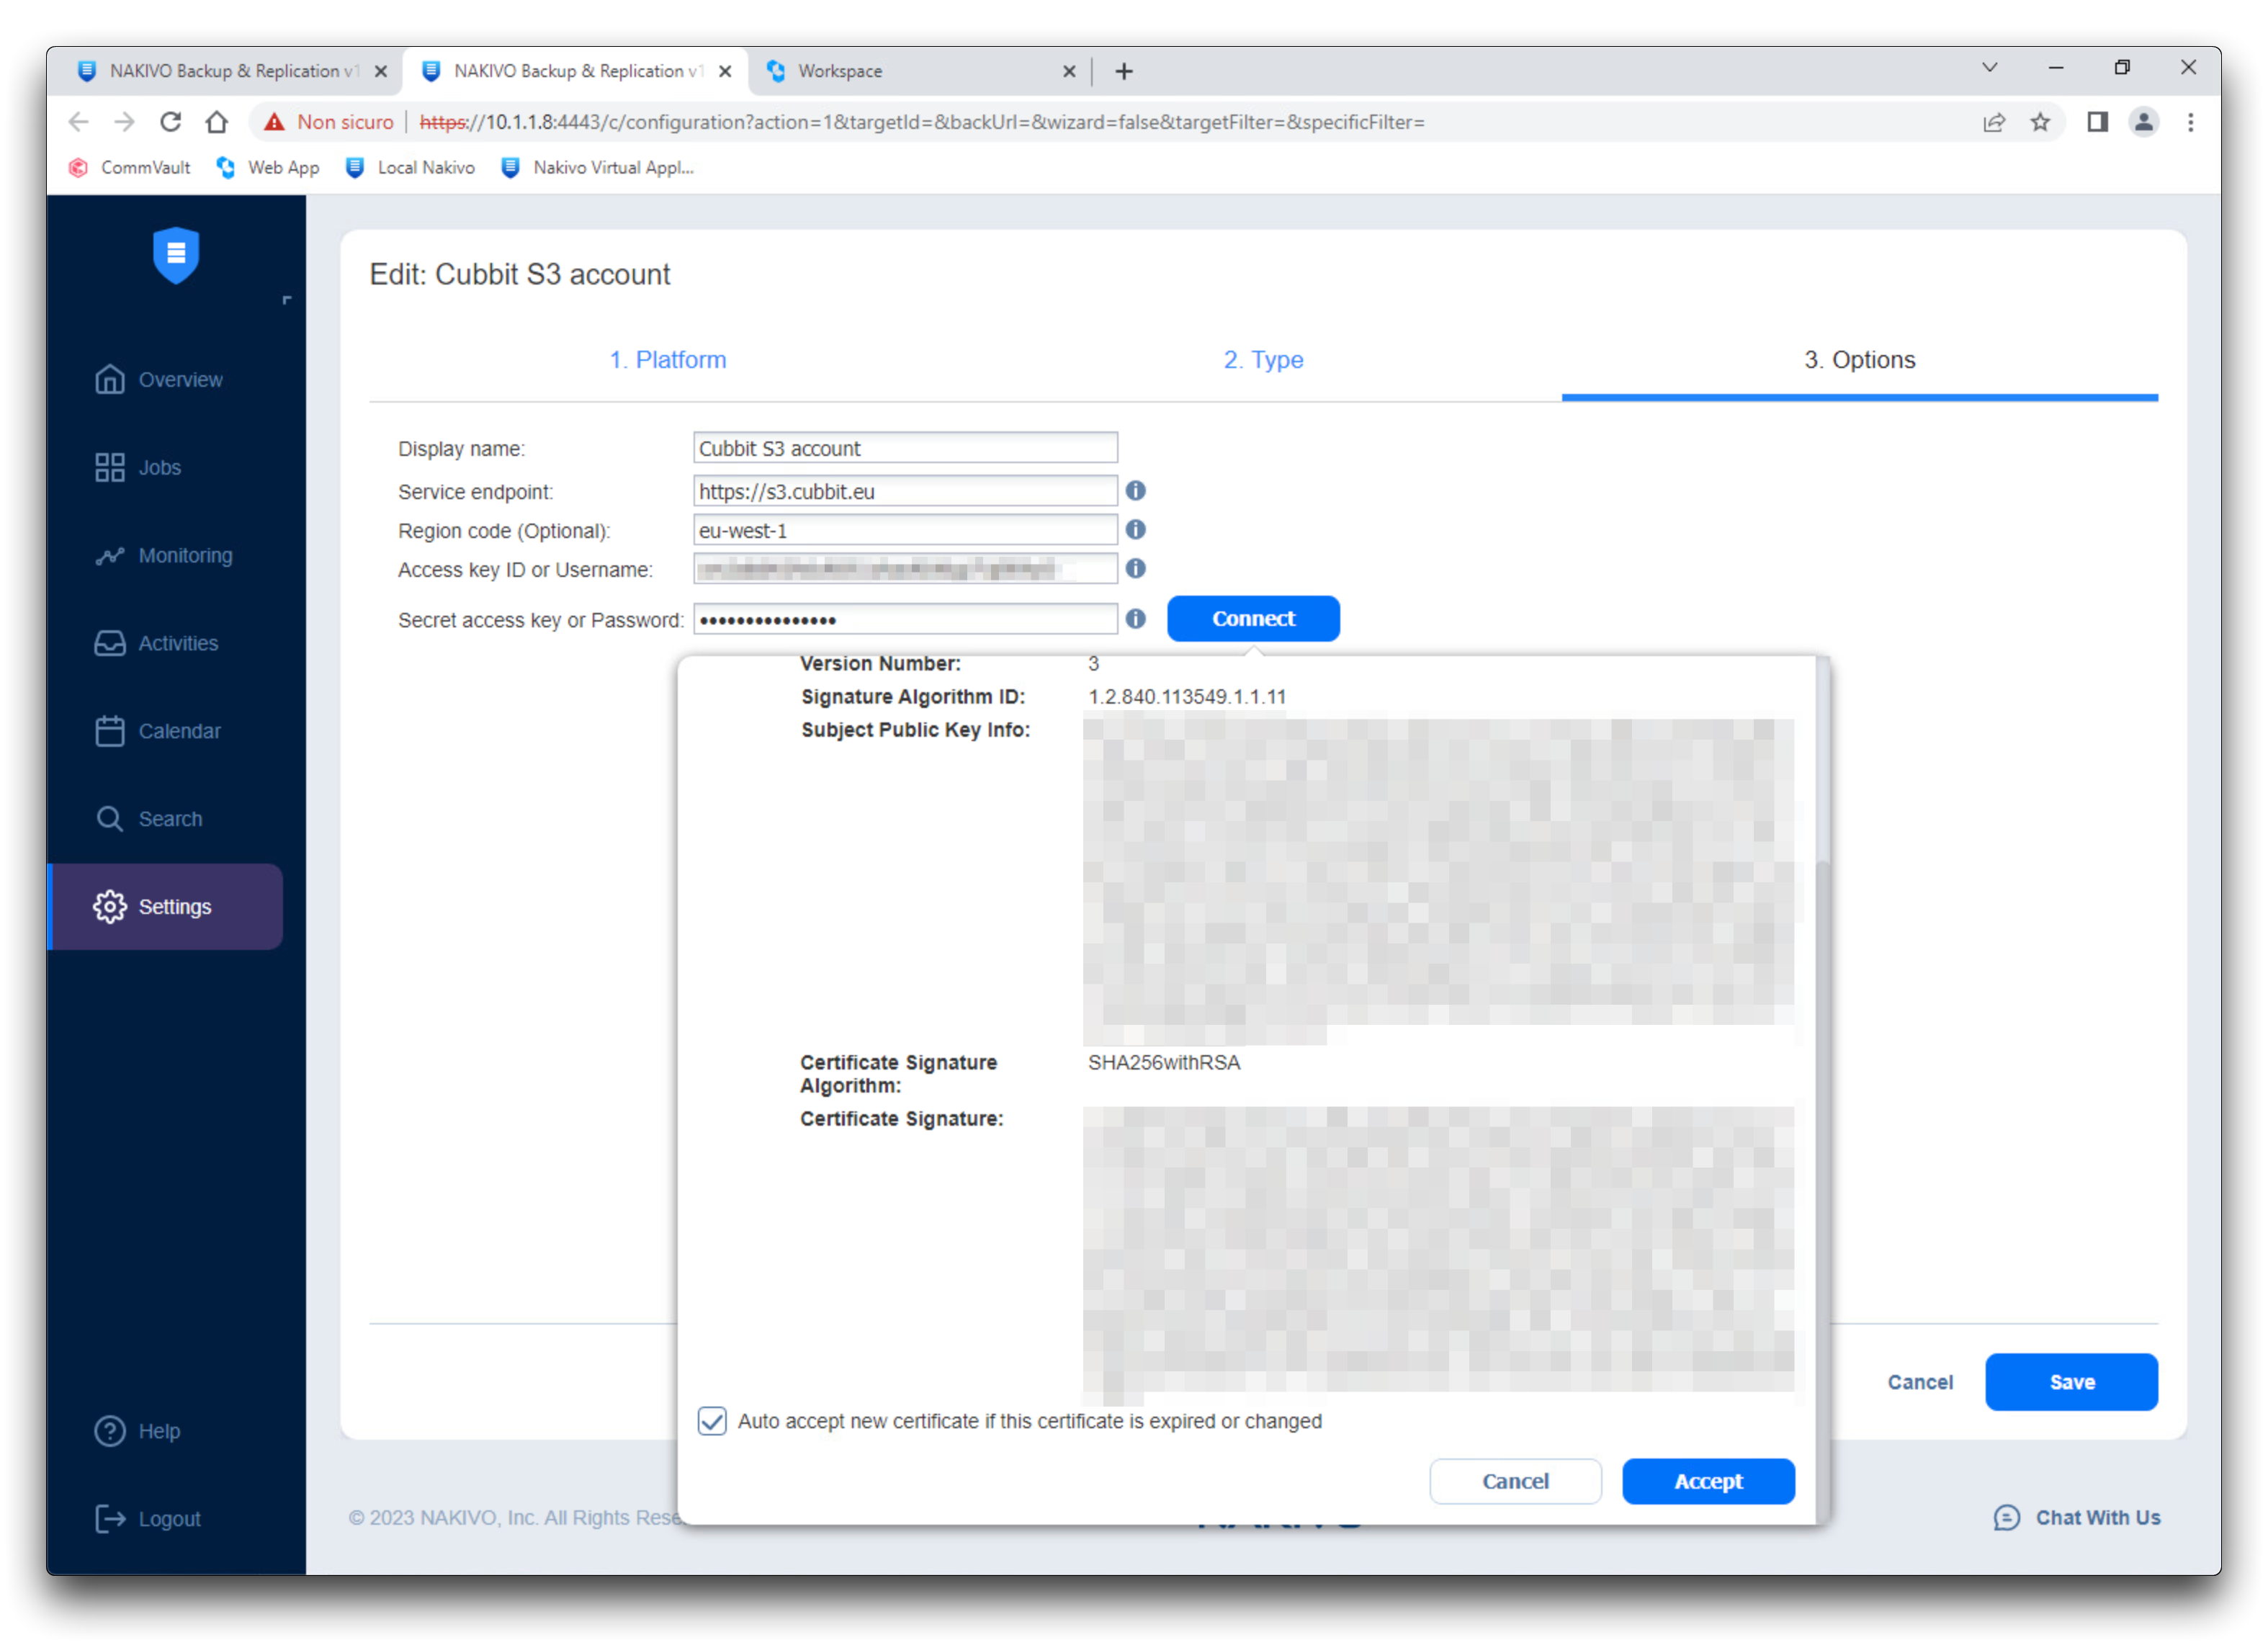
- Set the following Options:
- Service endpoint:
https://s3.cubbit.euor if you have a custom tenants3.[your-tenant].cubbit.eu - Region code:
eu-west-1 - Username: your Cubbit access key
- Password: your Cubbit secret key
- Service endpoint:
Click the Connect button, accept the certificate and click Save.
Go back to the previous tab, and from the Account dropdown select the newly created one. From the Bucket dropdown choose the preferred bucket in which to save all future Nakivo backups.
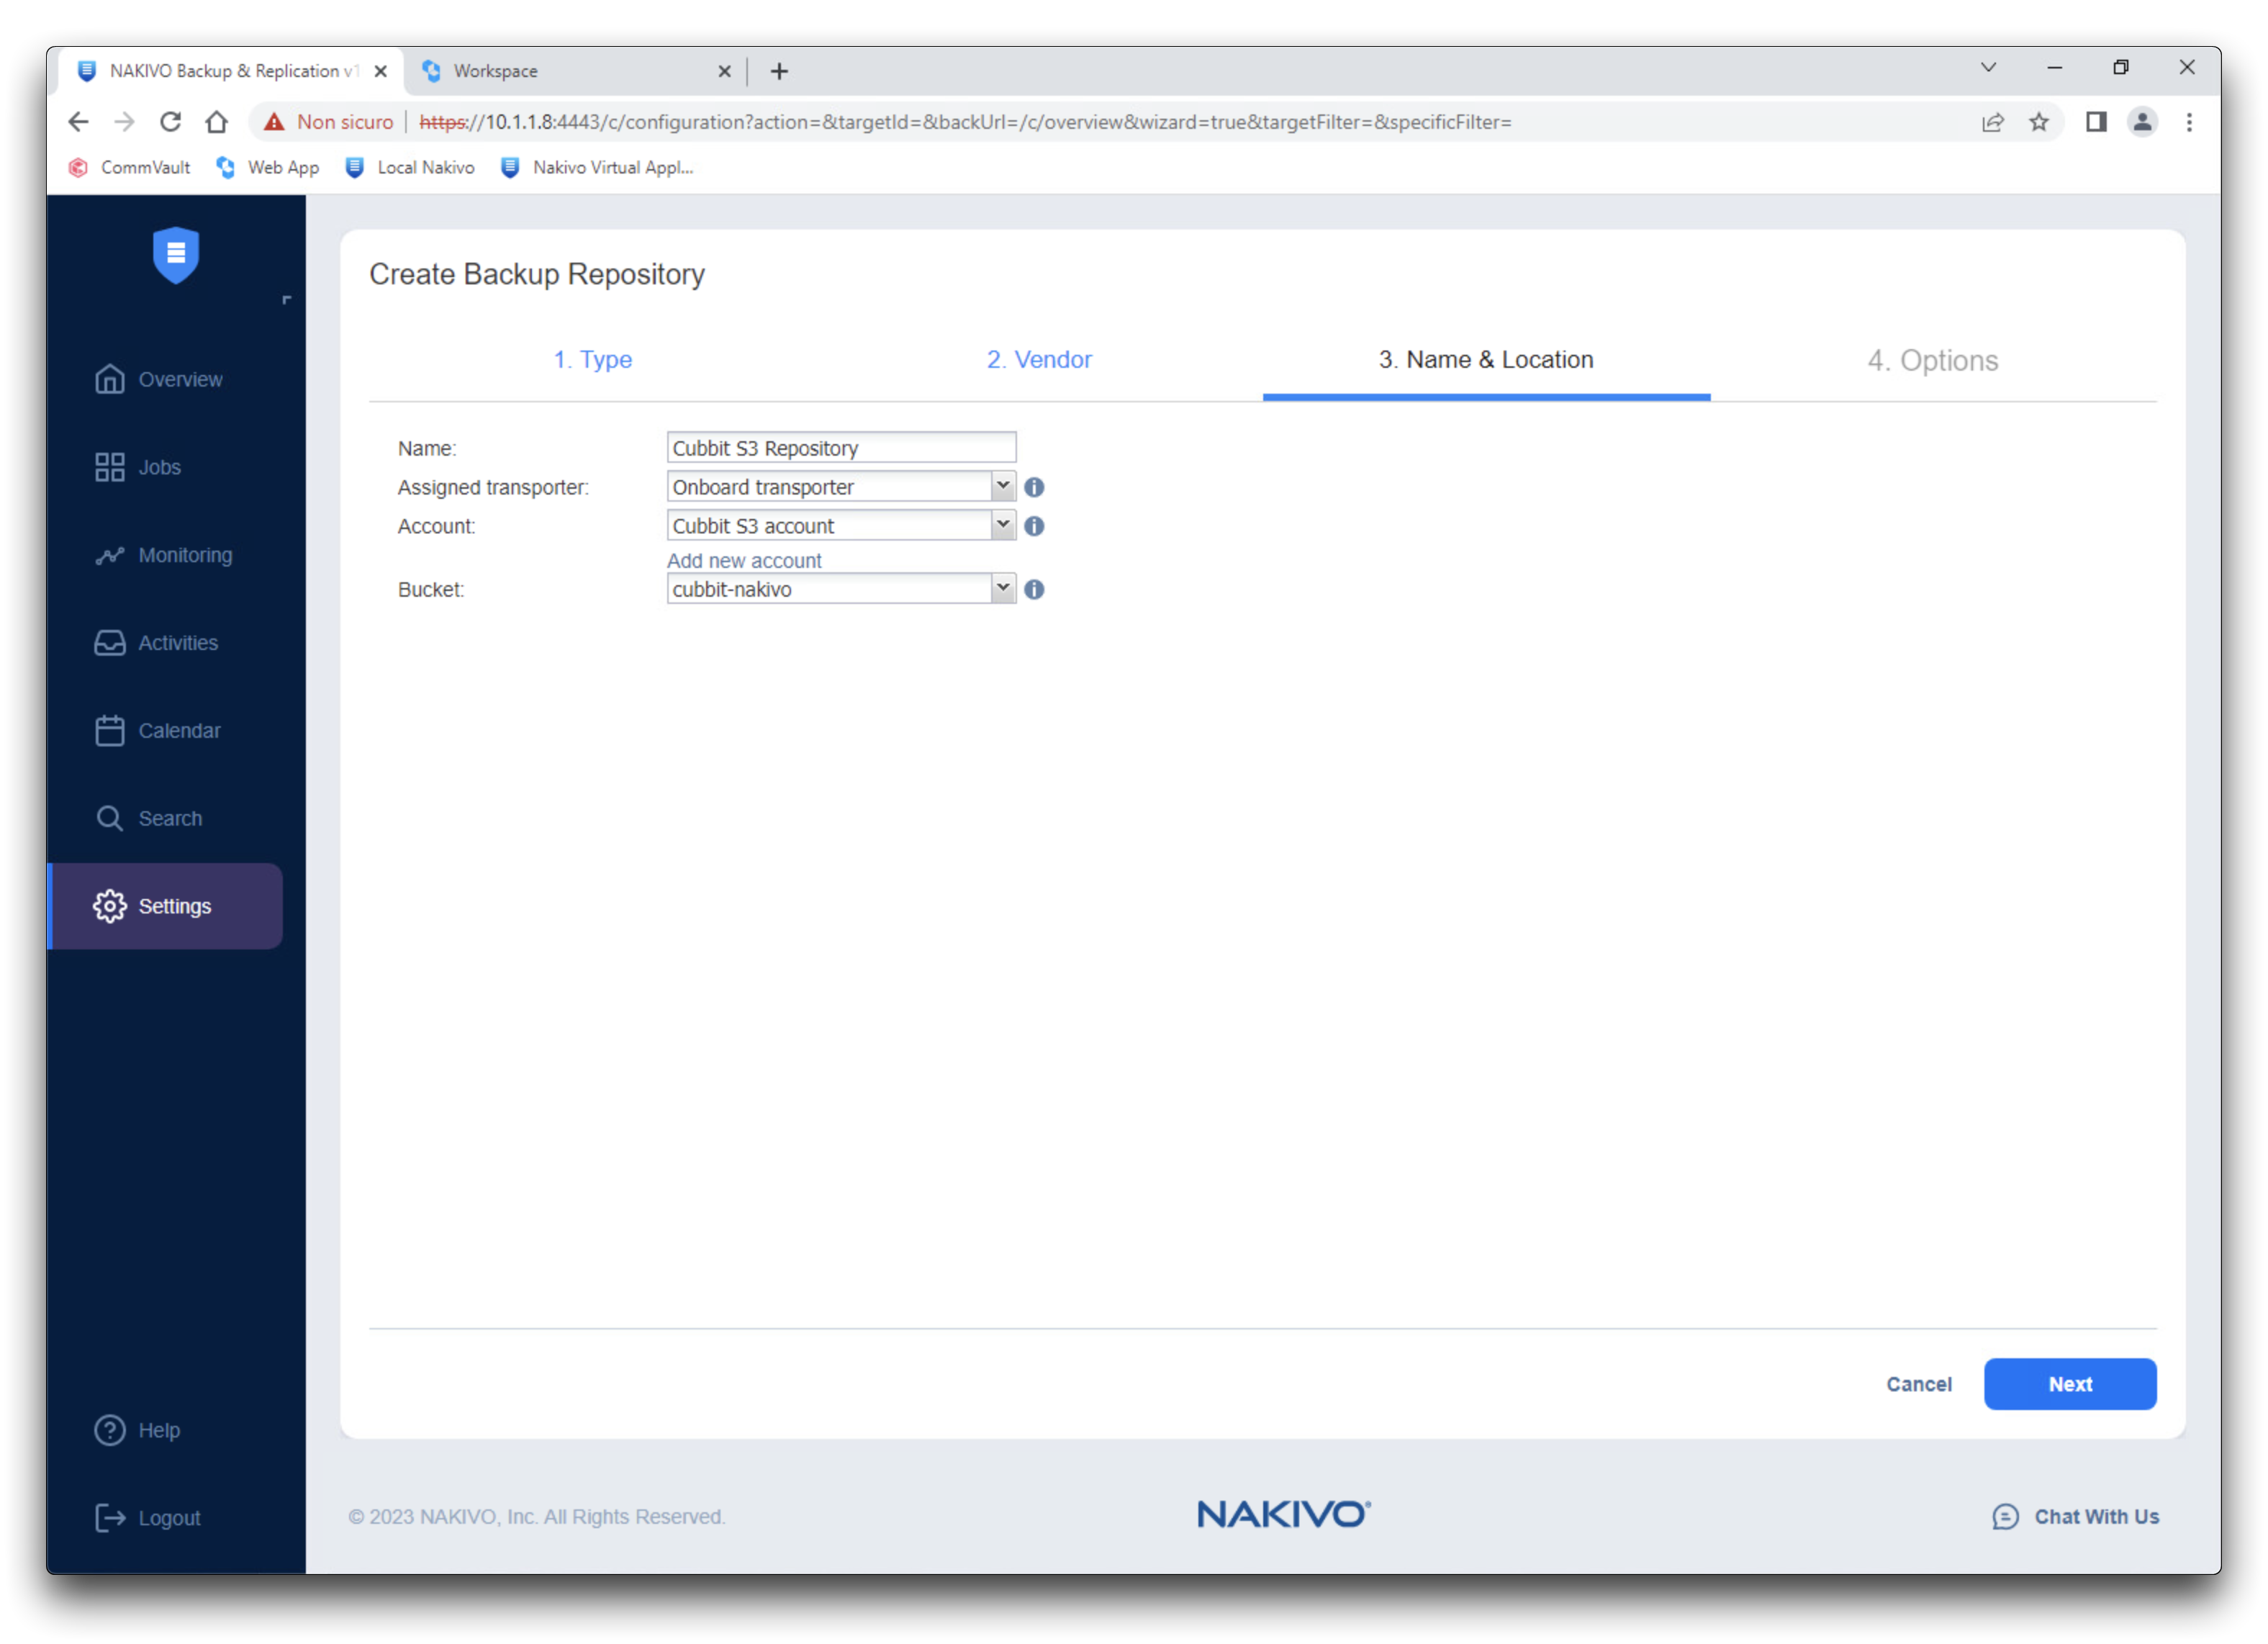
To complete the creation of the repository click Next, set the desired Options and click Finish.
Backup job creation
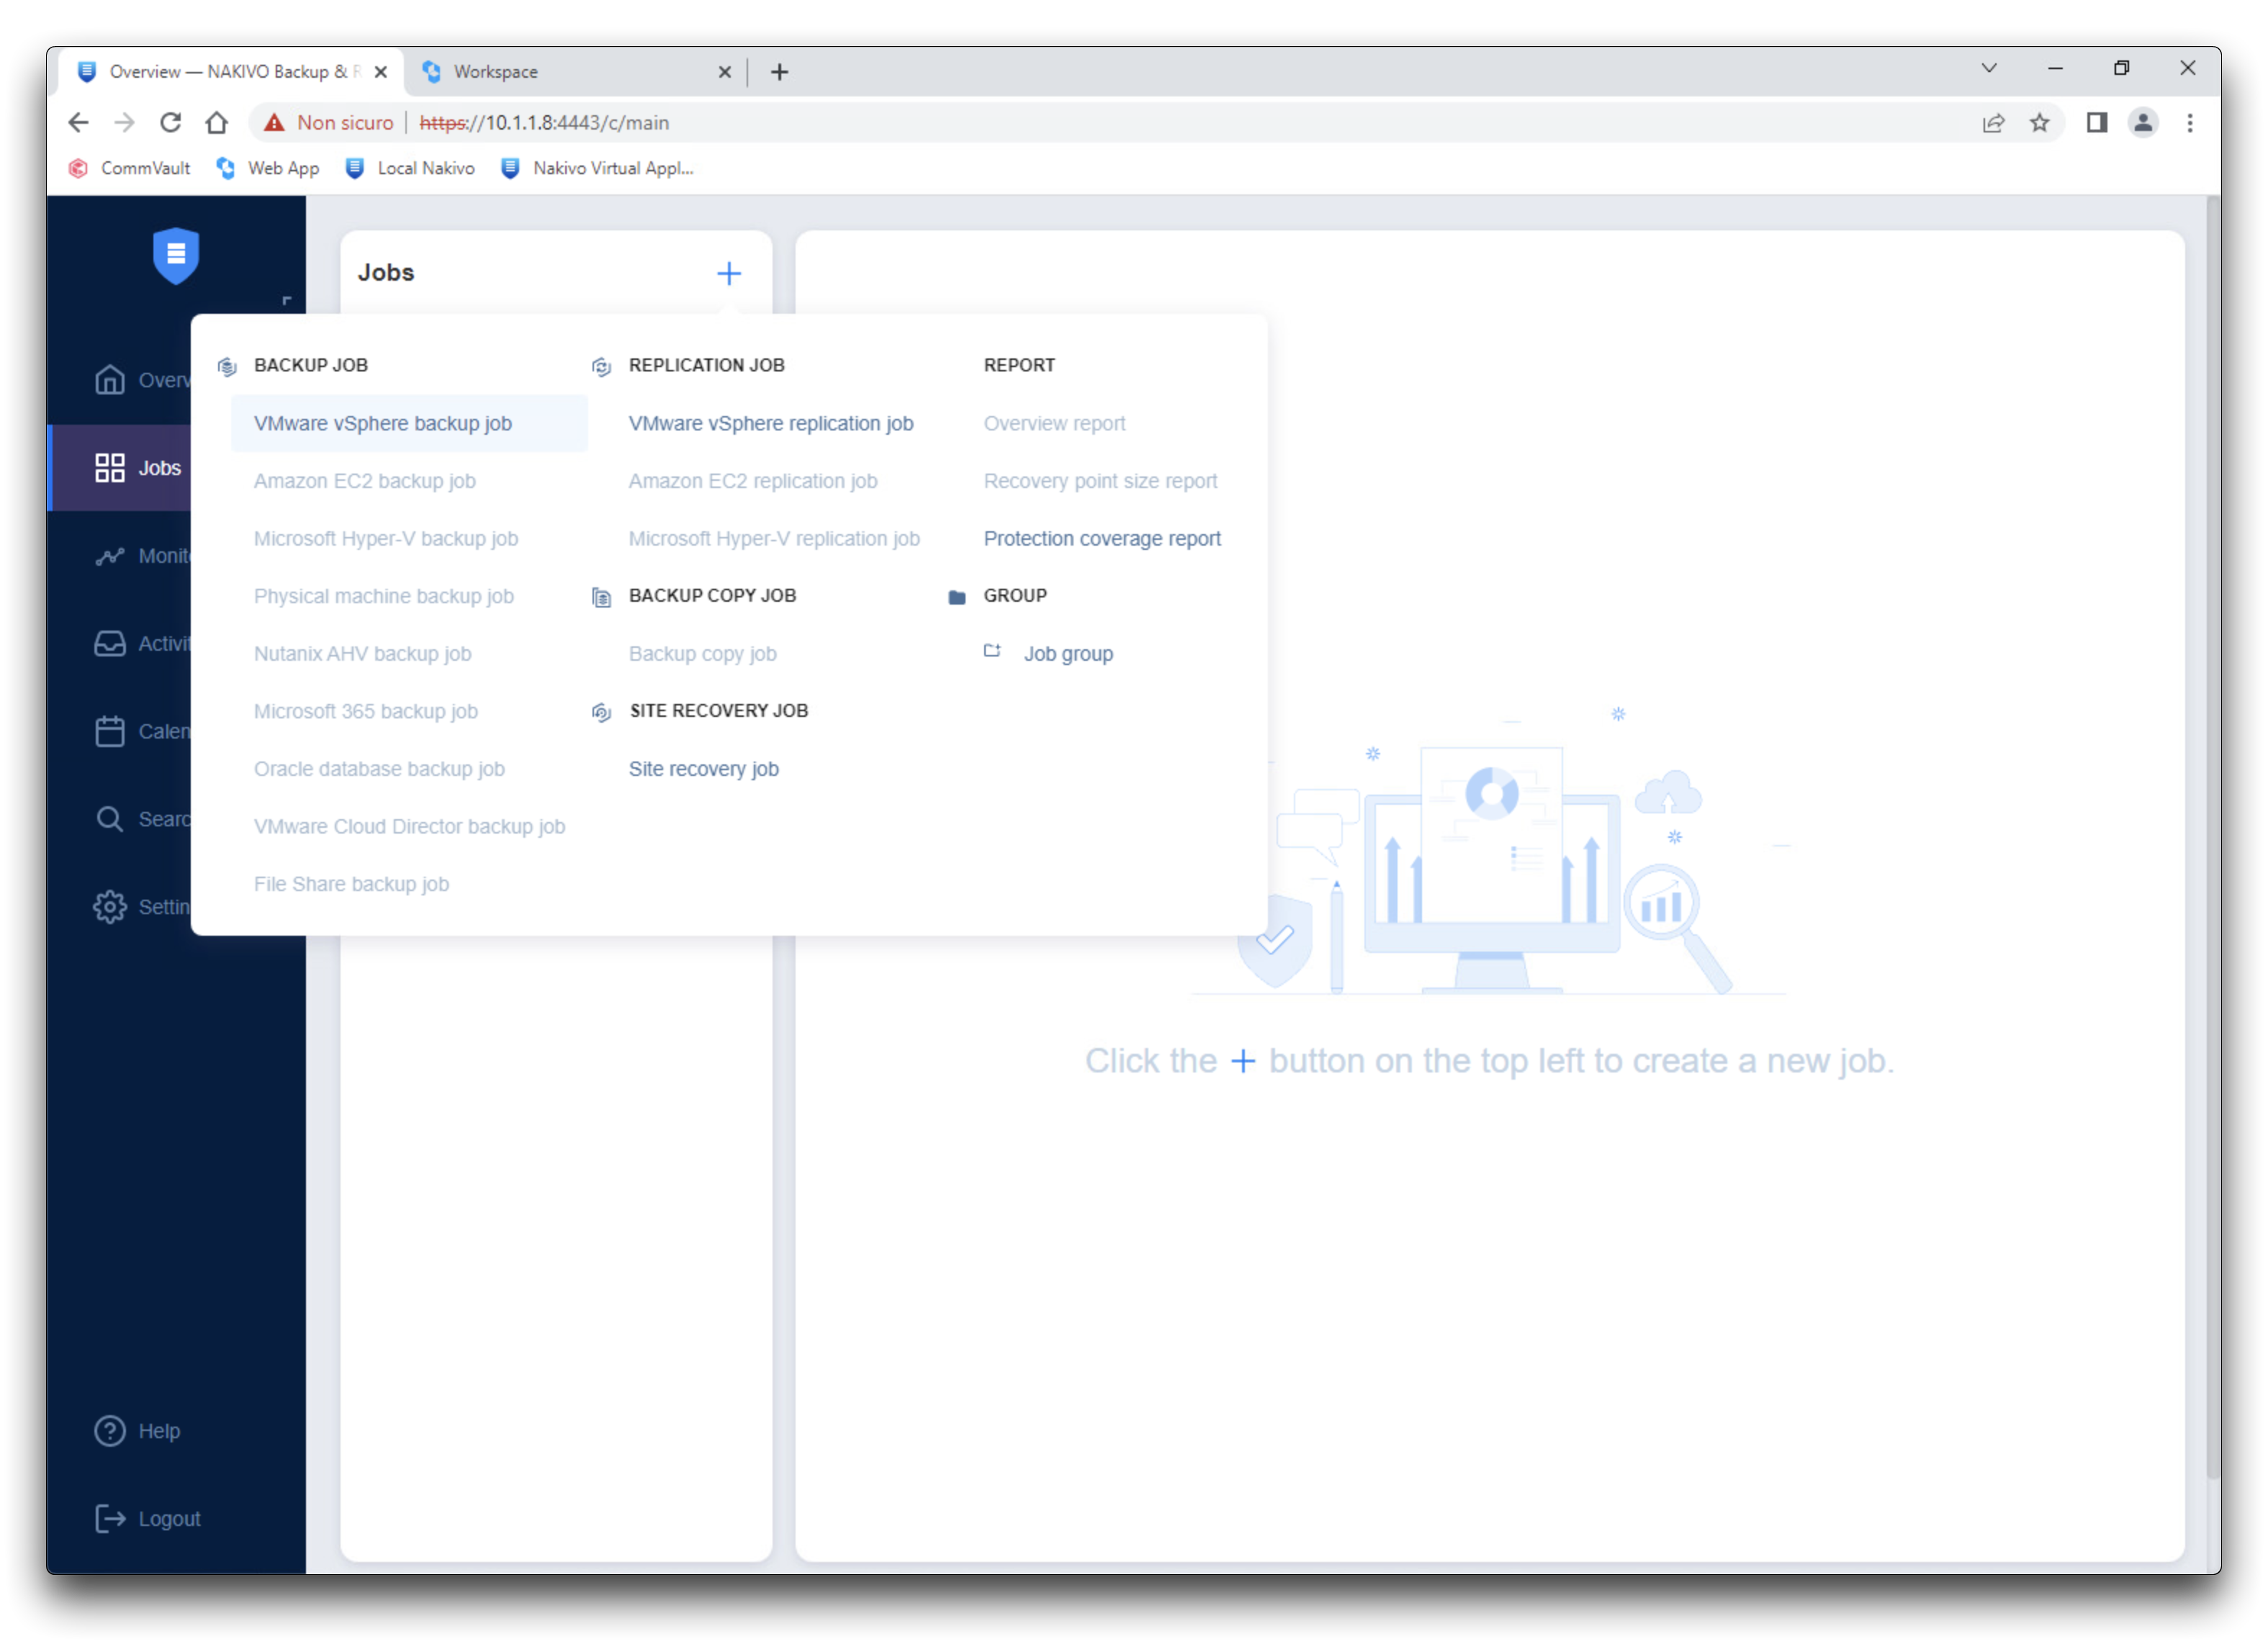
To create a backup job go to Jobs, click the plus button and choose the type of backup job needed, e.g. VMware vSphere backup job.
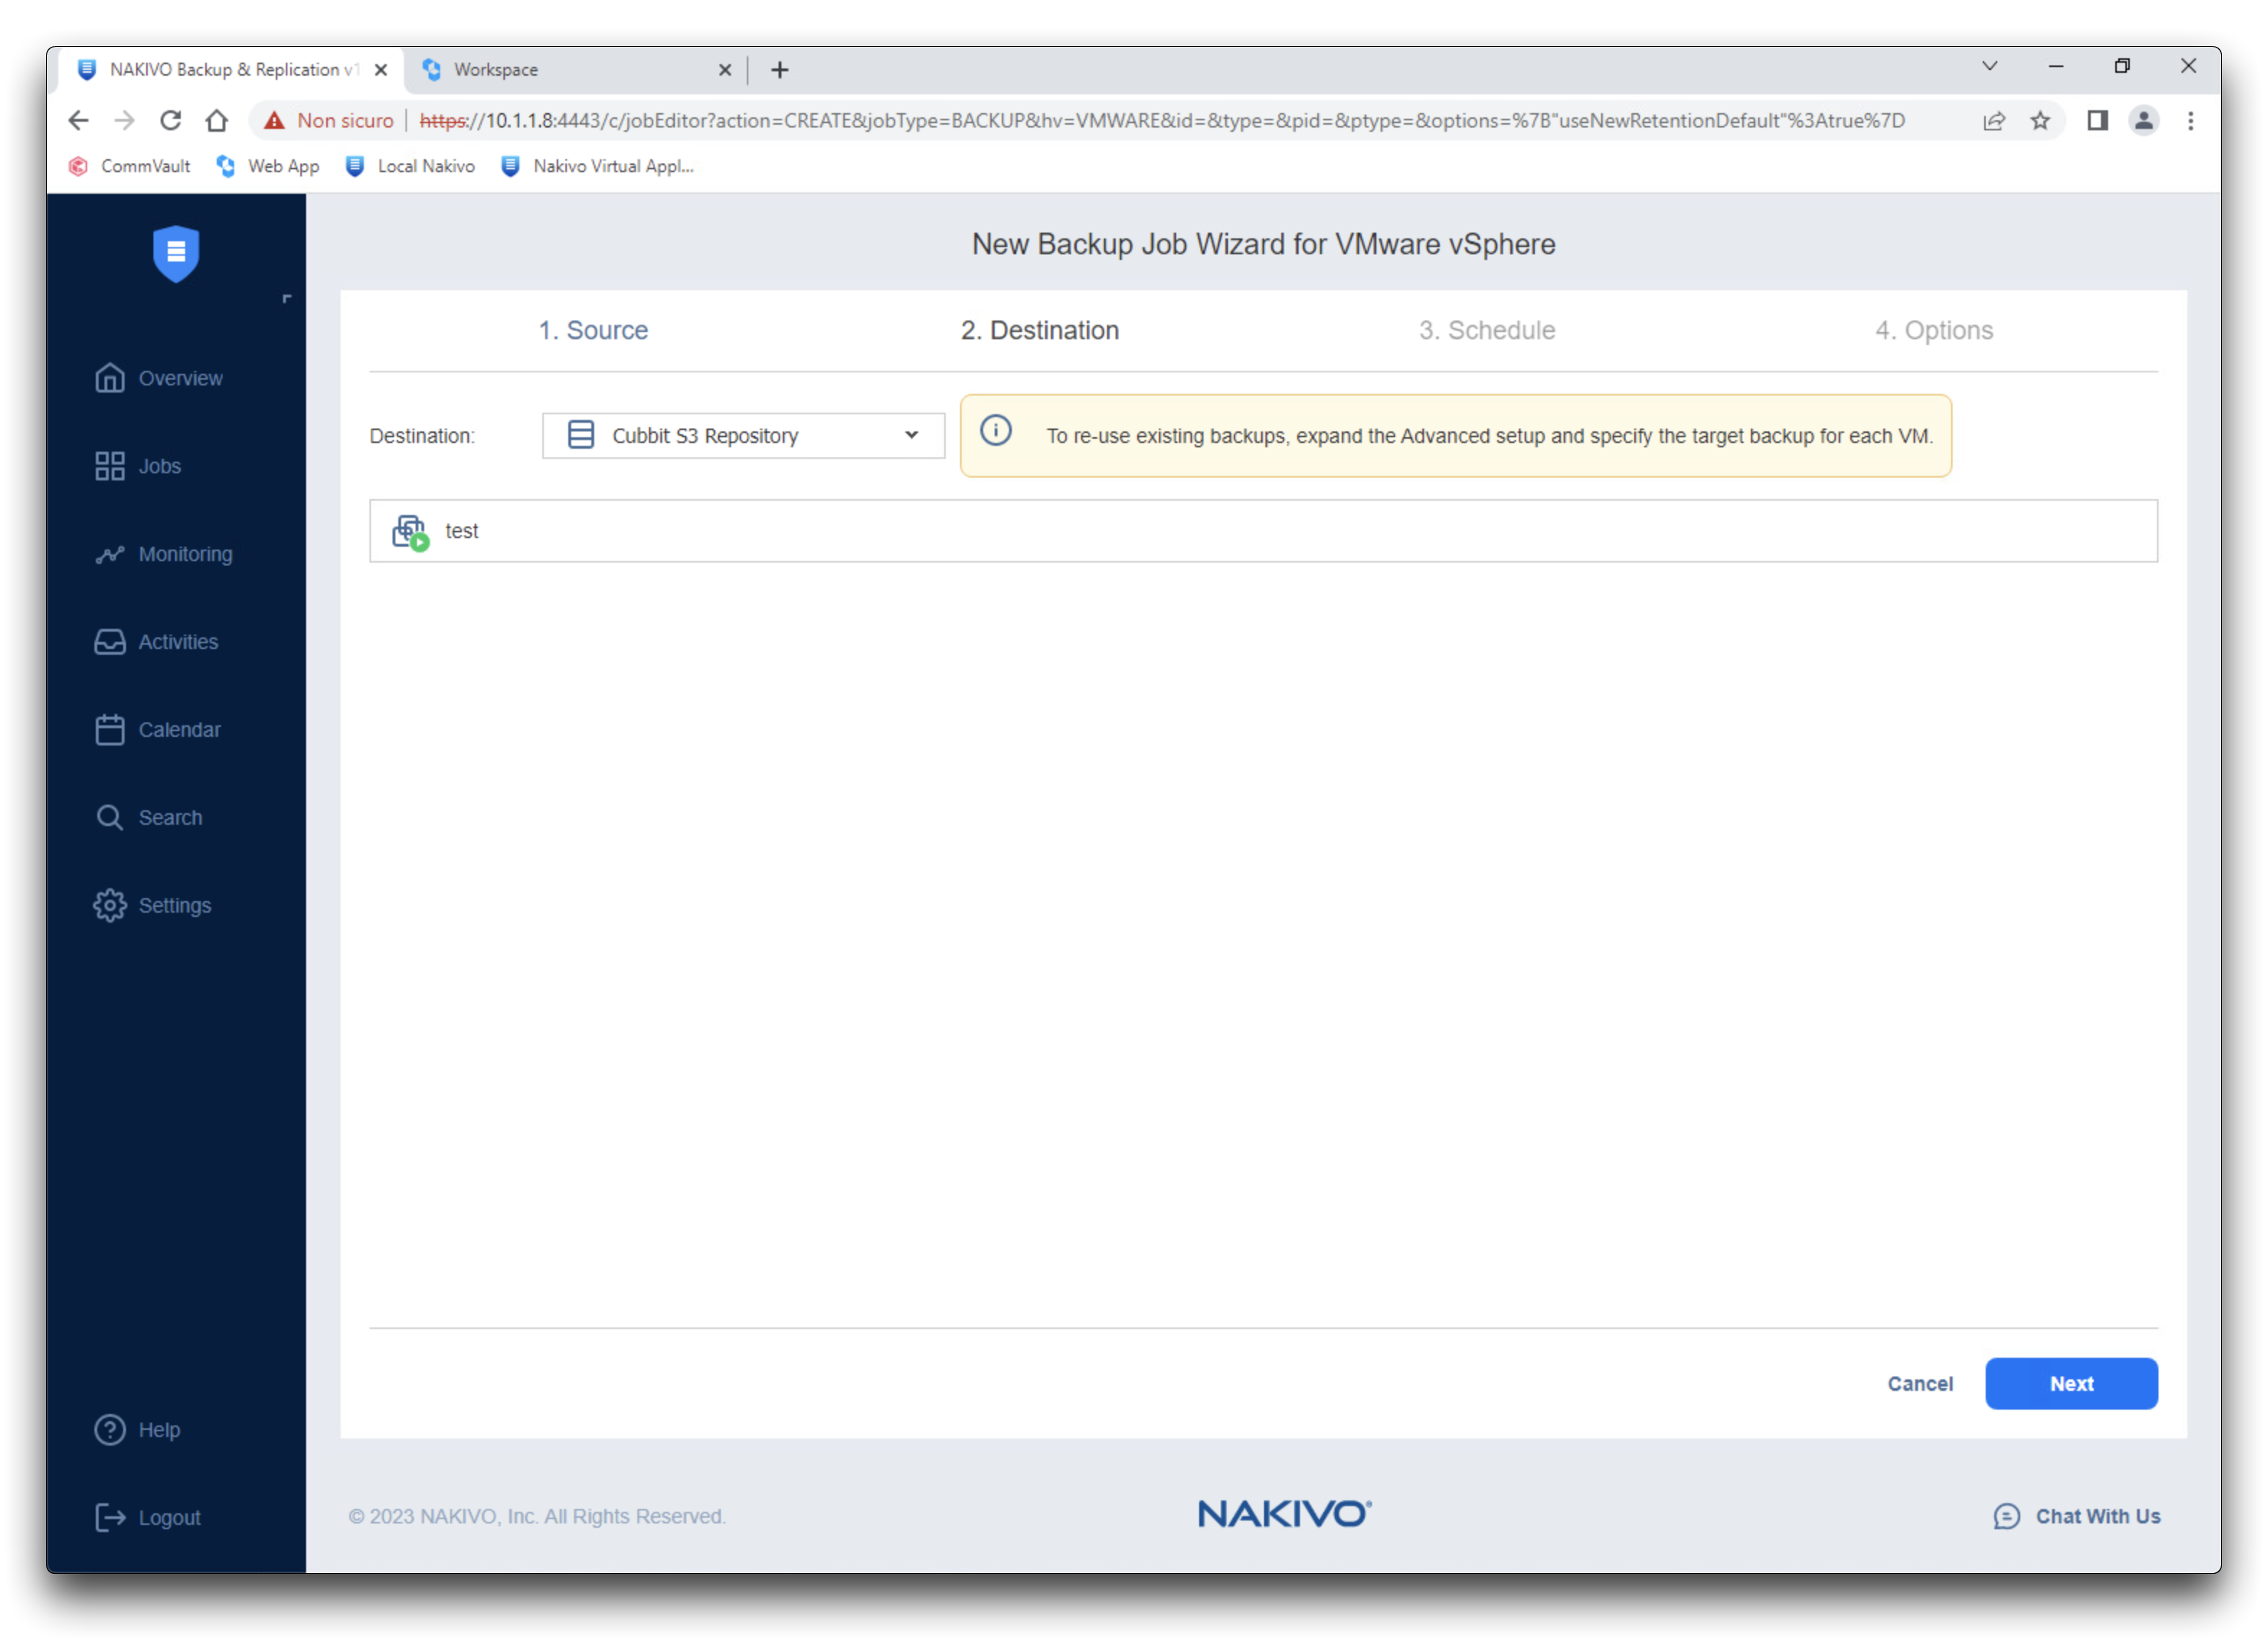
In the first step (Source) you can select which virtual machine to back up, while in the Destination step select the Cubbit repository that has been created previously.
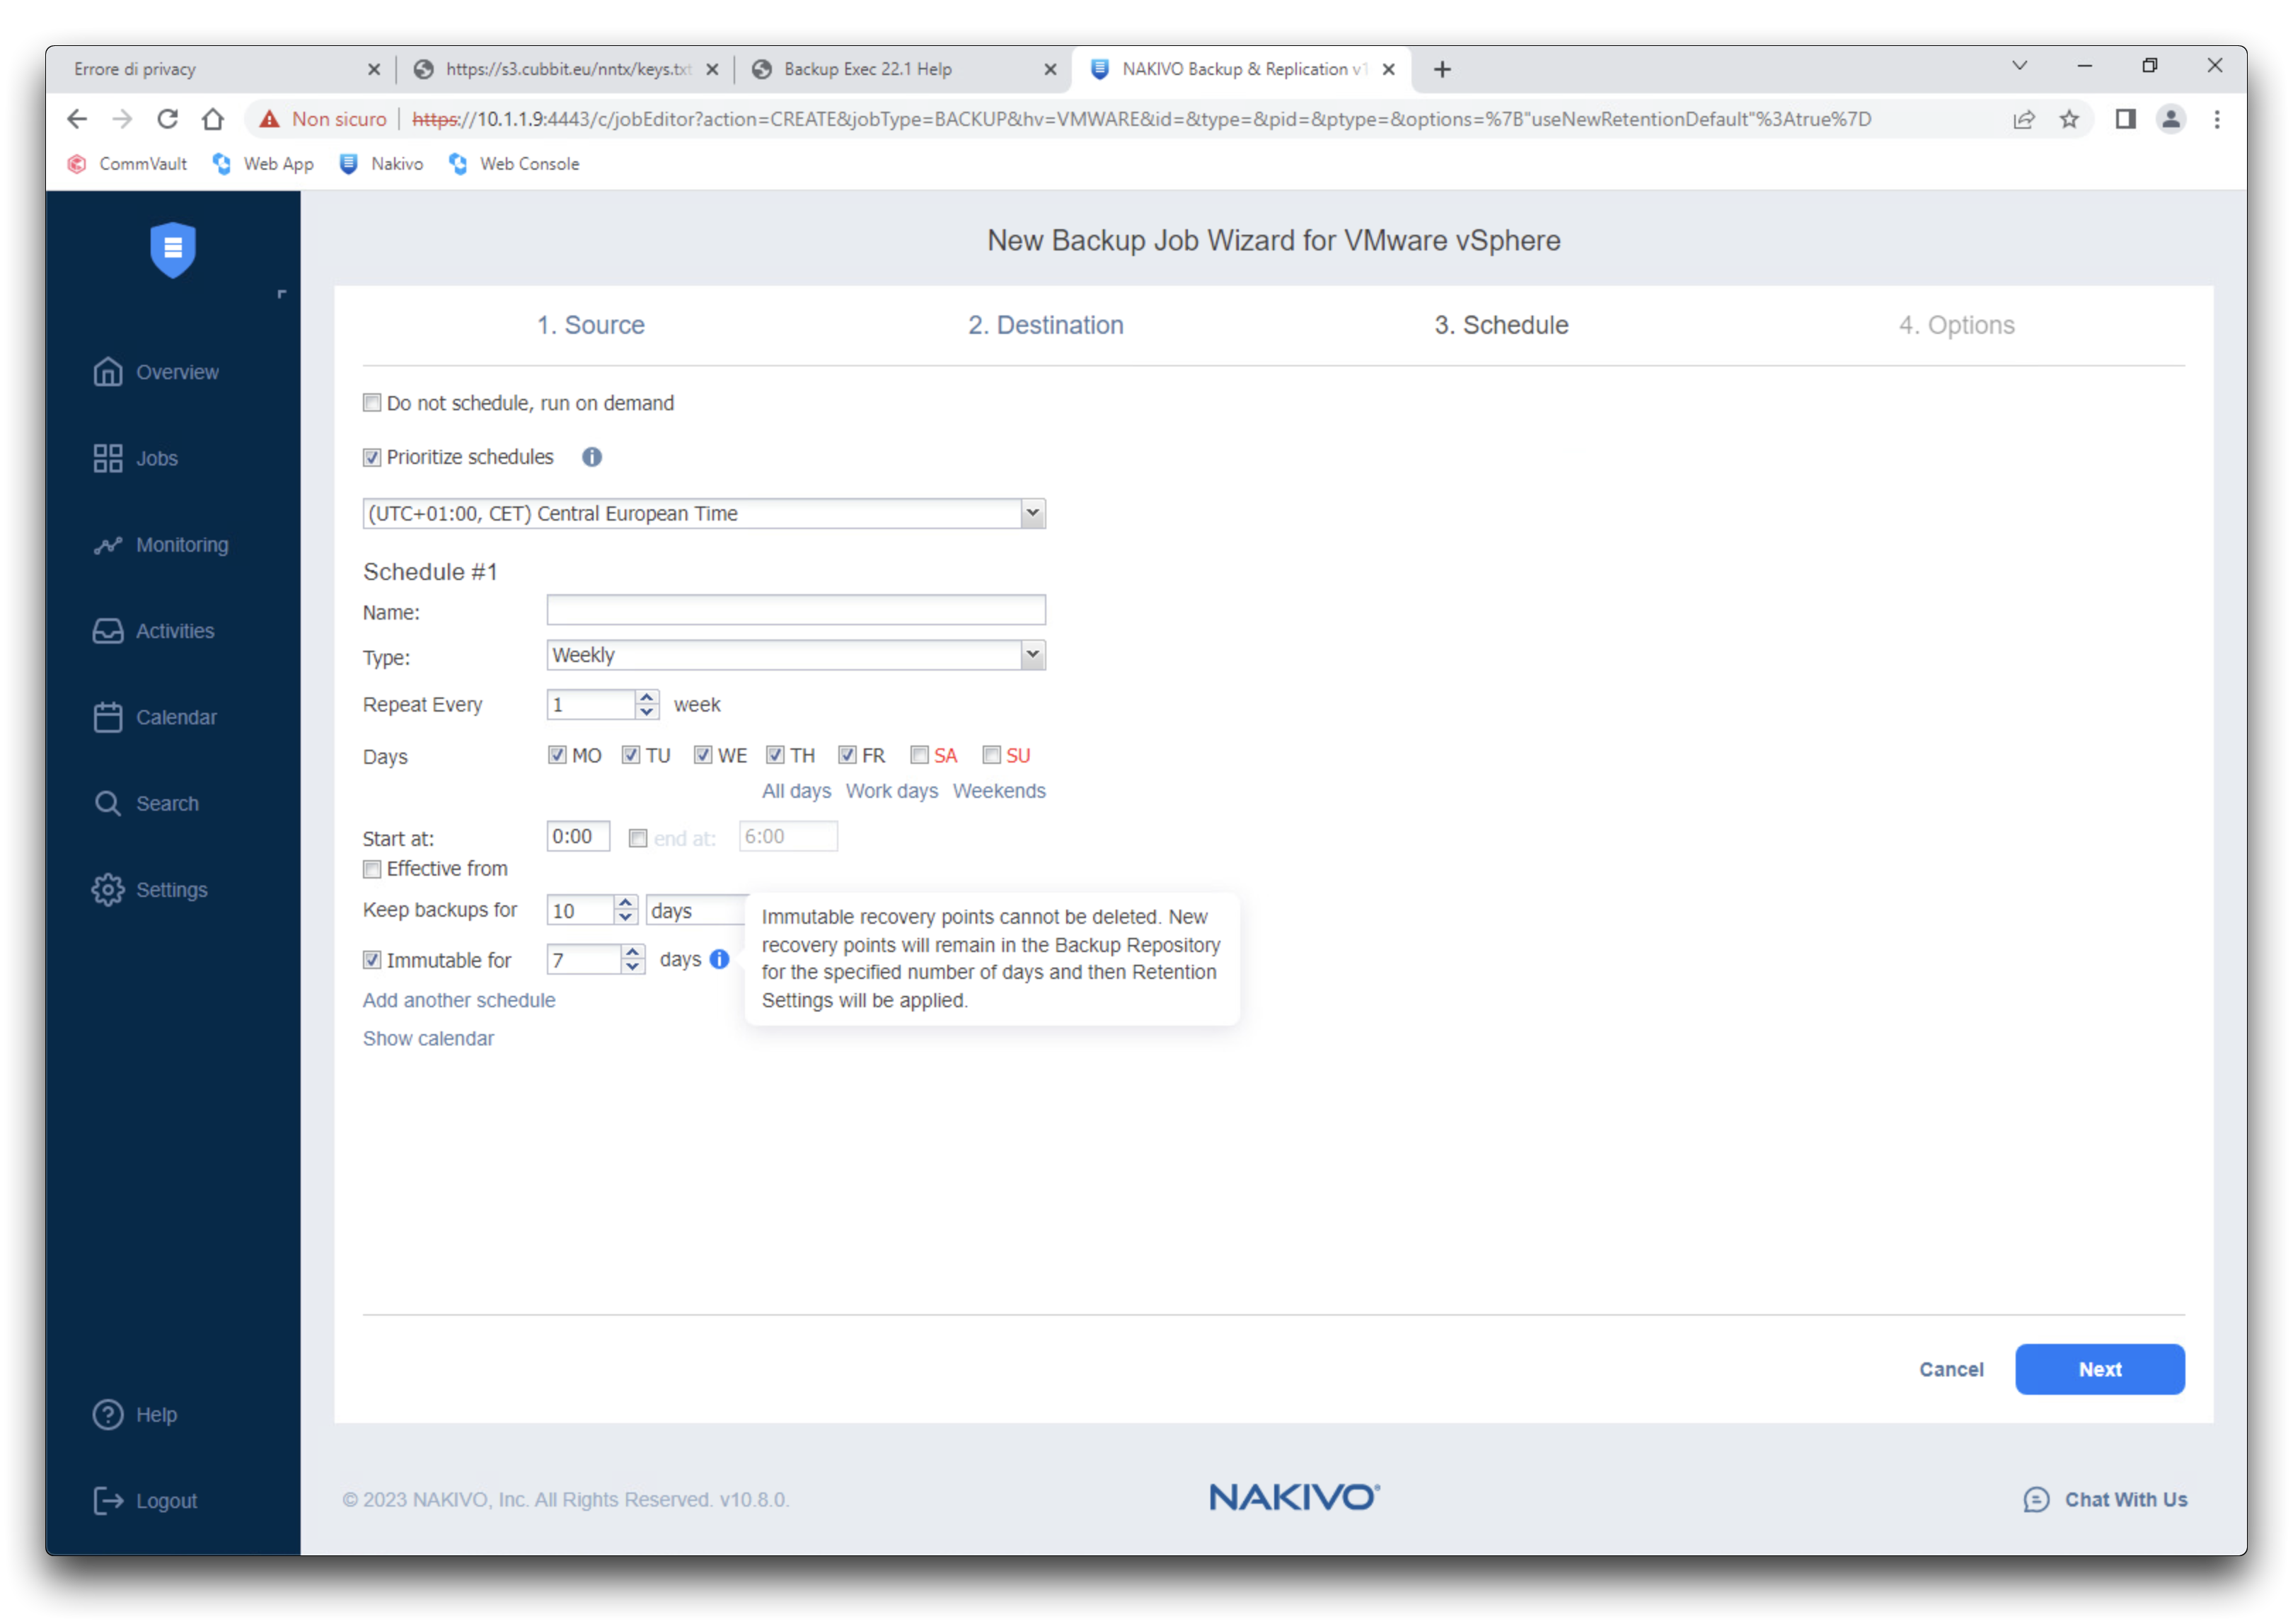
If the bucket in use has S3 Object Lock enabled, you also have to activate the option Immutable for X days in the Schedule tab.
How to
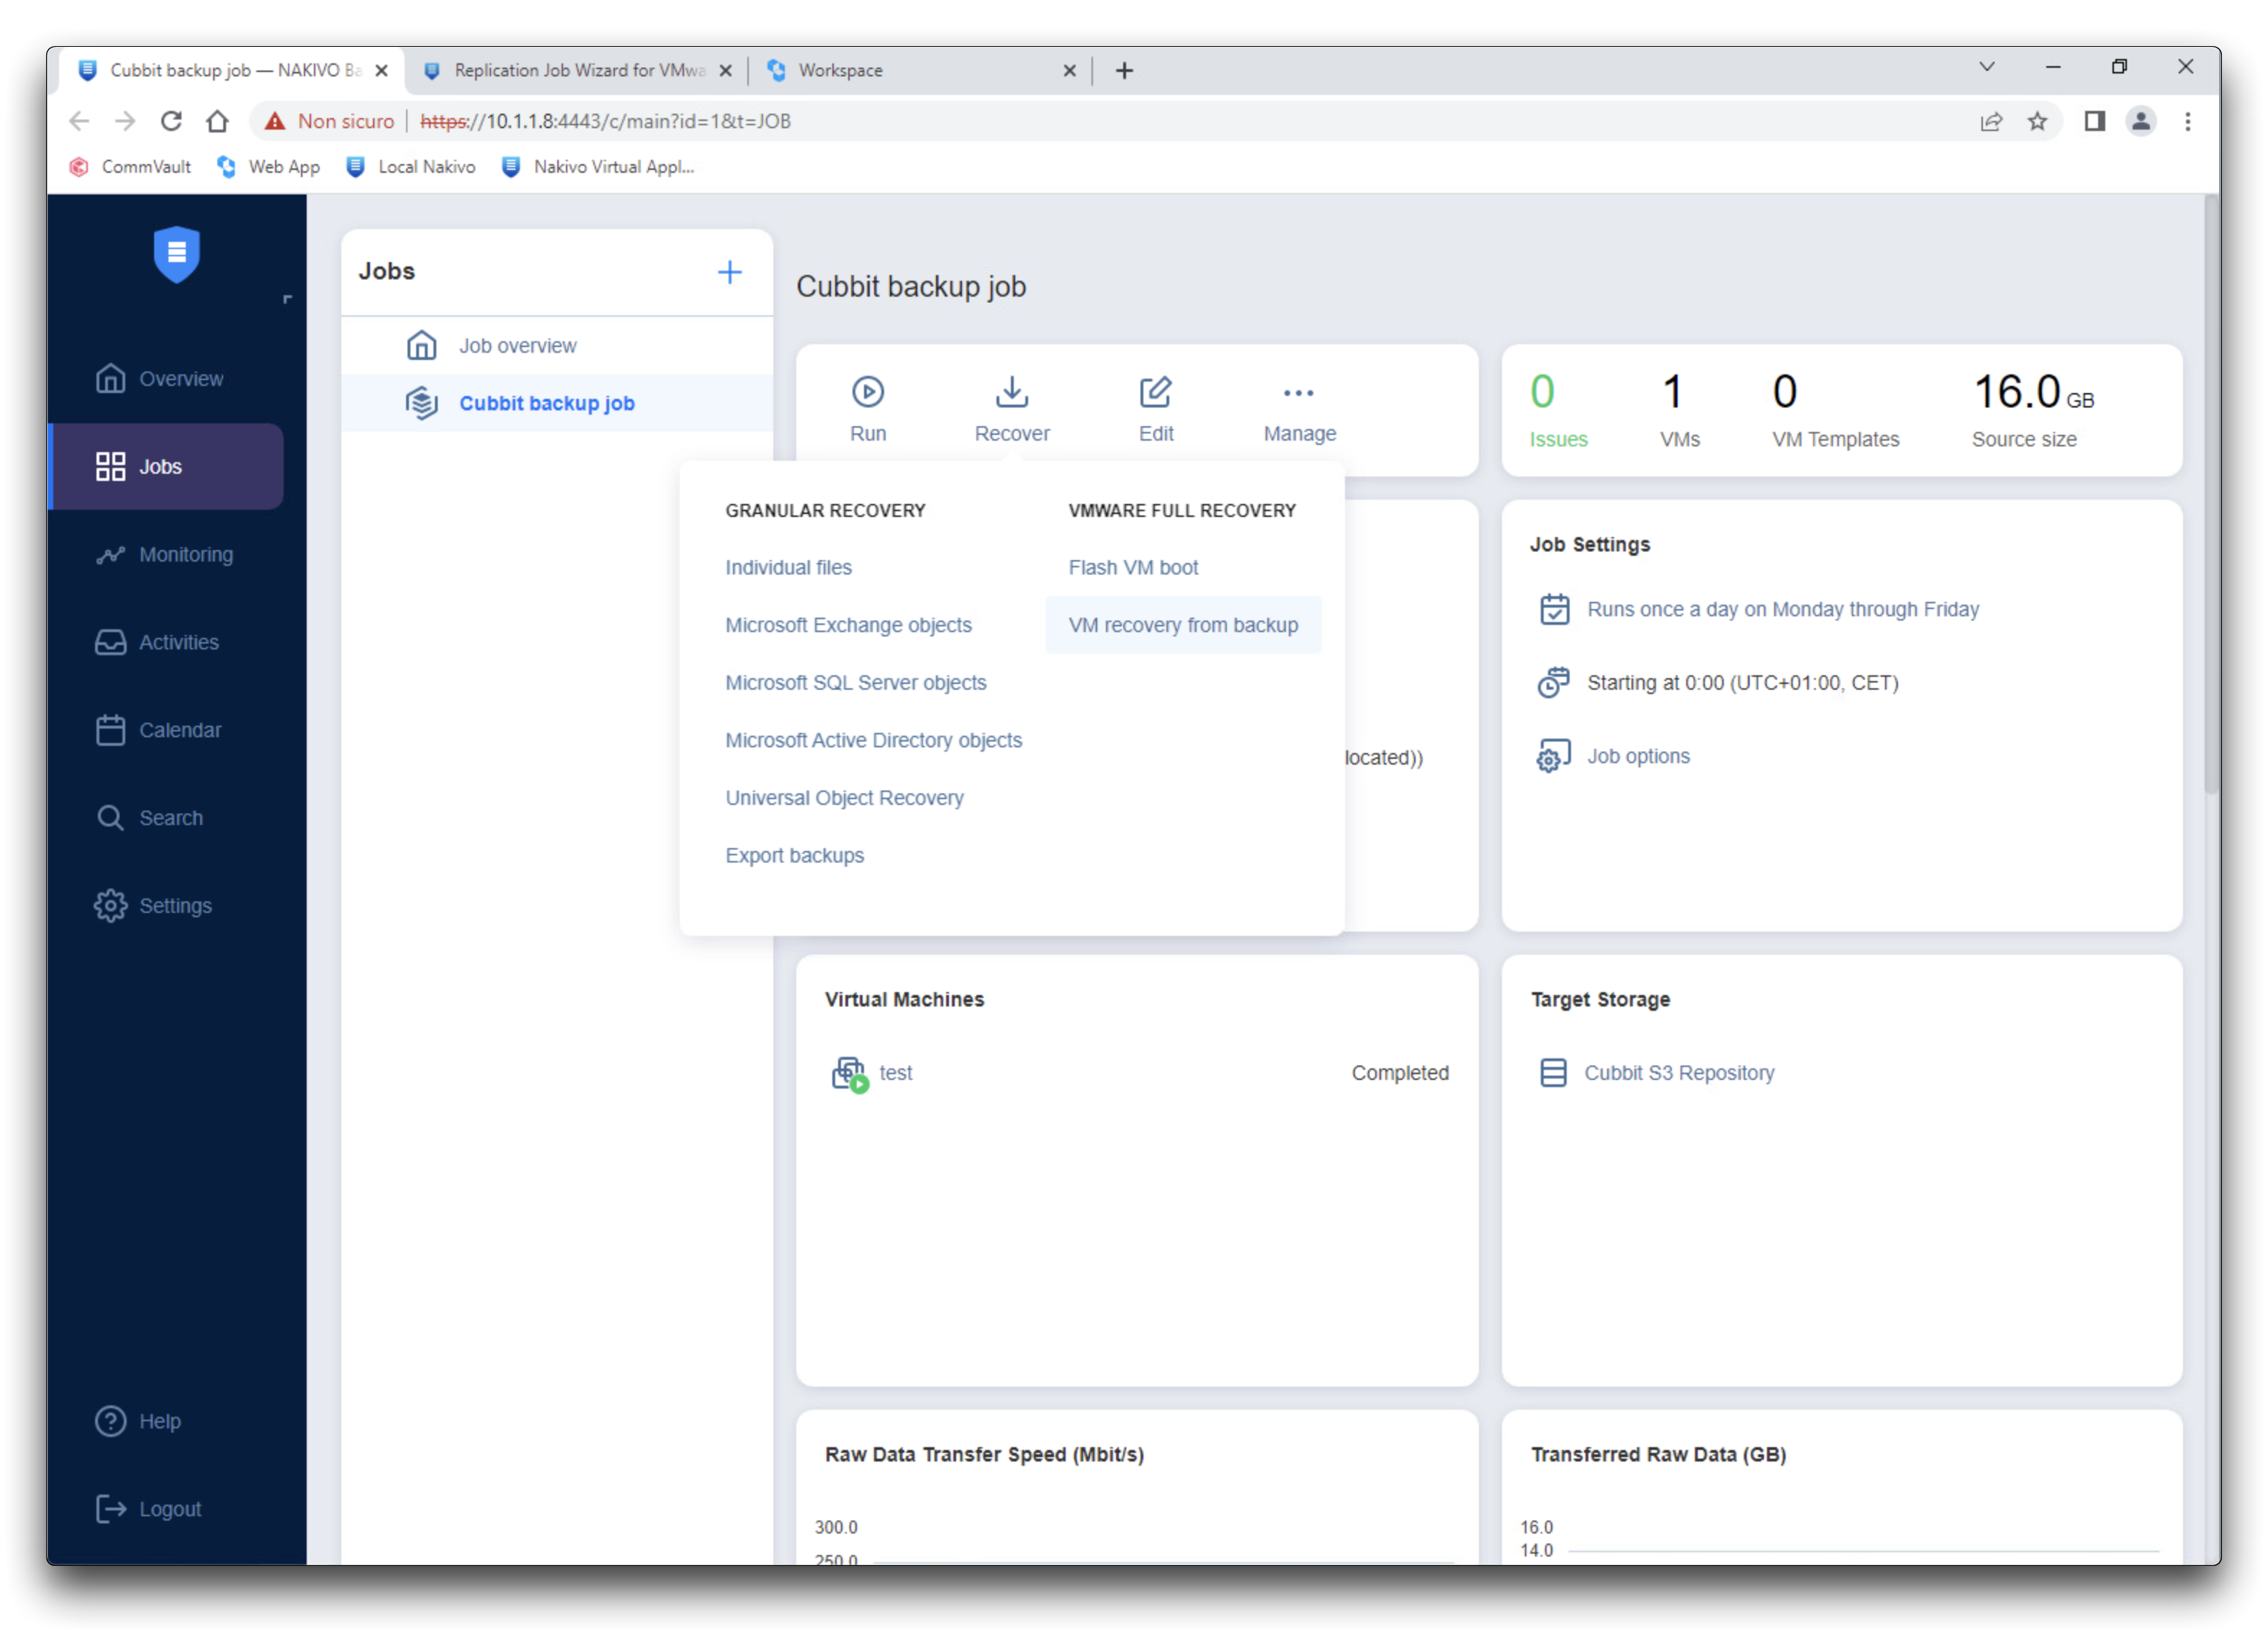
To start a backup manually, simply press the Run button, which is the round "play" button found inside the backup job.
Instead, to restore a previous backup, press the Restore button with the "download" icon and from the menu choose VM recovery from backup. In the first step select the VM along with the restore point, then click Next to continue with the preferred Destination and Options configuration.
For more information on using Nakivo products please visit the official documentation page.