Synology Hyper Backup
Intro
Hyper Backup is a backup solution for Synology NAS devices that allows users to create backup tasks for their data. This feature supports multiple backup destinations, including local shared folders, external hard drives, and various cloud storage services. Hyper Backup provides an easy and secure way for users to protect their data from accidental deletion or hardware failure.
Prerequisites
First, you need to get your access key and secret key, from the Cubbit Web Console or https://console.[your-tenant].cubbit.eu. Please follow these instructions on how to get started with a Cubbit account and generate these keys.
Then make sure to have admin privileges on Synology.
Installation
To install Synology Hyper Backup you can proceed directly from the Synology Package Center.
Configuration
Open Hyper Backup, click on the plus button and choose Folders and Packages:
- Select S3 Storage as Cloud Service and click Next
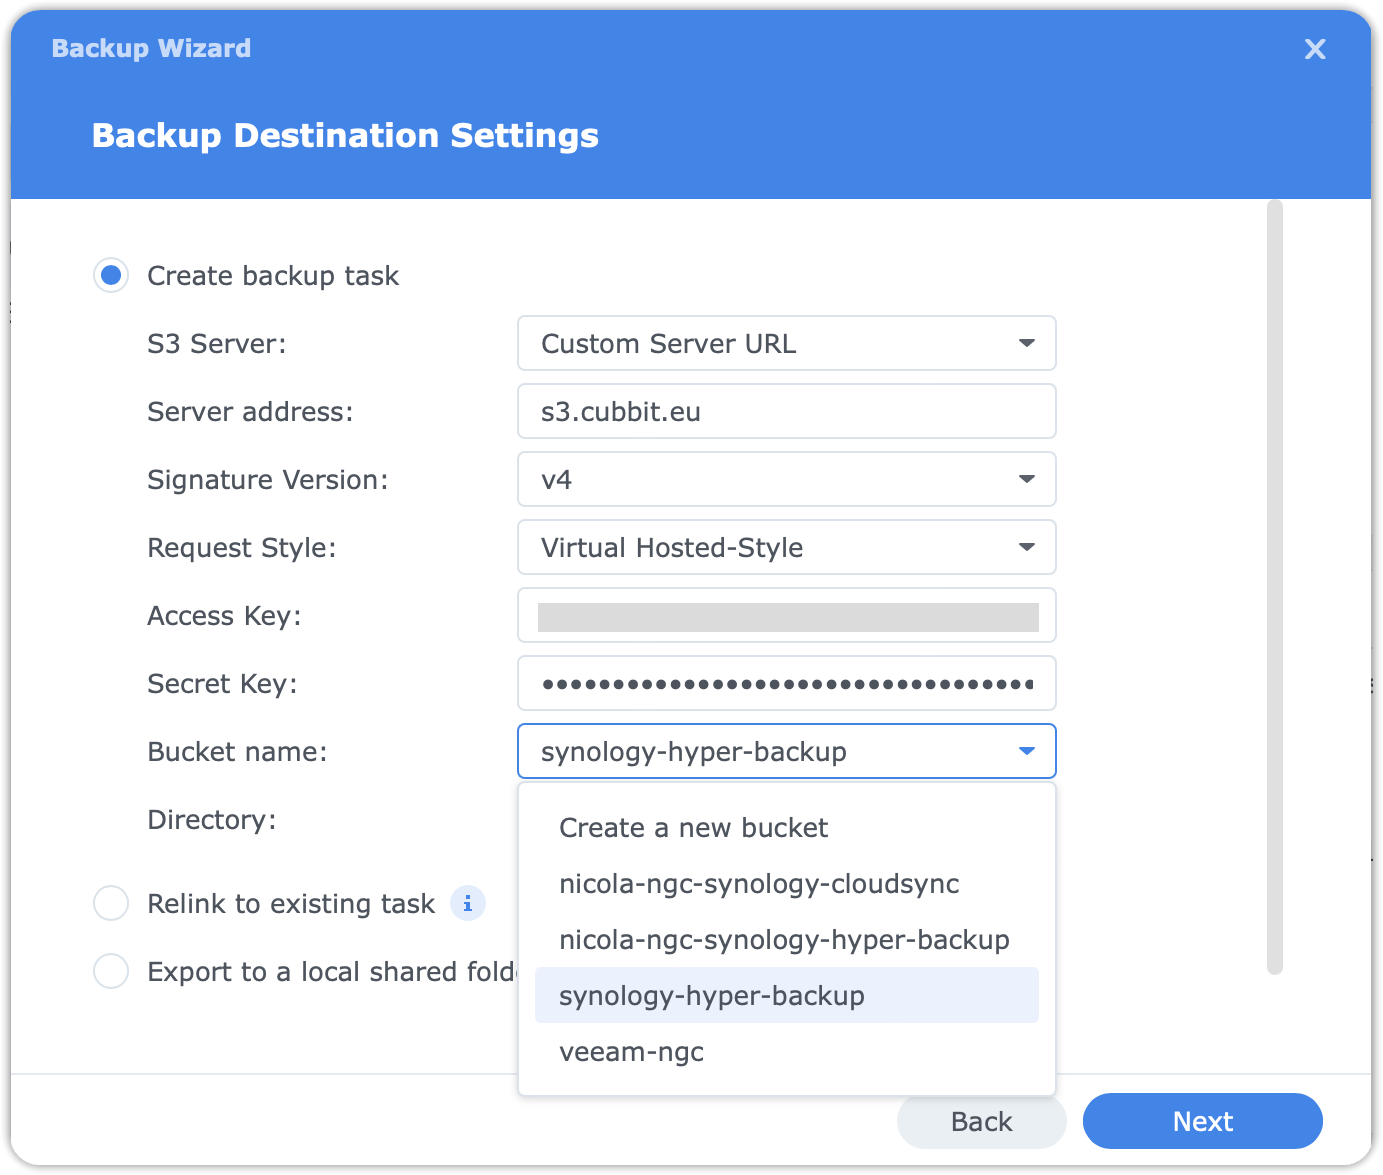
- In the S3 Server dropdown choose
Custom Server URL - In the Server address field type
s3.cubbit.euor if you have a custom tenants3.[your-tenant].cubbit.eu(the signature can be either V2 or V4) - Copy the access key and secret key in the respective fields
- Use an existing bucket or create a new one
- Click next to select the folders to backup
- Click next again to select the applications to back up.
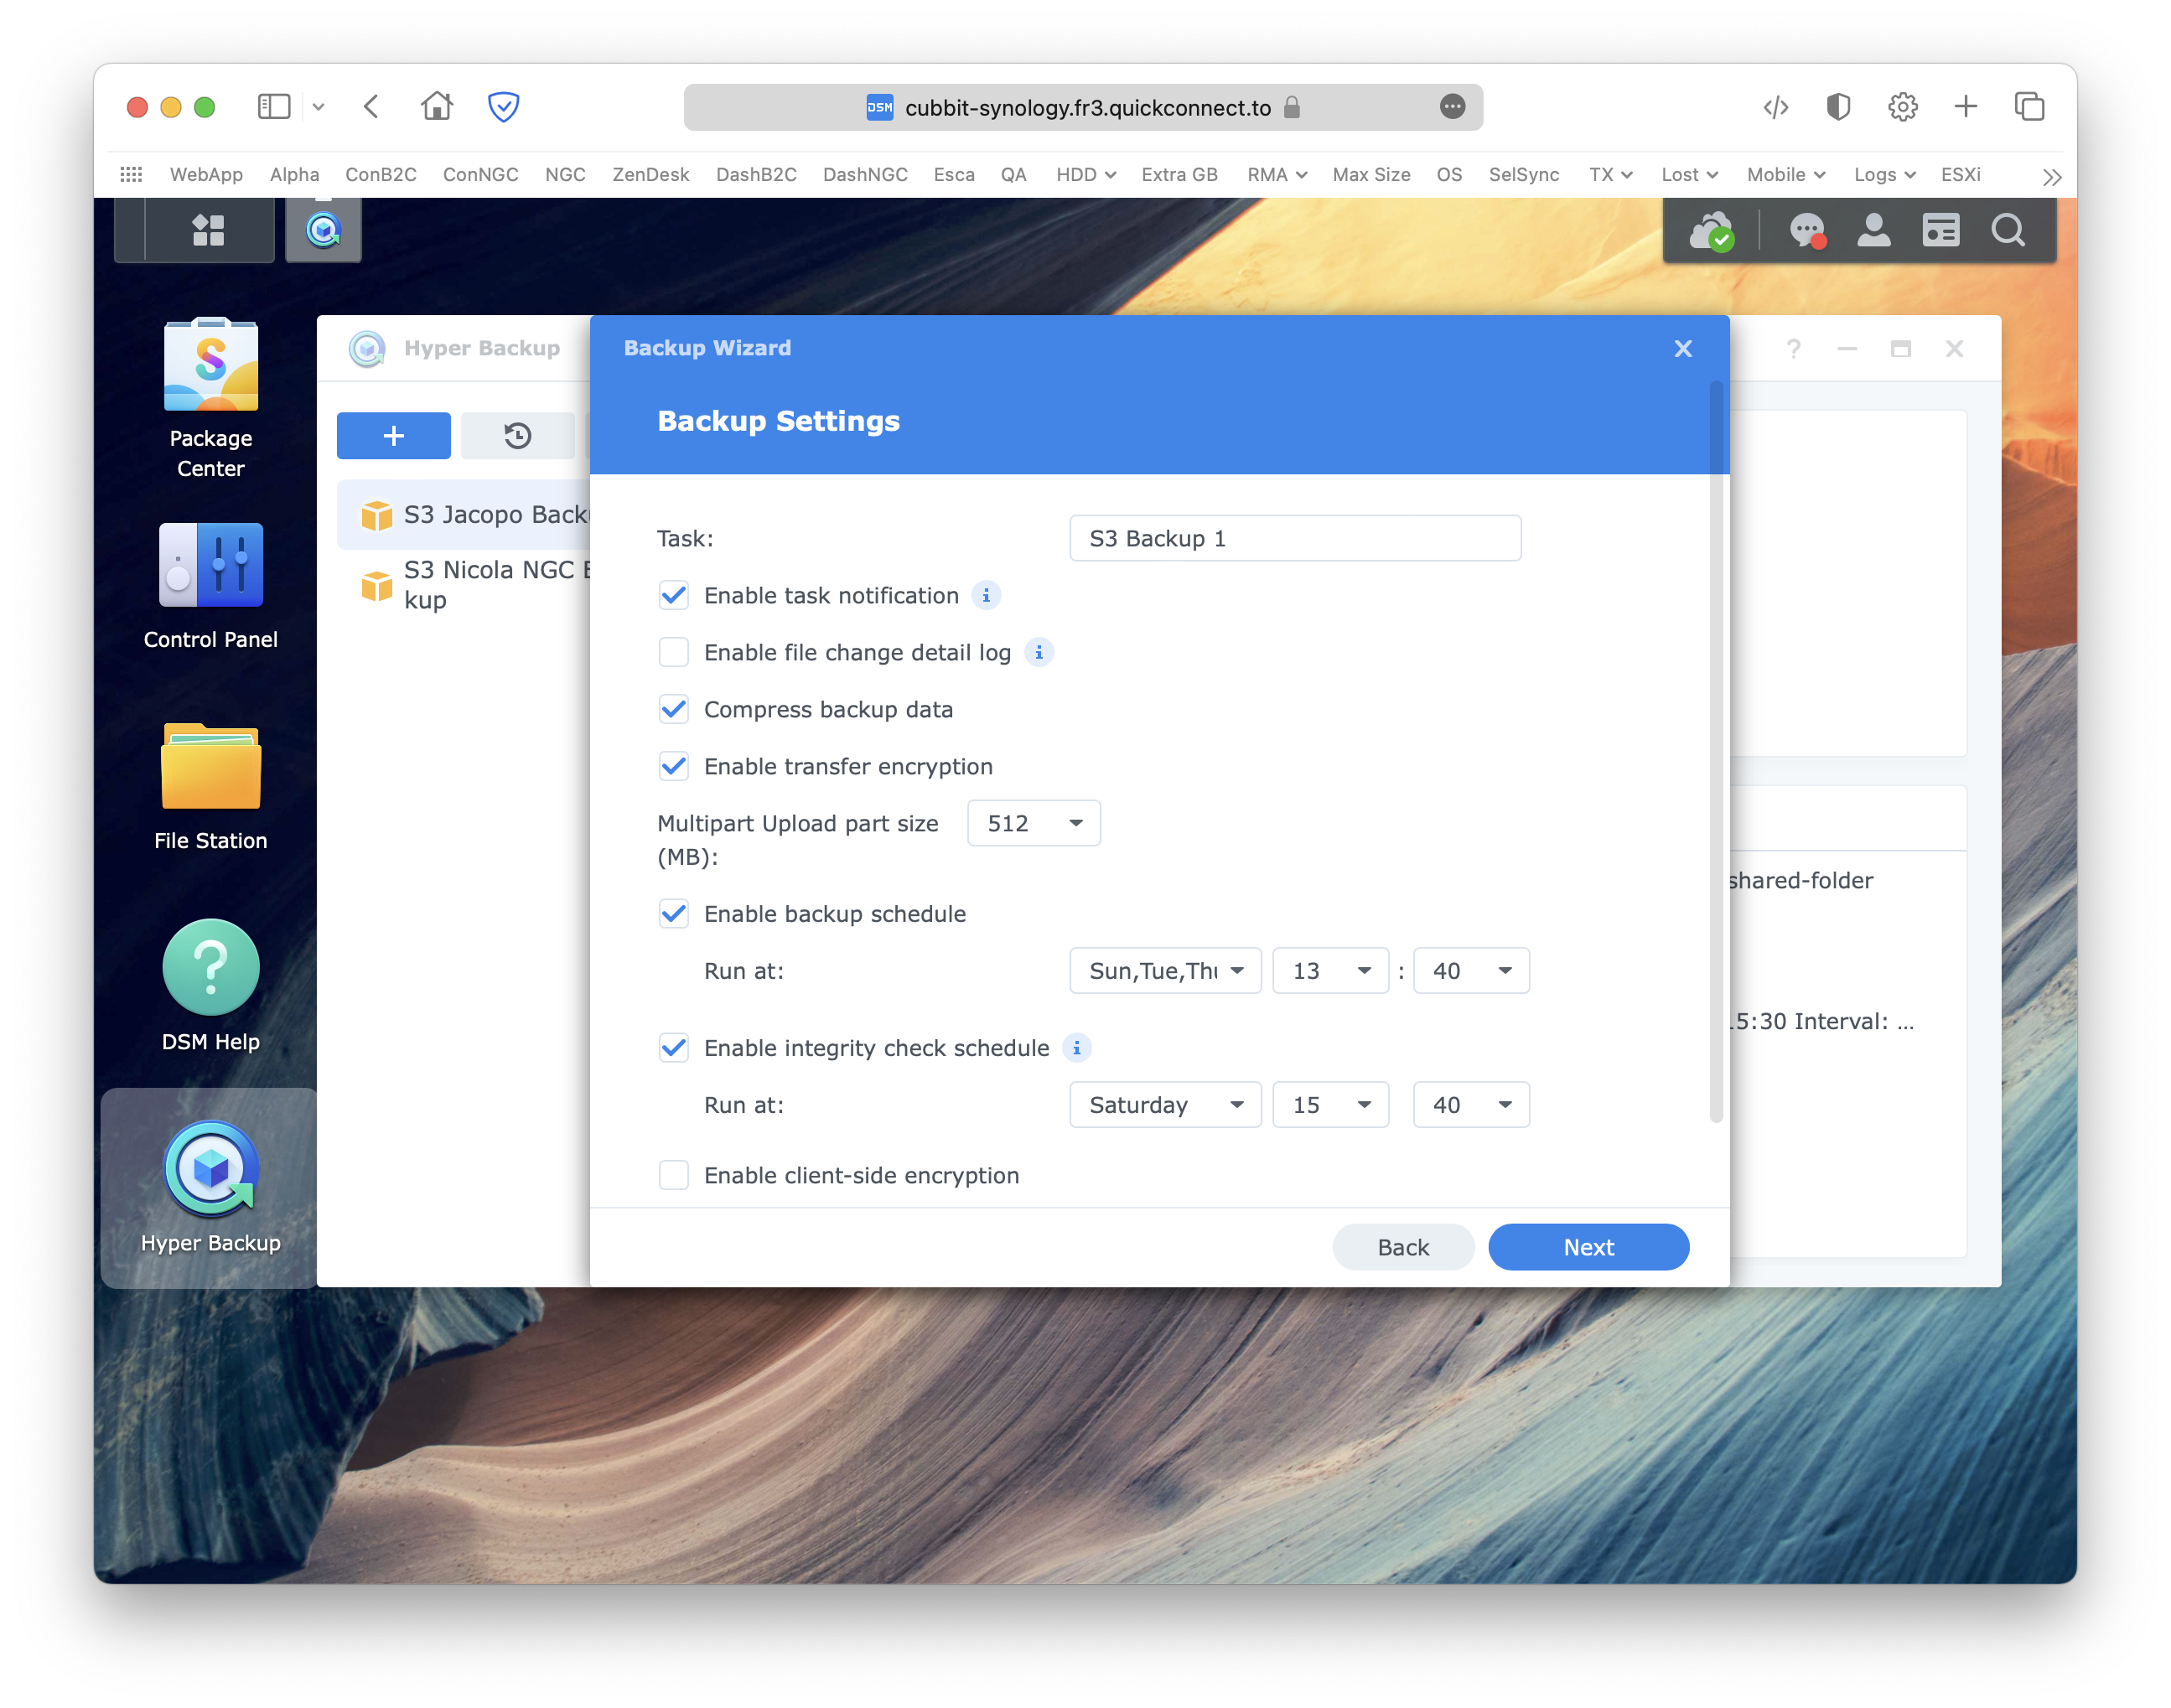
In the next window, it's possible to set up the Backup Settings like the backup task name, schedule, encryption and multipart size.
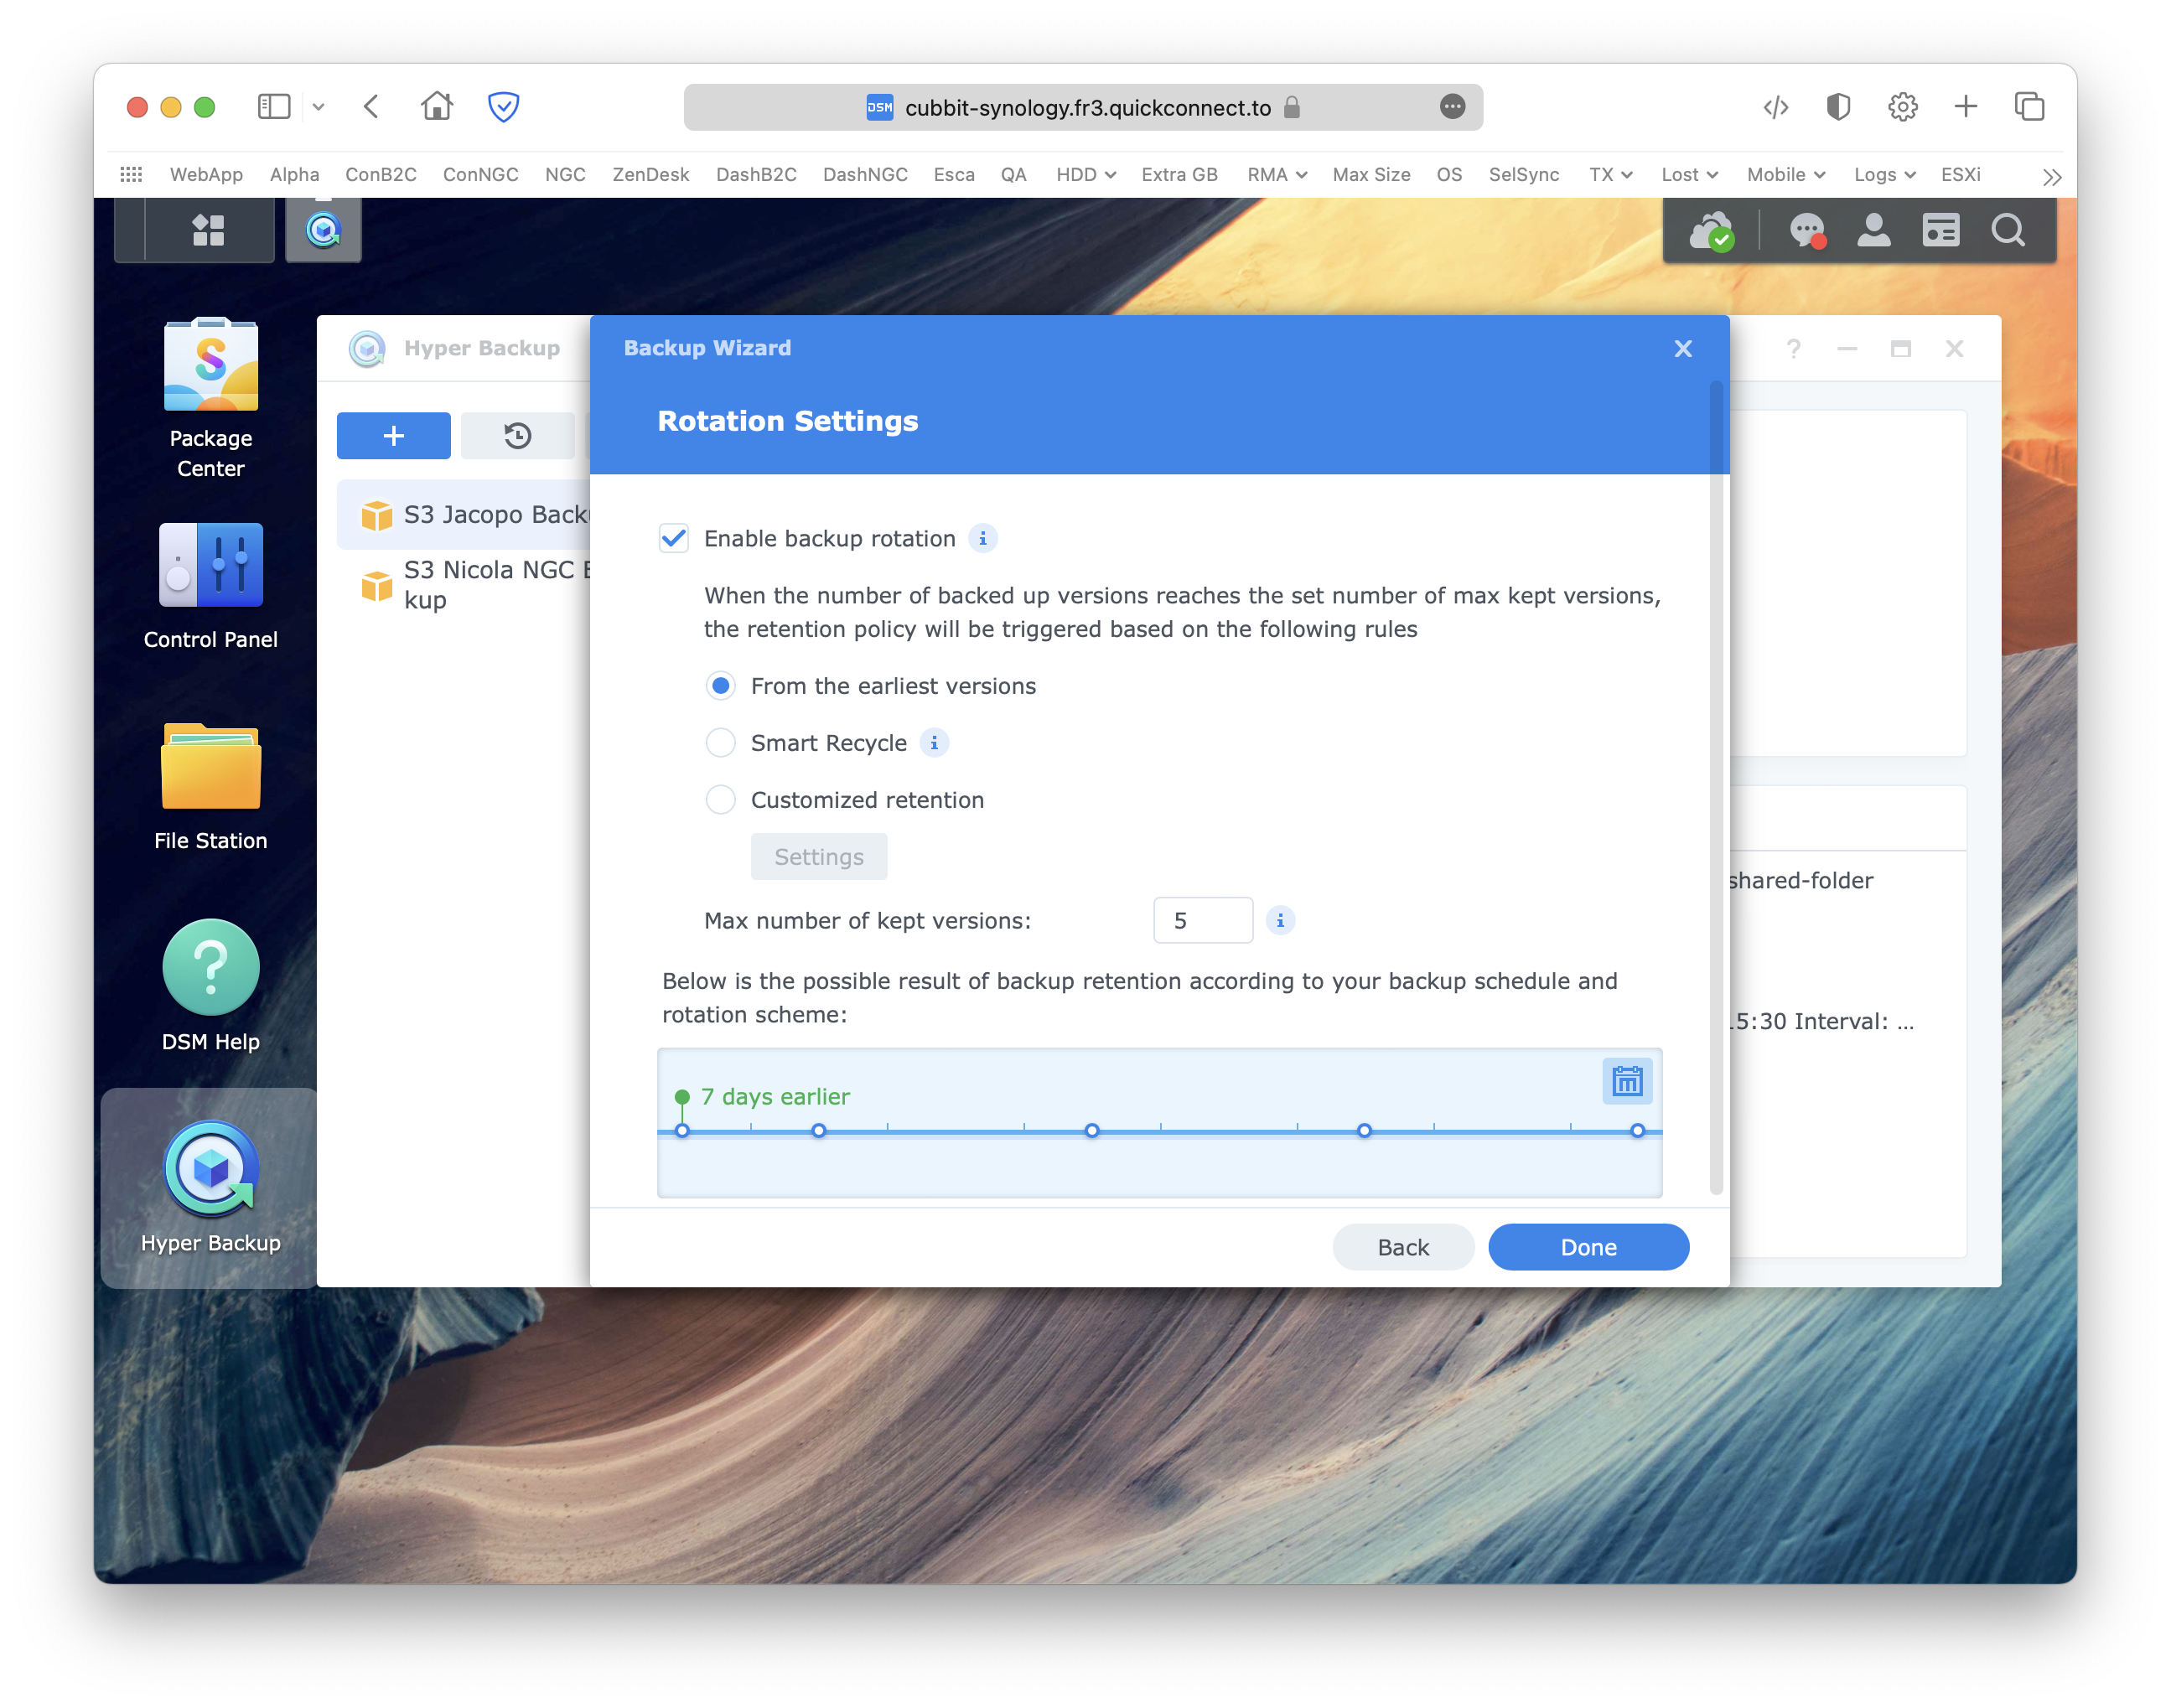
And finally, on the last settings page, it's possible to enable and edit the backup rotation.
How to
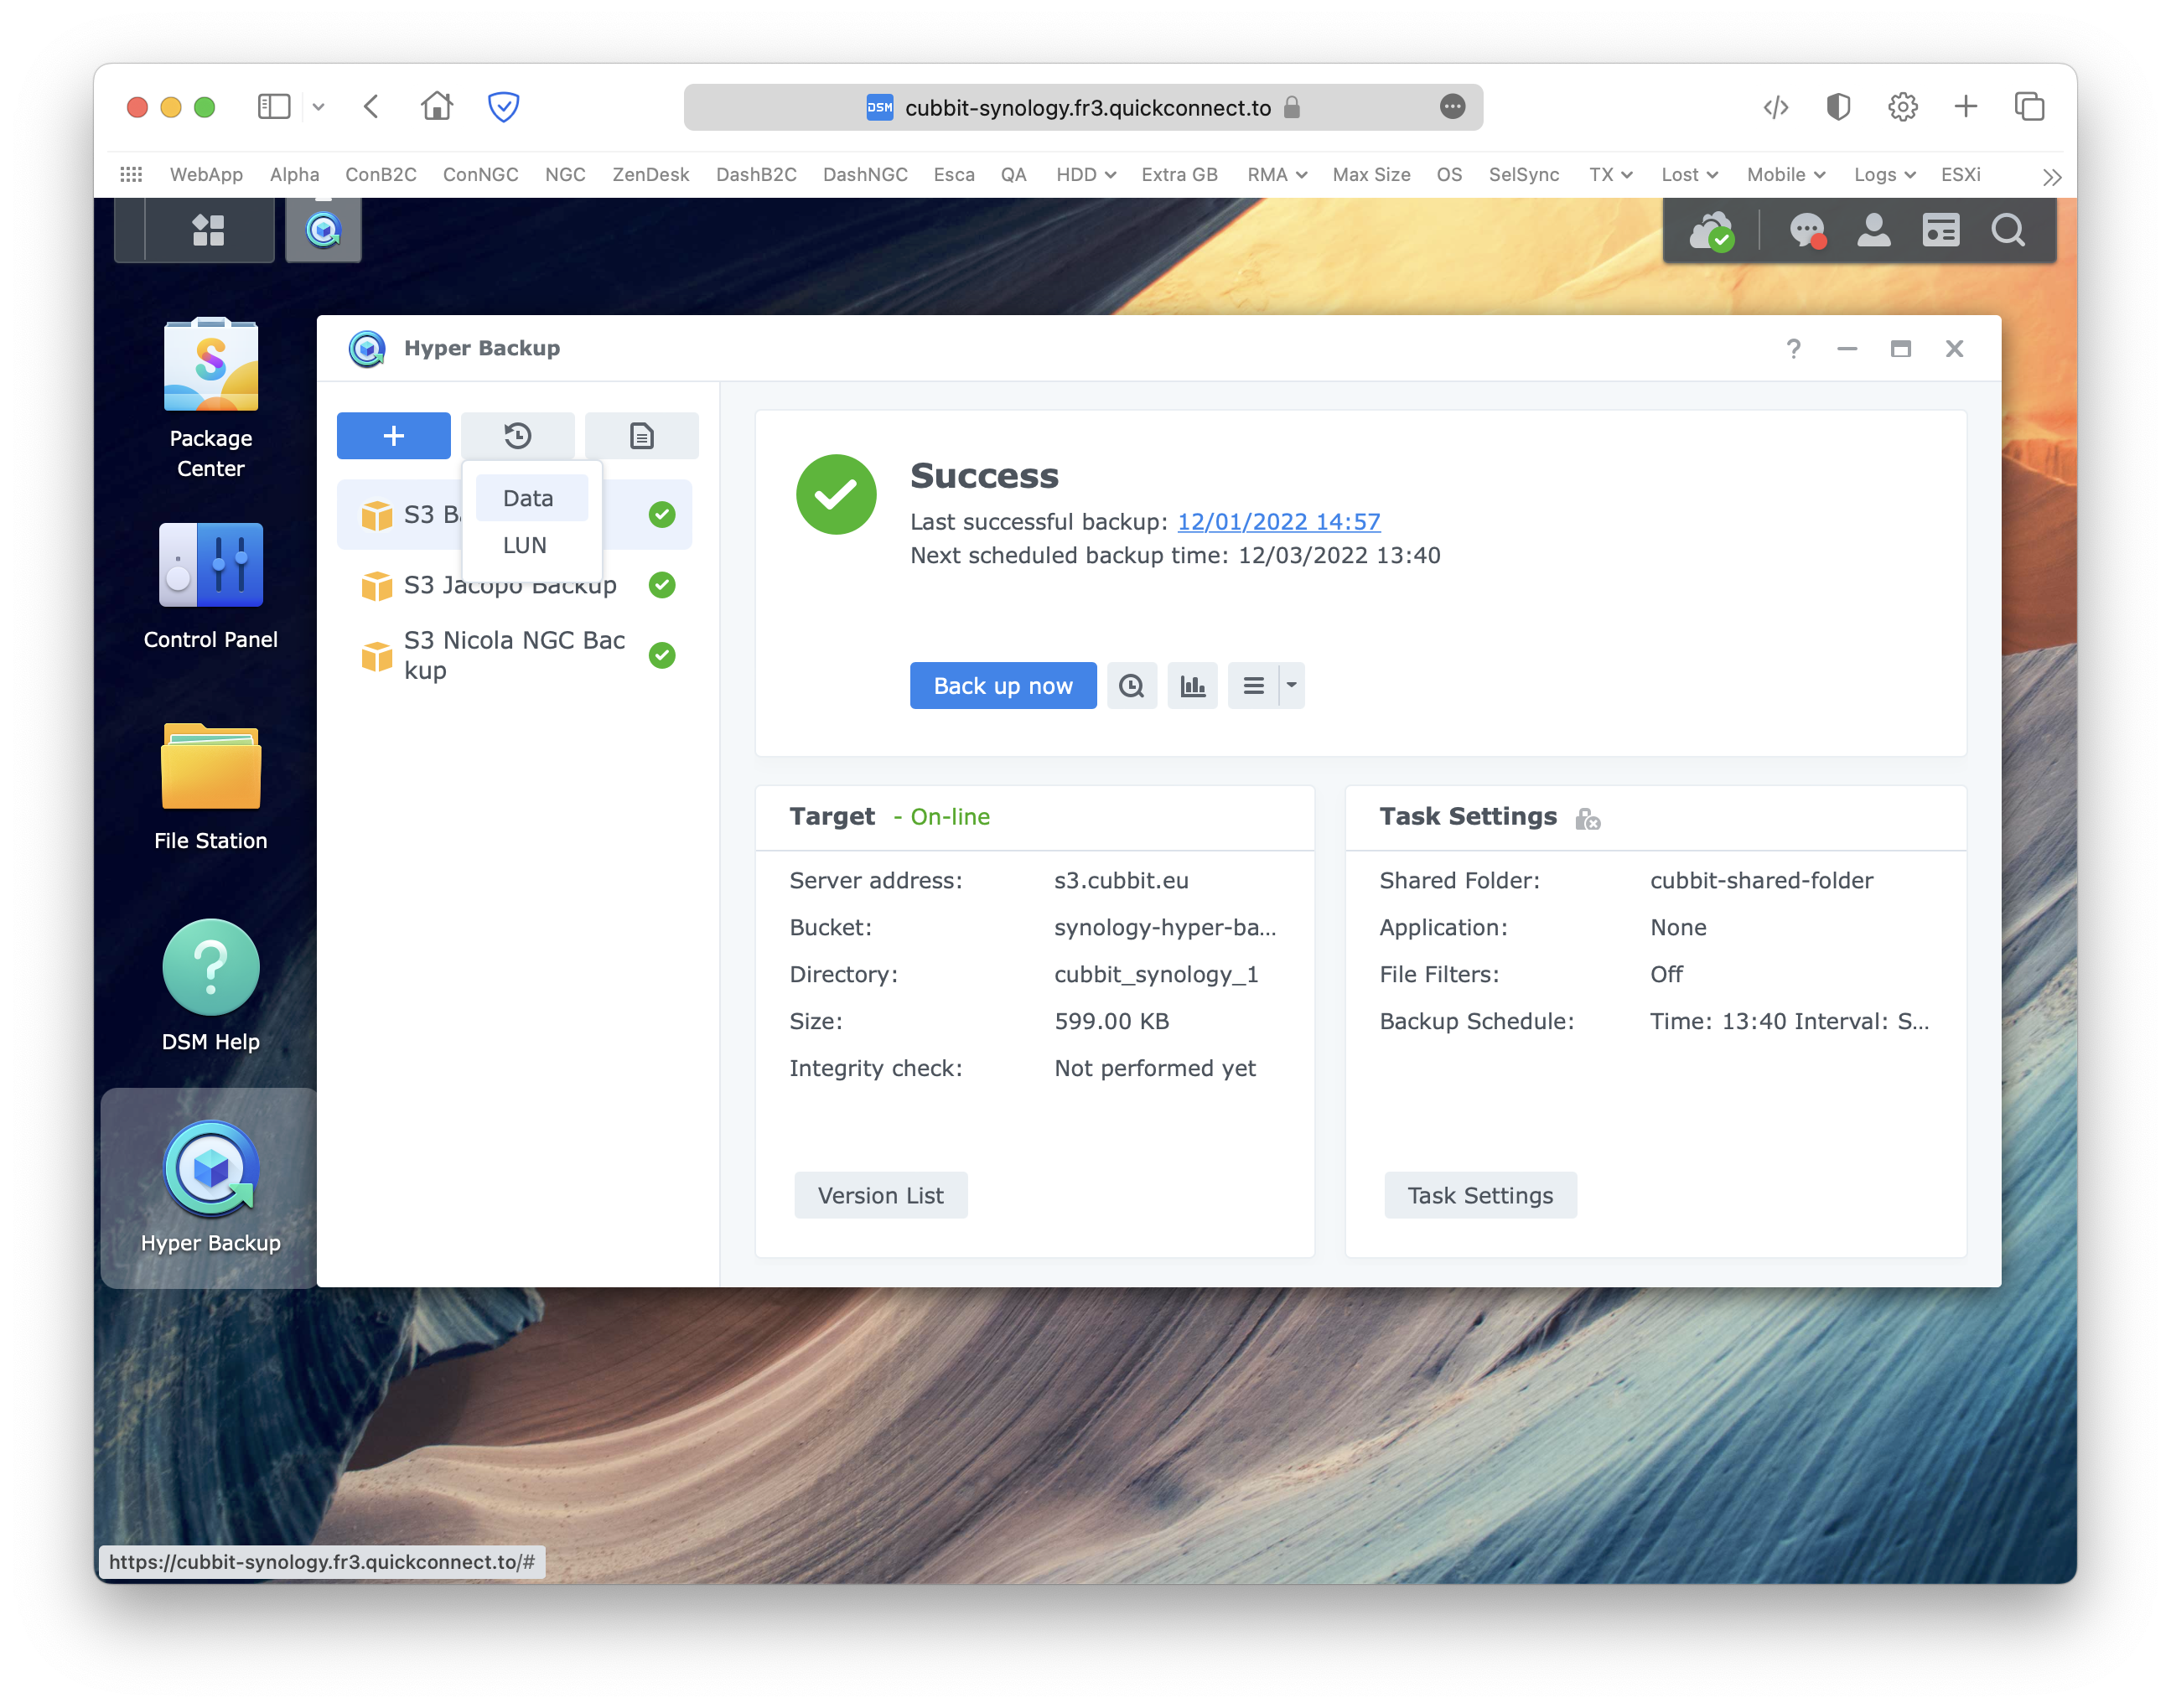
Once you configured Synology Hyper Backup, you can start a new backup by clicking the Backup now button, while to restore, you have to click on the Restore button next to the blue plus button, choose Data and select the backup to recover from the list.
For additional information about Synology Hyper Backup please visit the official documentation page.