Quickstart
Account setup
To setup your account, follow these steps:
-
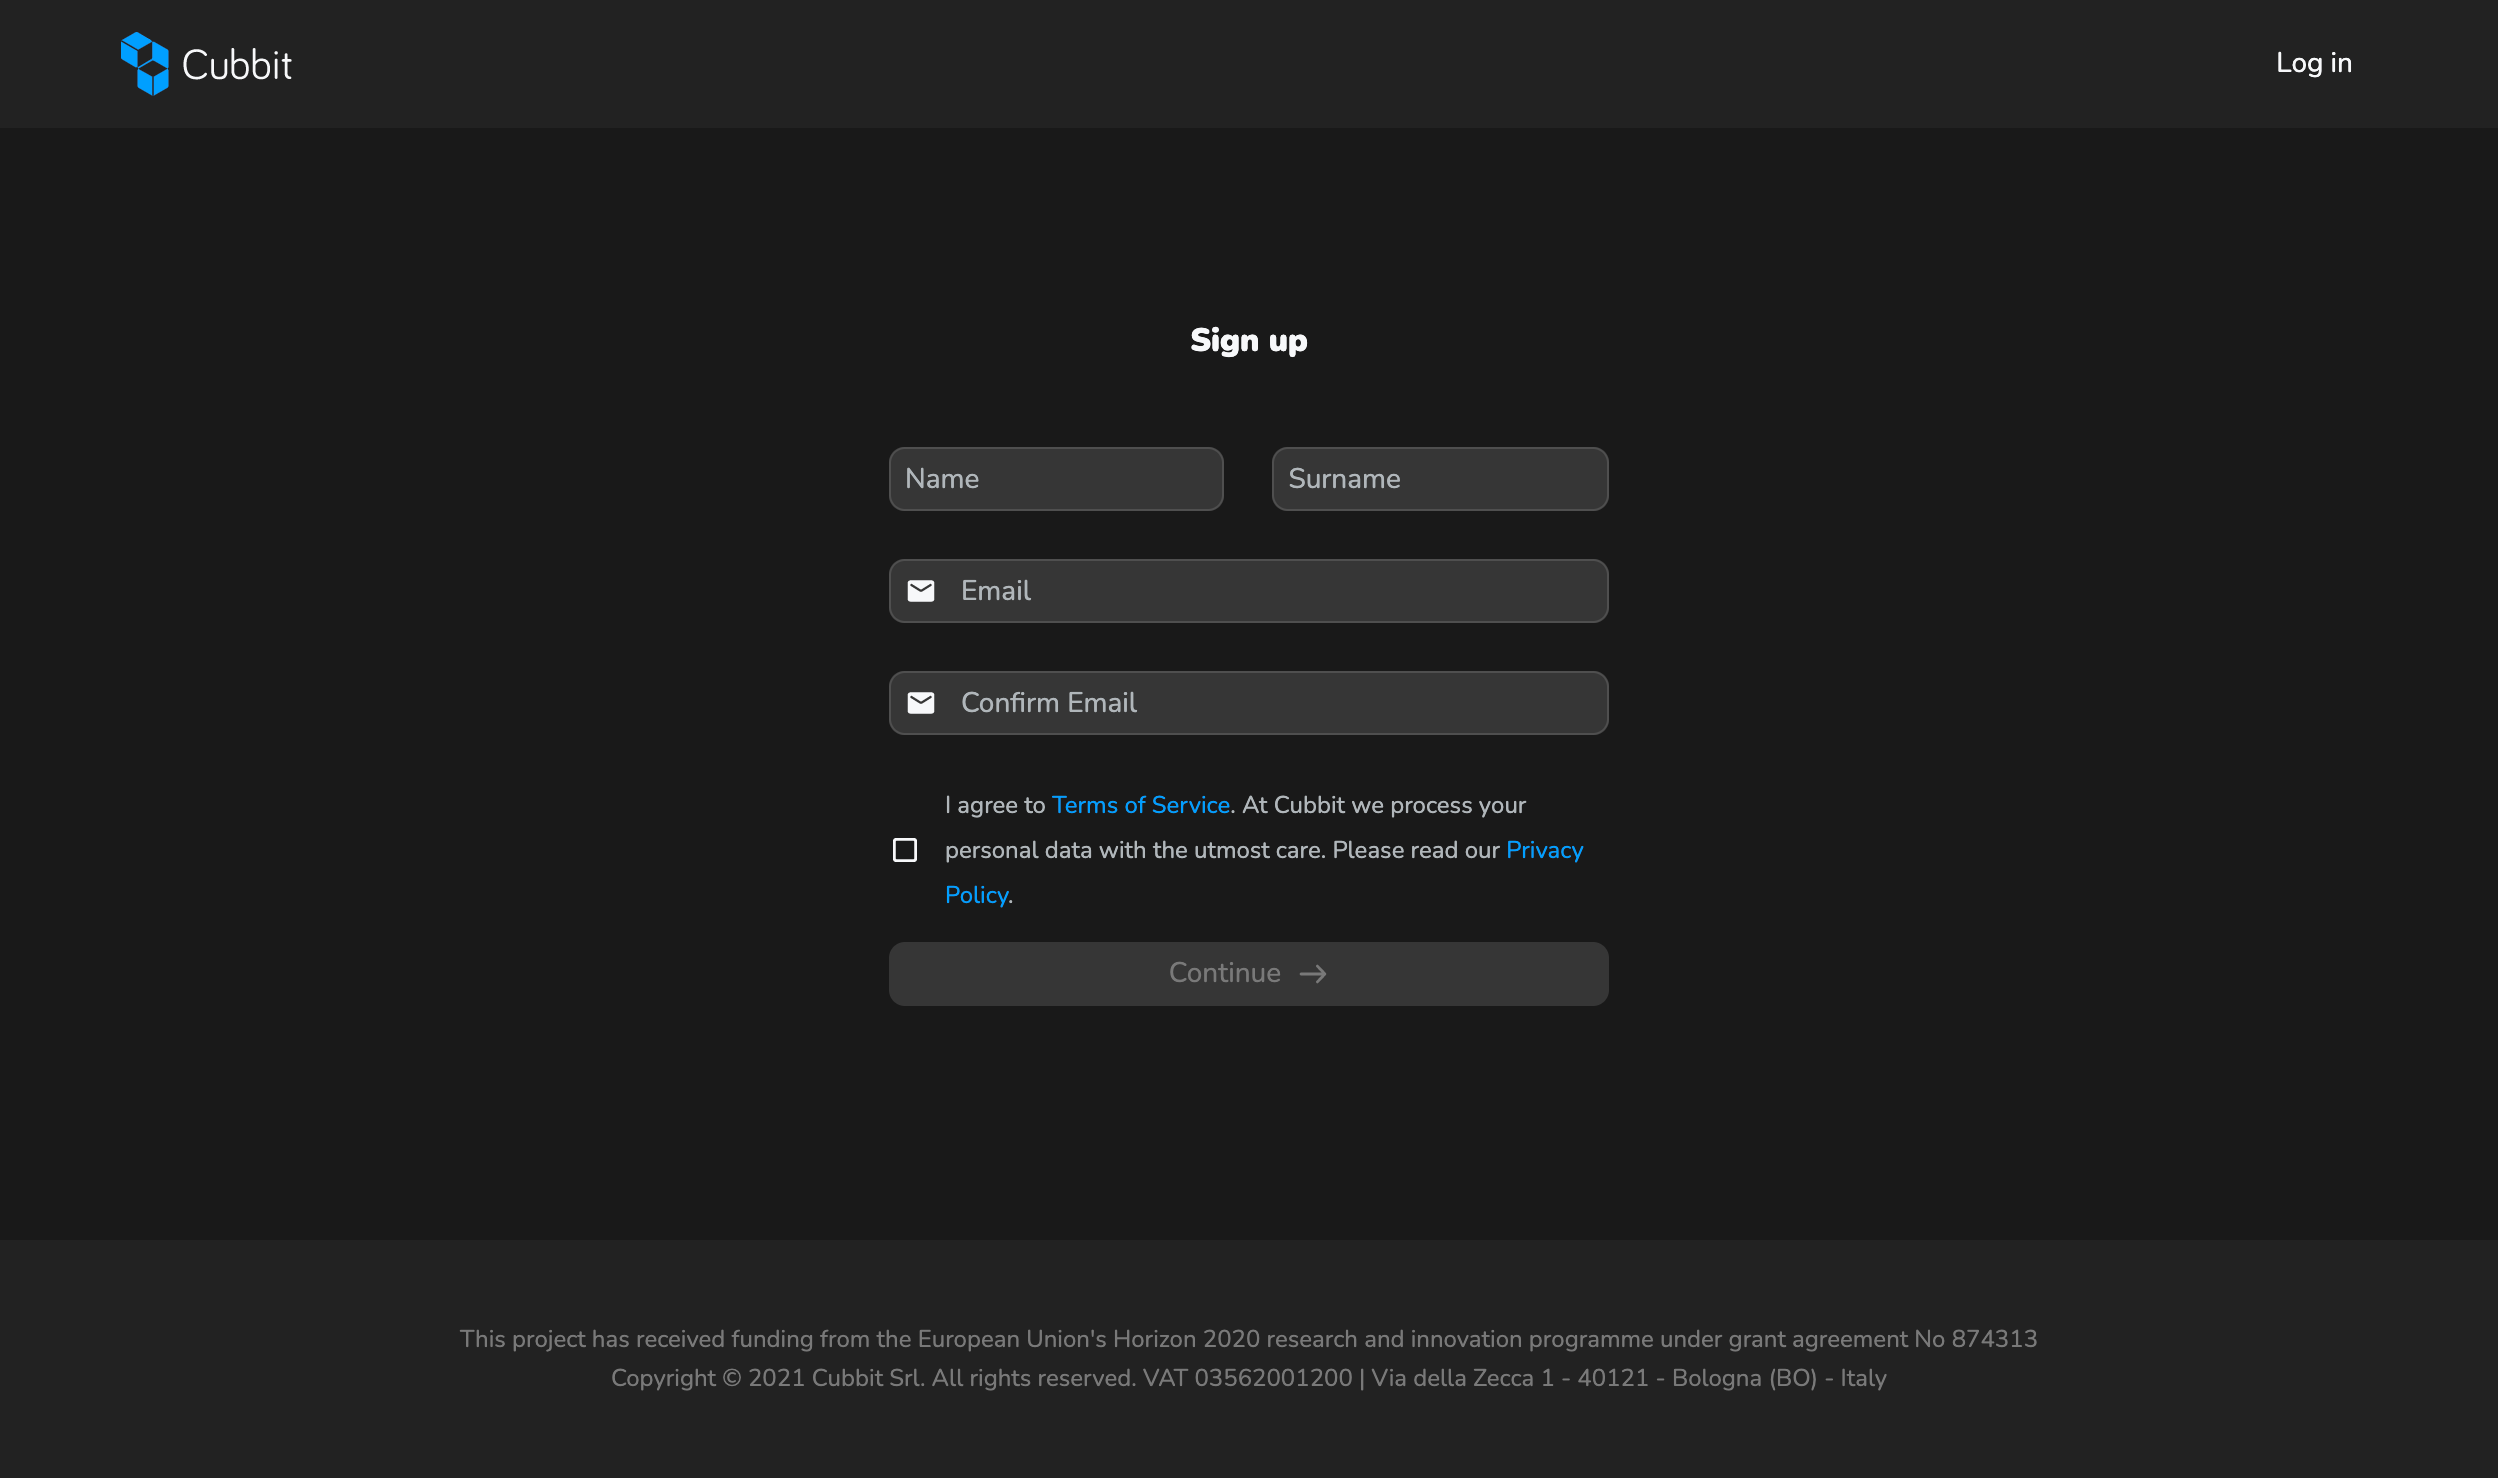
Access the Cubbit web console shown in the image below.
-
Fill in the form with your account information.
-
Agree to Cubbit's Terms of Service and Cubbit's Privacy Policy.
-
Enter a secure password for your Cubbit account.
-
Check your inbox and confirm your email by clicking the link you received via email.
If you already have an account, go to console.cubbit.eu/signin and create your first project.
Create a project
Projects are in Cubbit the main entities associated with buckets and objects. To access the service, users must create a minimum of one project, since a basic account lacks the required permissions.
Every account can create multiple projects and each of them will receive free space in the network.
Multiple accounts can join the same project and collaborate on the resources associated with it. The user that creates the project is considered the owner of it and will be named the root user of the project. He will always be able to perform any action over the project's resources.
Root users can collaborate over specific resources not owned by them if they have been granted access to the resource via ACL (Access Control List).
Every account that has joined the project, even if is not the root user, can access the project's resources and all the resources to which the root user has granted access.
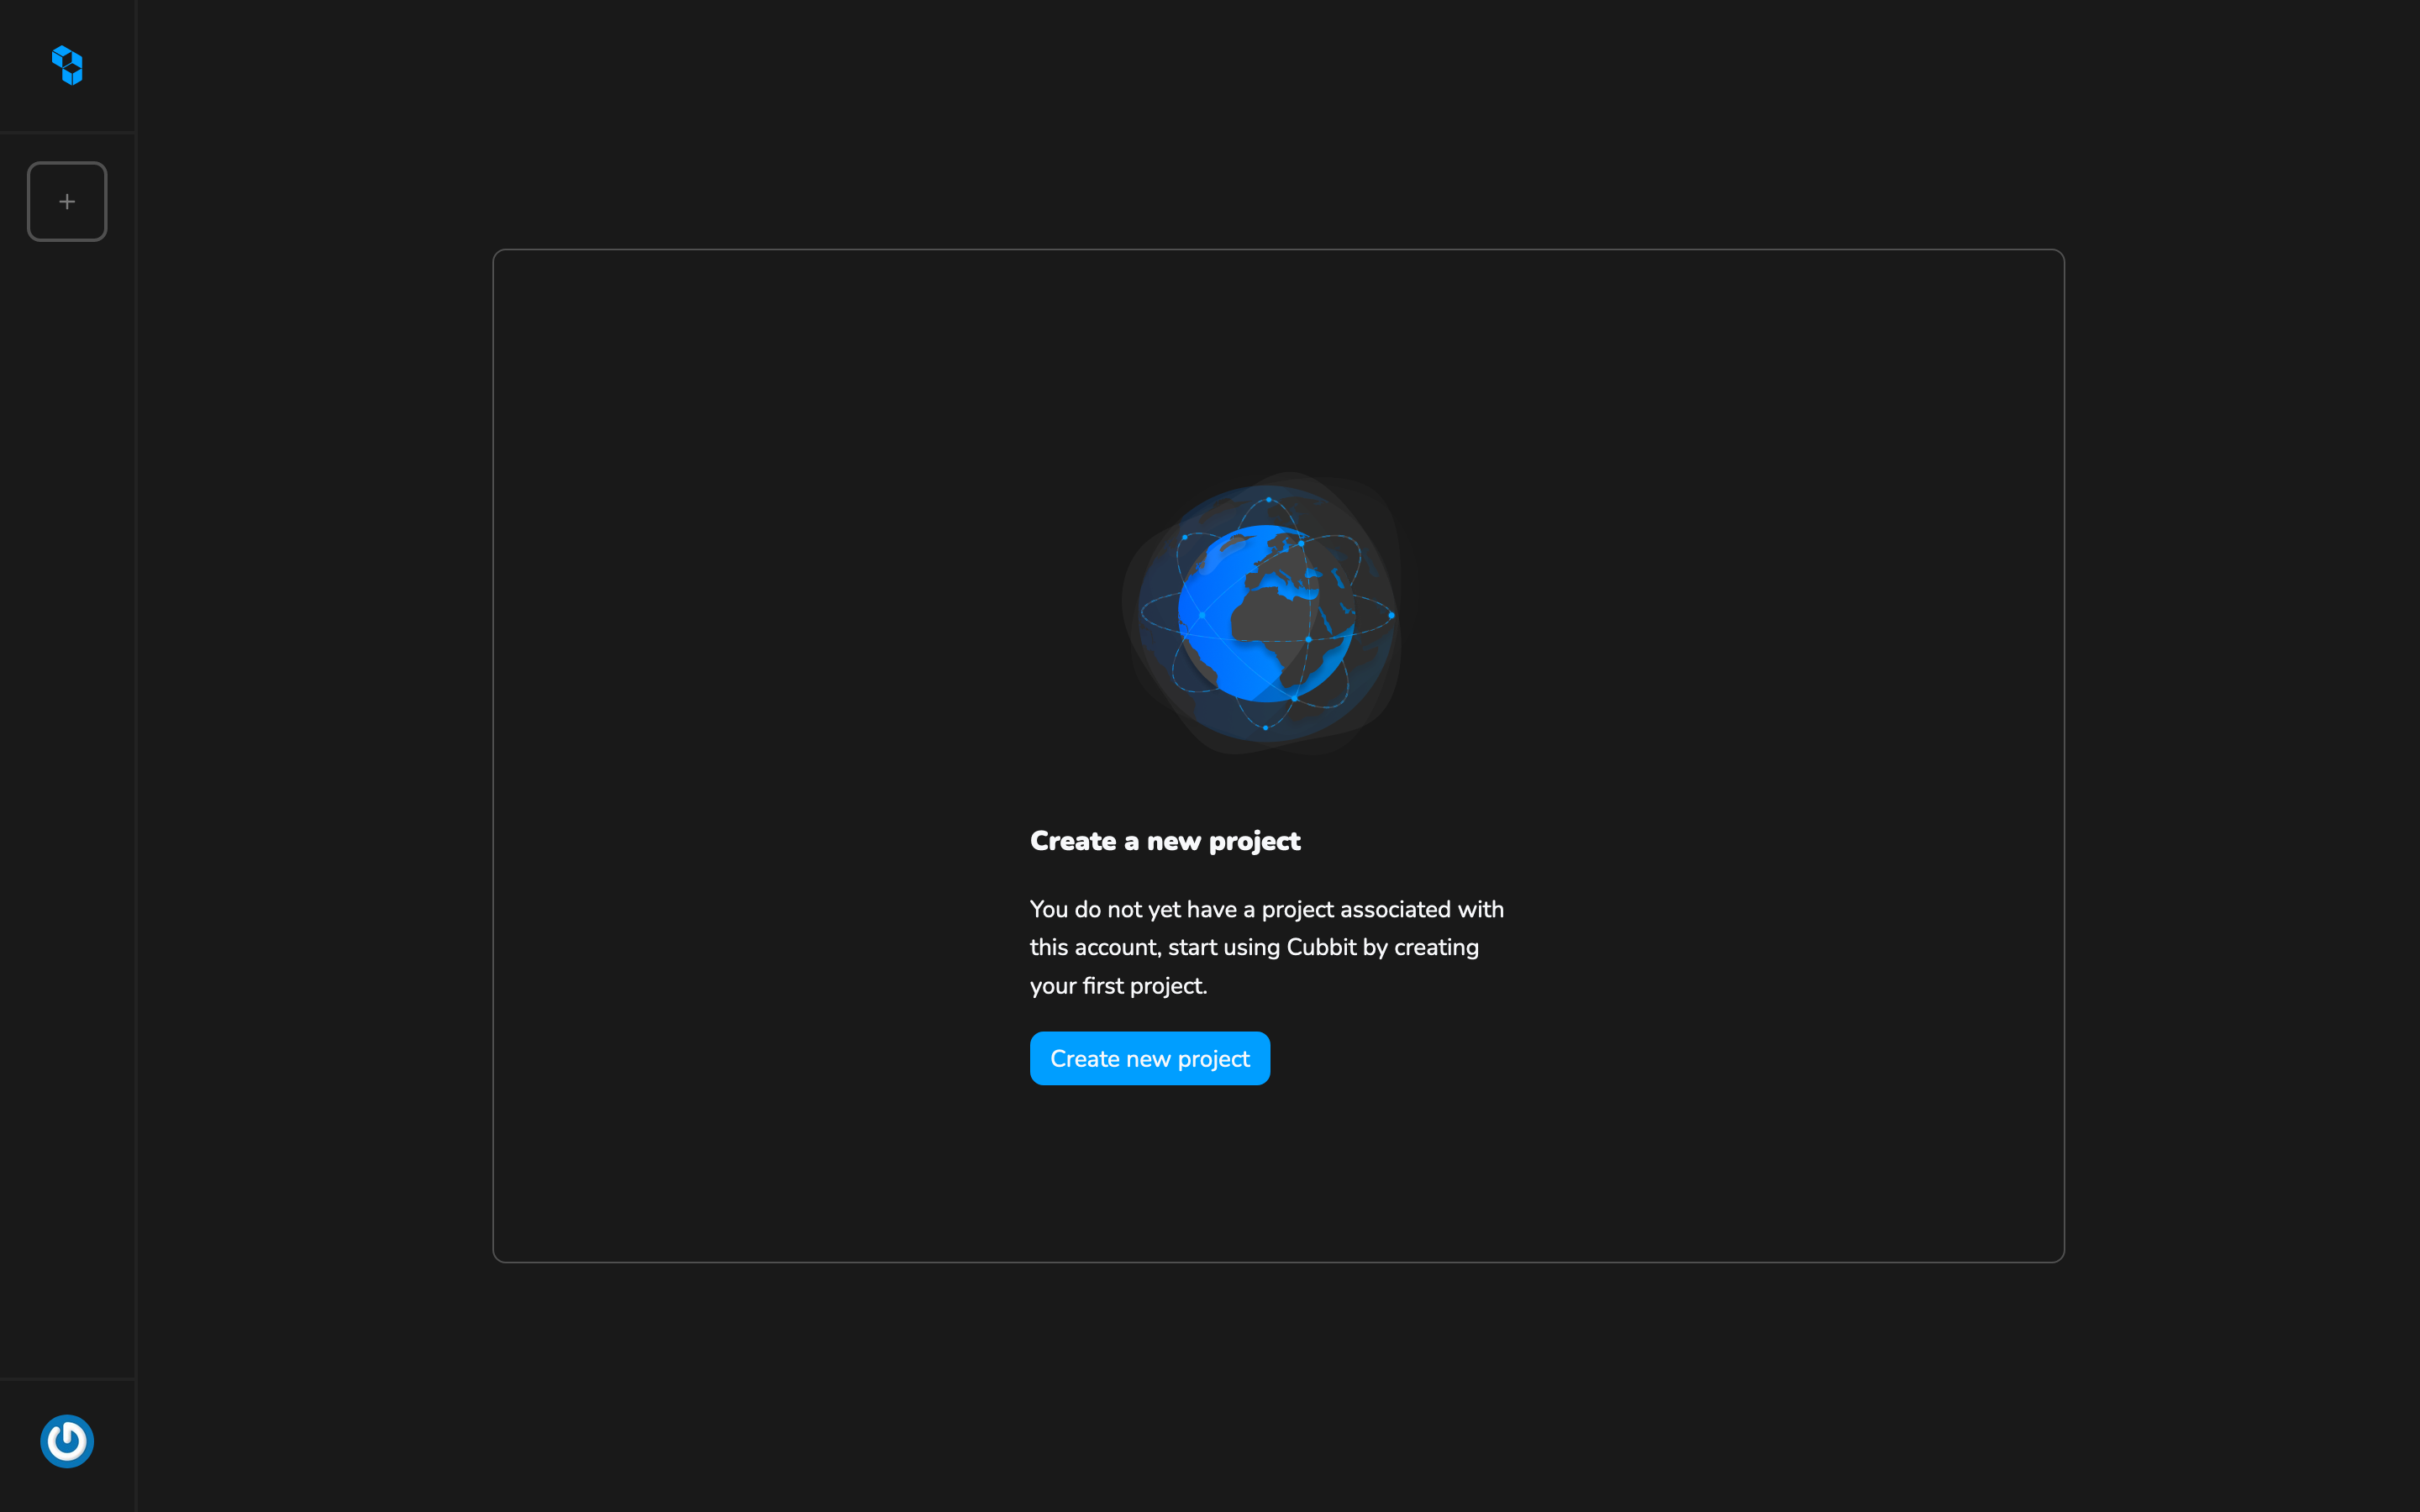
Create your first project
-
Sign in with your credentials
-
By clicking the button in the sidebar or the main view, you will be redirected to the project creation page
-
Insert the project name and click Submit
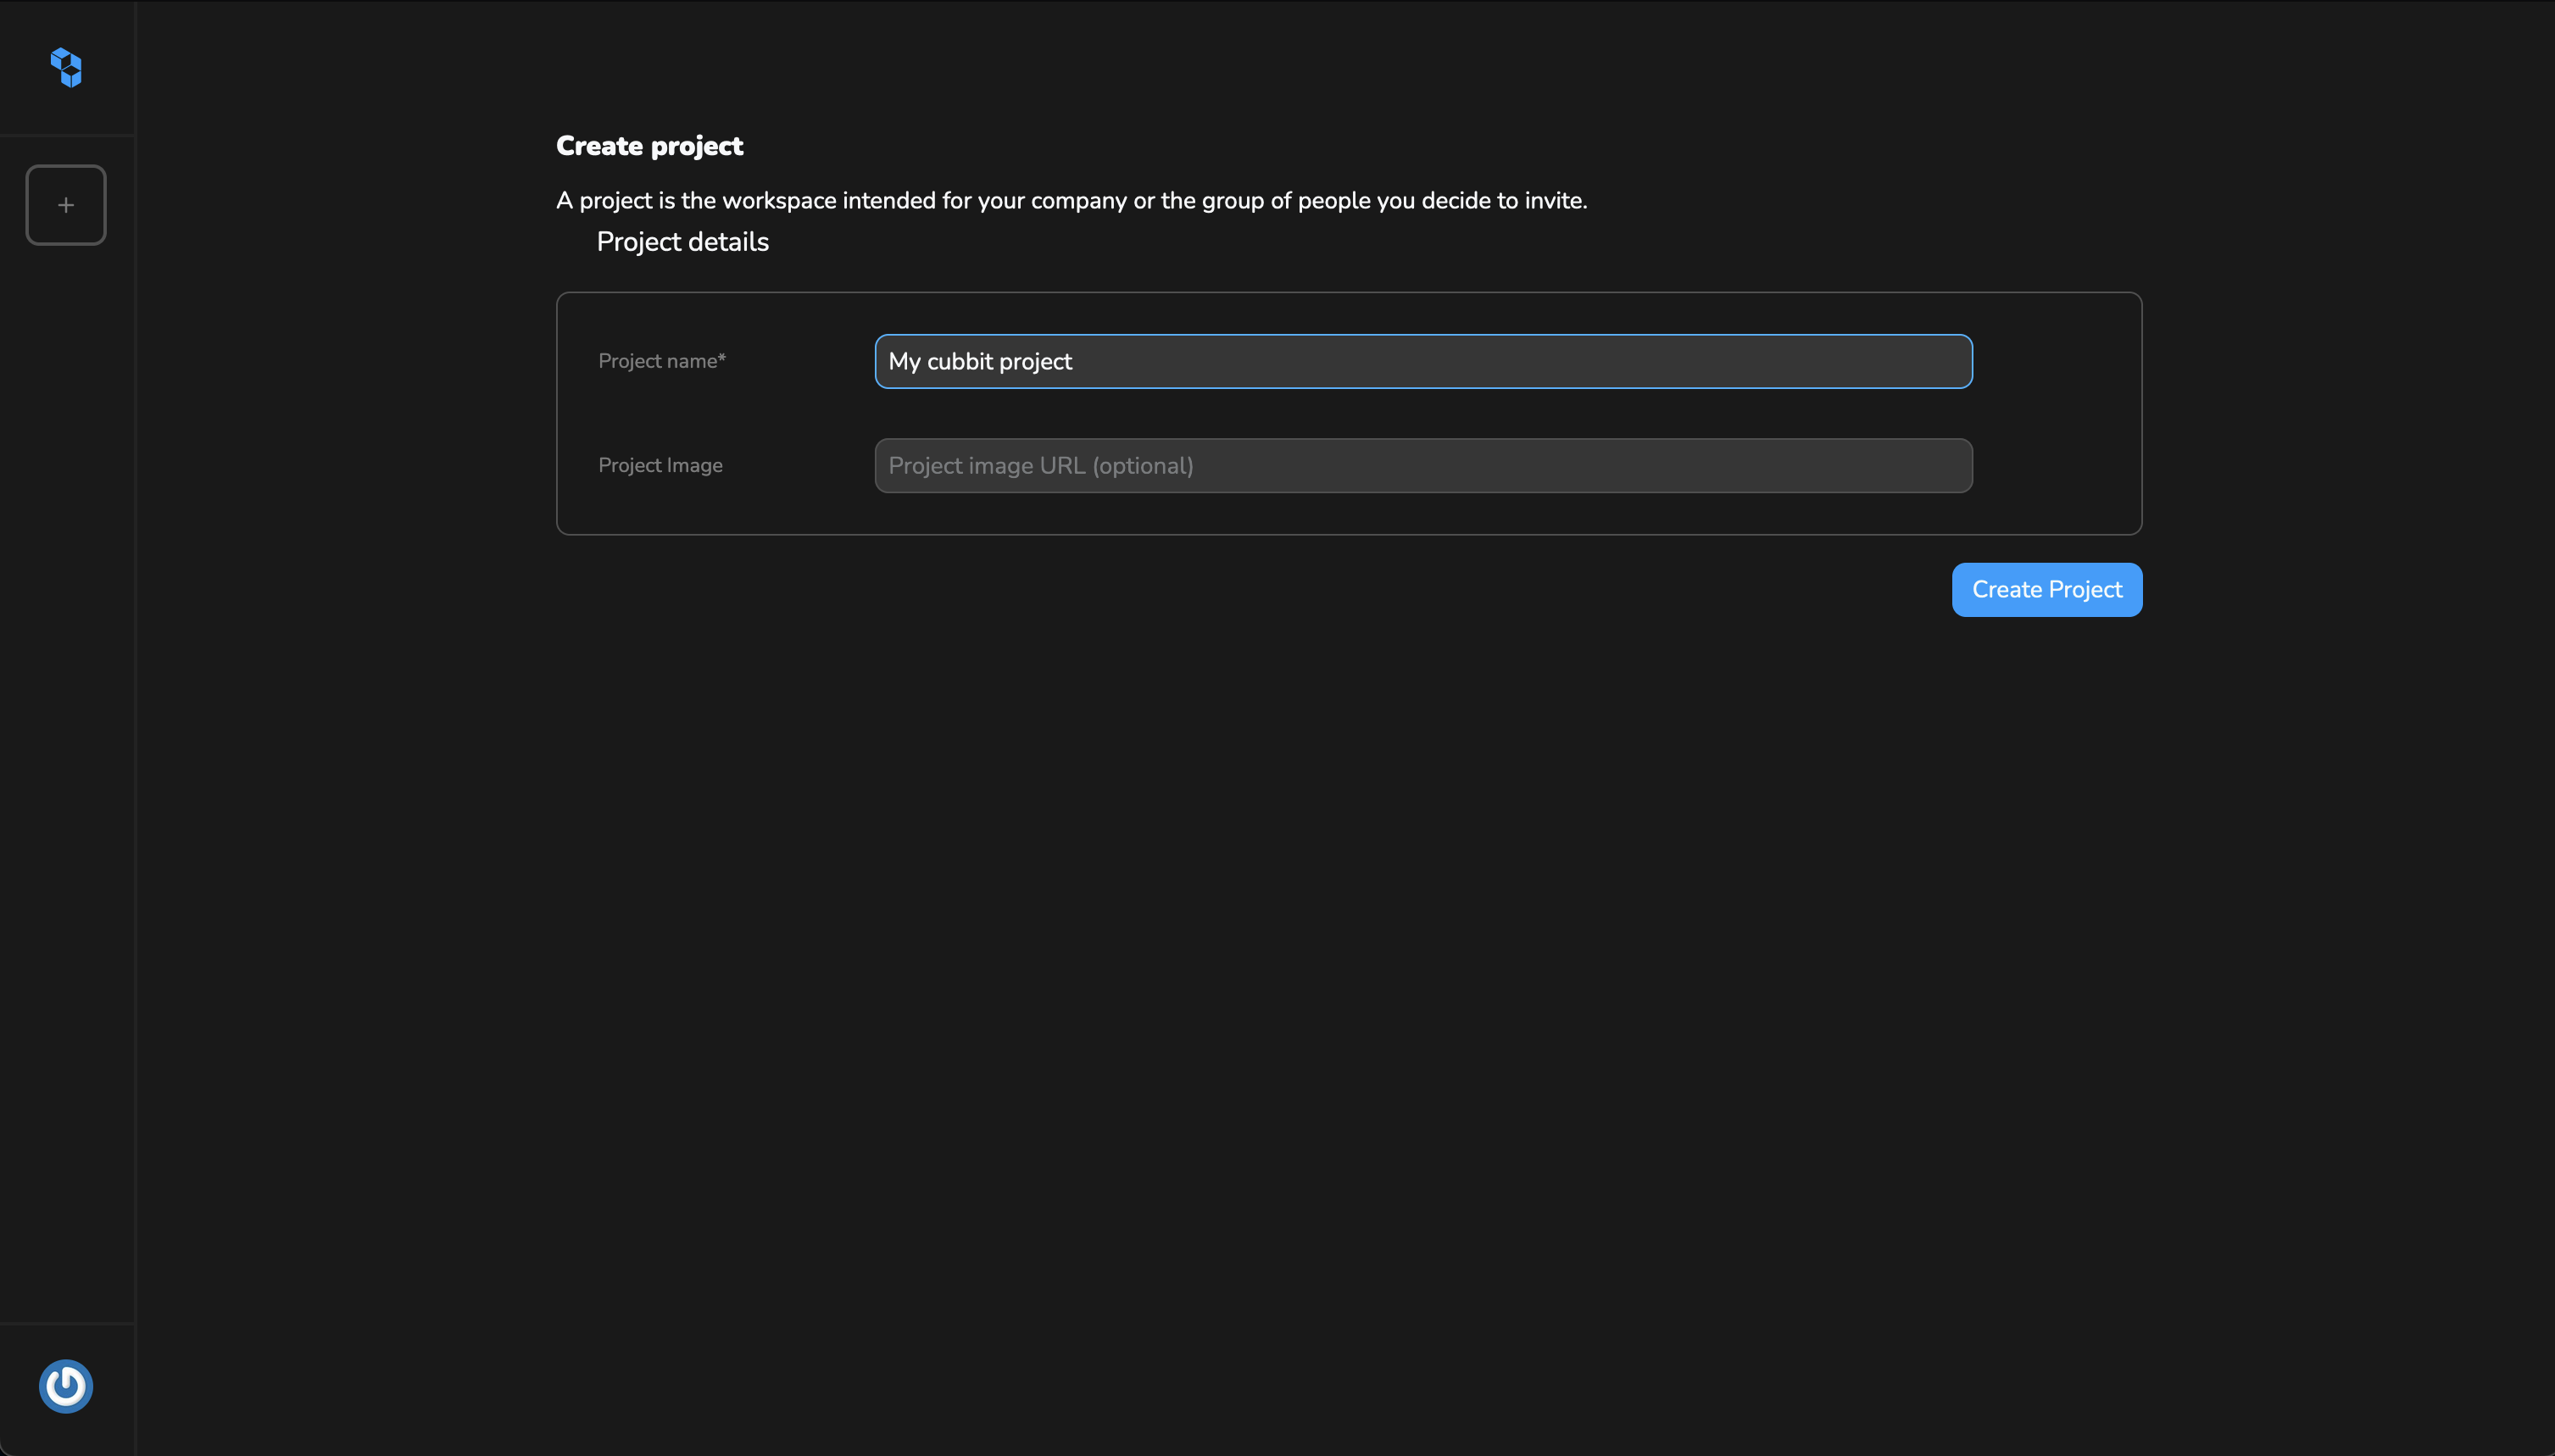 note
noteThe name can be updated later and is not unique, so you can have multiple projects with the same name associated with your account. The endpoint gateway field cannot be edited and will be enabled in the next future.
-
Now that you have created the first project you can start using it on the Cubbit web console or using a third-party client
-
You can retrieve the project references or update the project name in the project settings
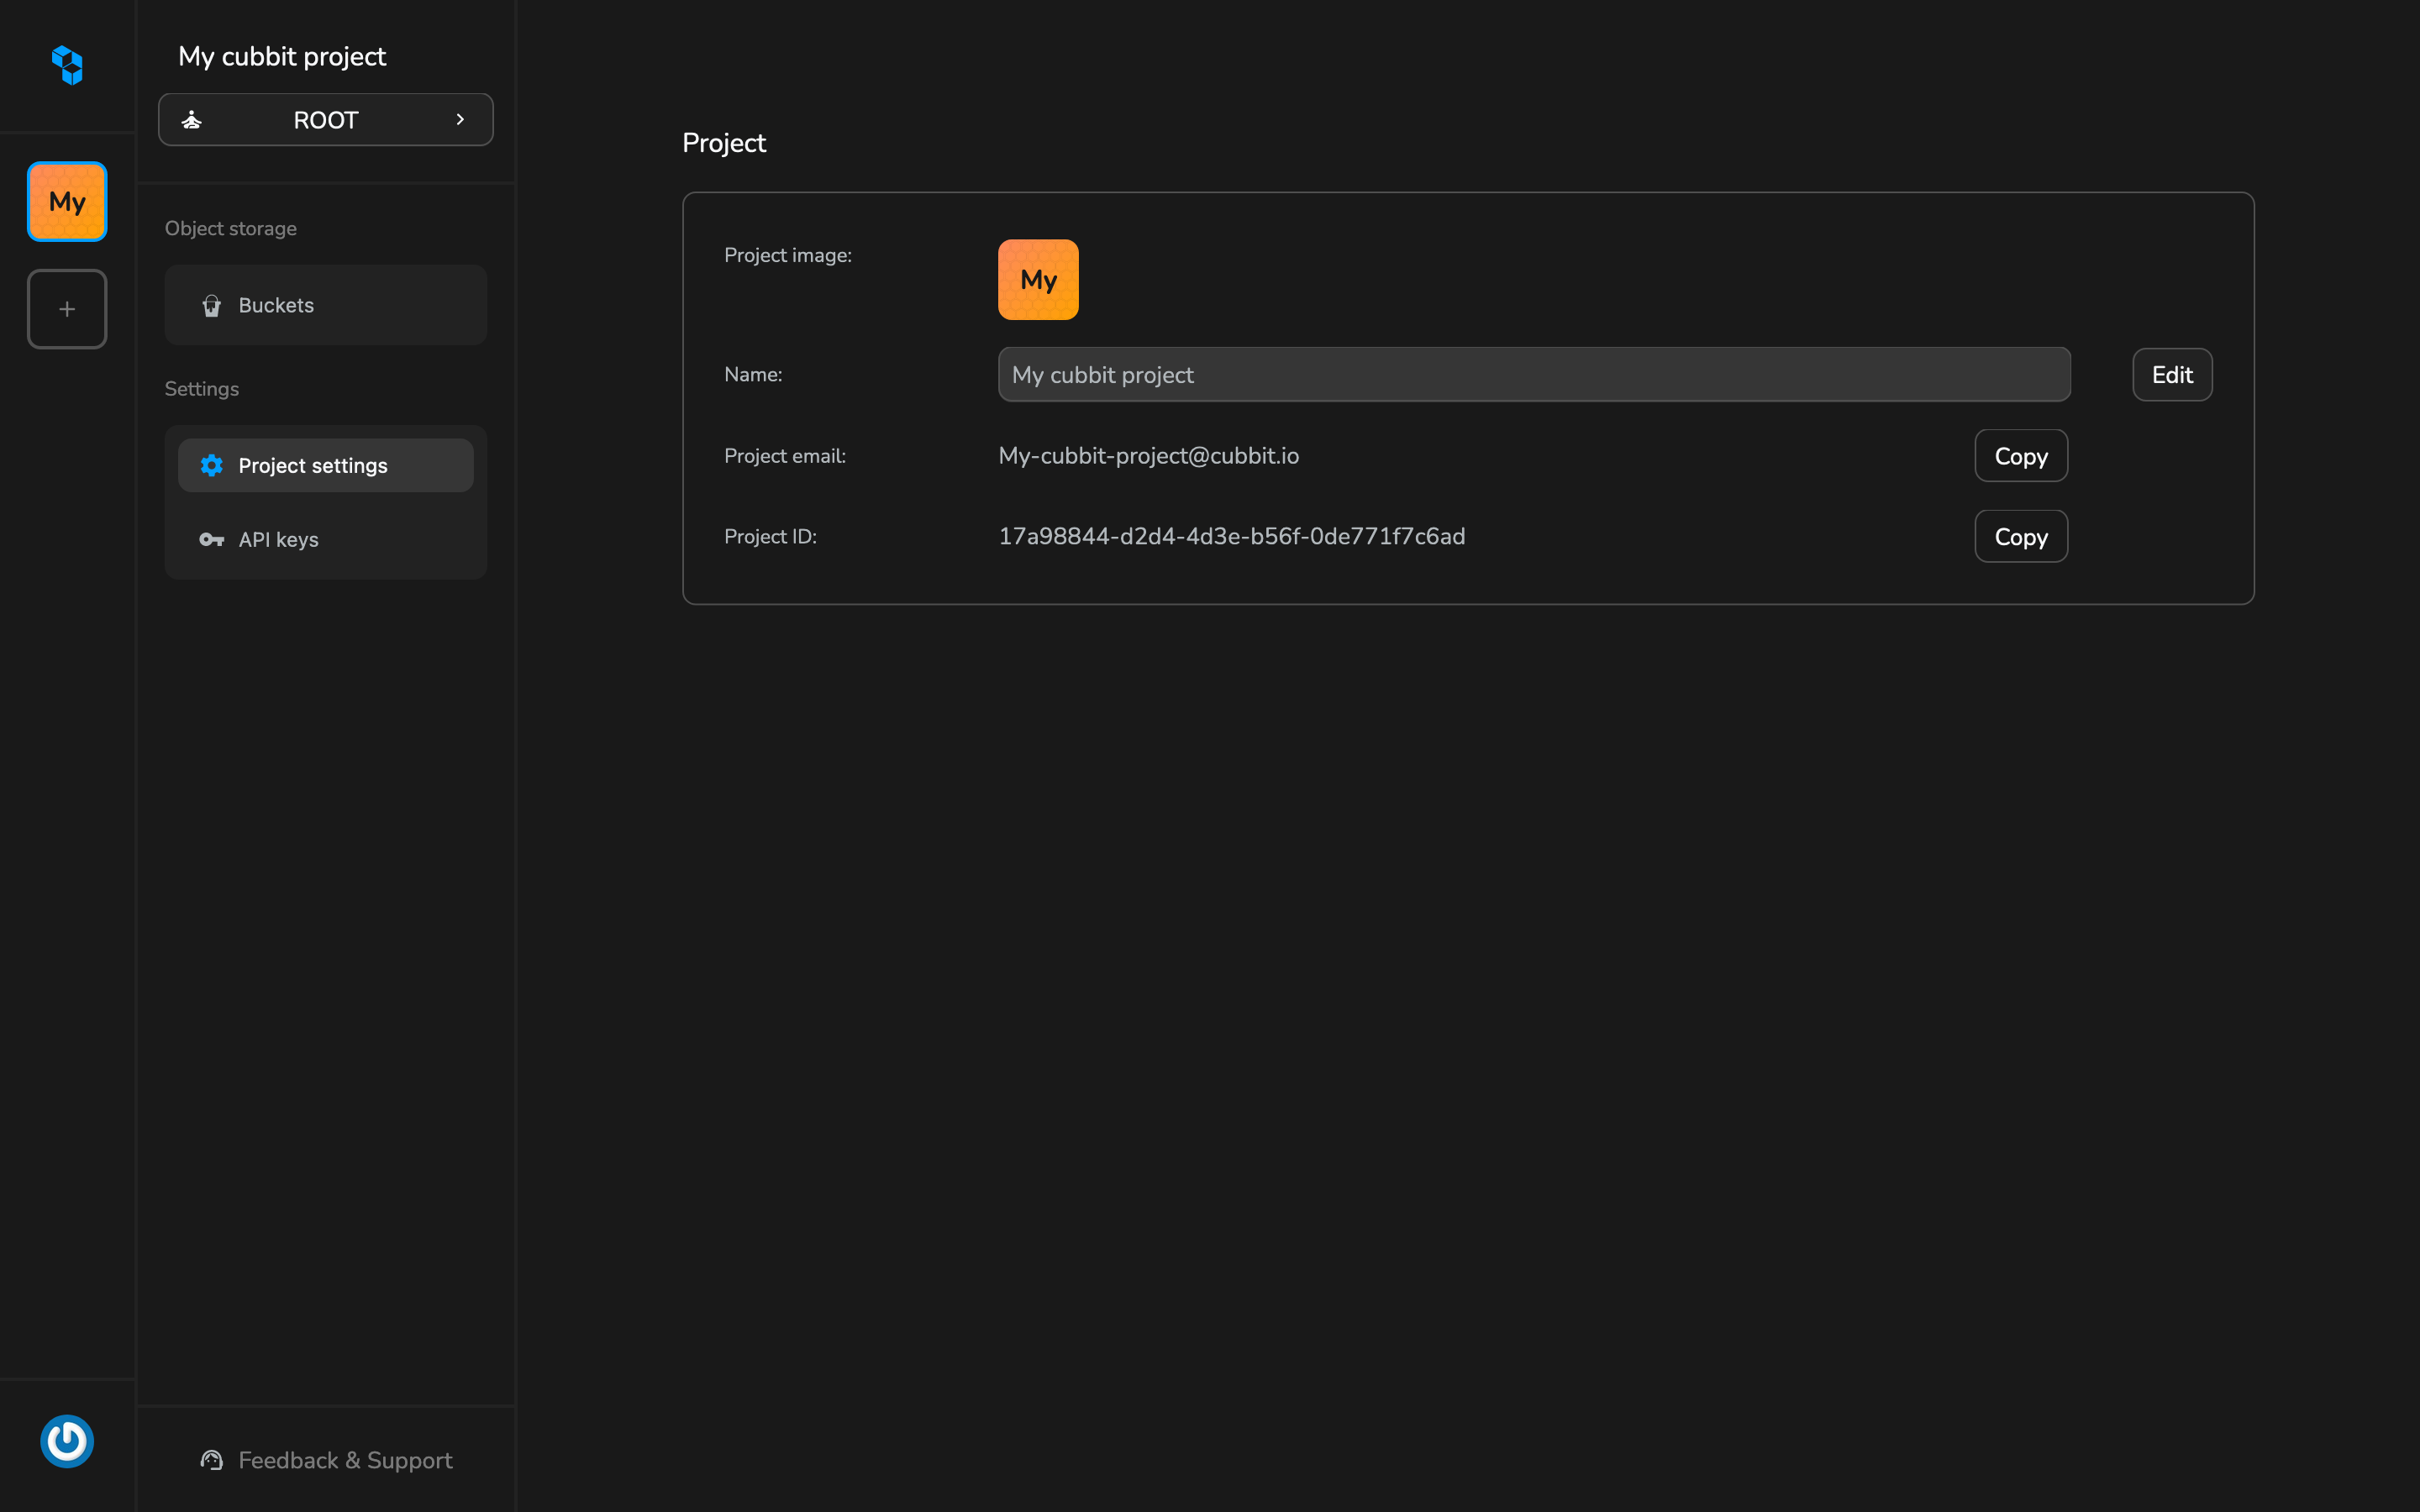
Project id and email can be used as references in the ACL (Access Control List) to grant access to the root user of the project and all the other members.
The project email cannot be used to send or receive email. It is an automatically generated reference to easily share a project identifier with other users.
API keys
Access keys are a pair of unique credentials that are used for authentication through the Cubbit S3-compatible API. This access key pair is required for connecting to Cubbit through third-party clients, CLI tools, or any other interaction using the Cubbit S3-compatible APIs.
This access key pair is required for connecting to Cubbit through third-party clients, CLI tools, or any other interaction using the Cubbit S3-compatible APIs.
If you haven't created your first project yet, you can do it now.
Create API keys
-
Sign in with the Cubbit web console and select the project you would like to work on.
-
Navigate to the Access key menu item.
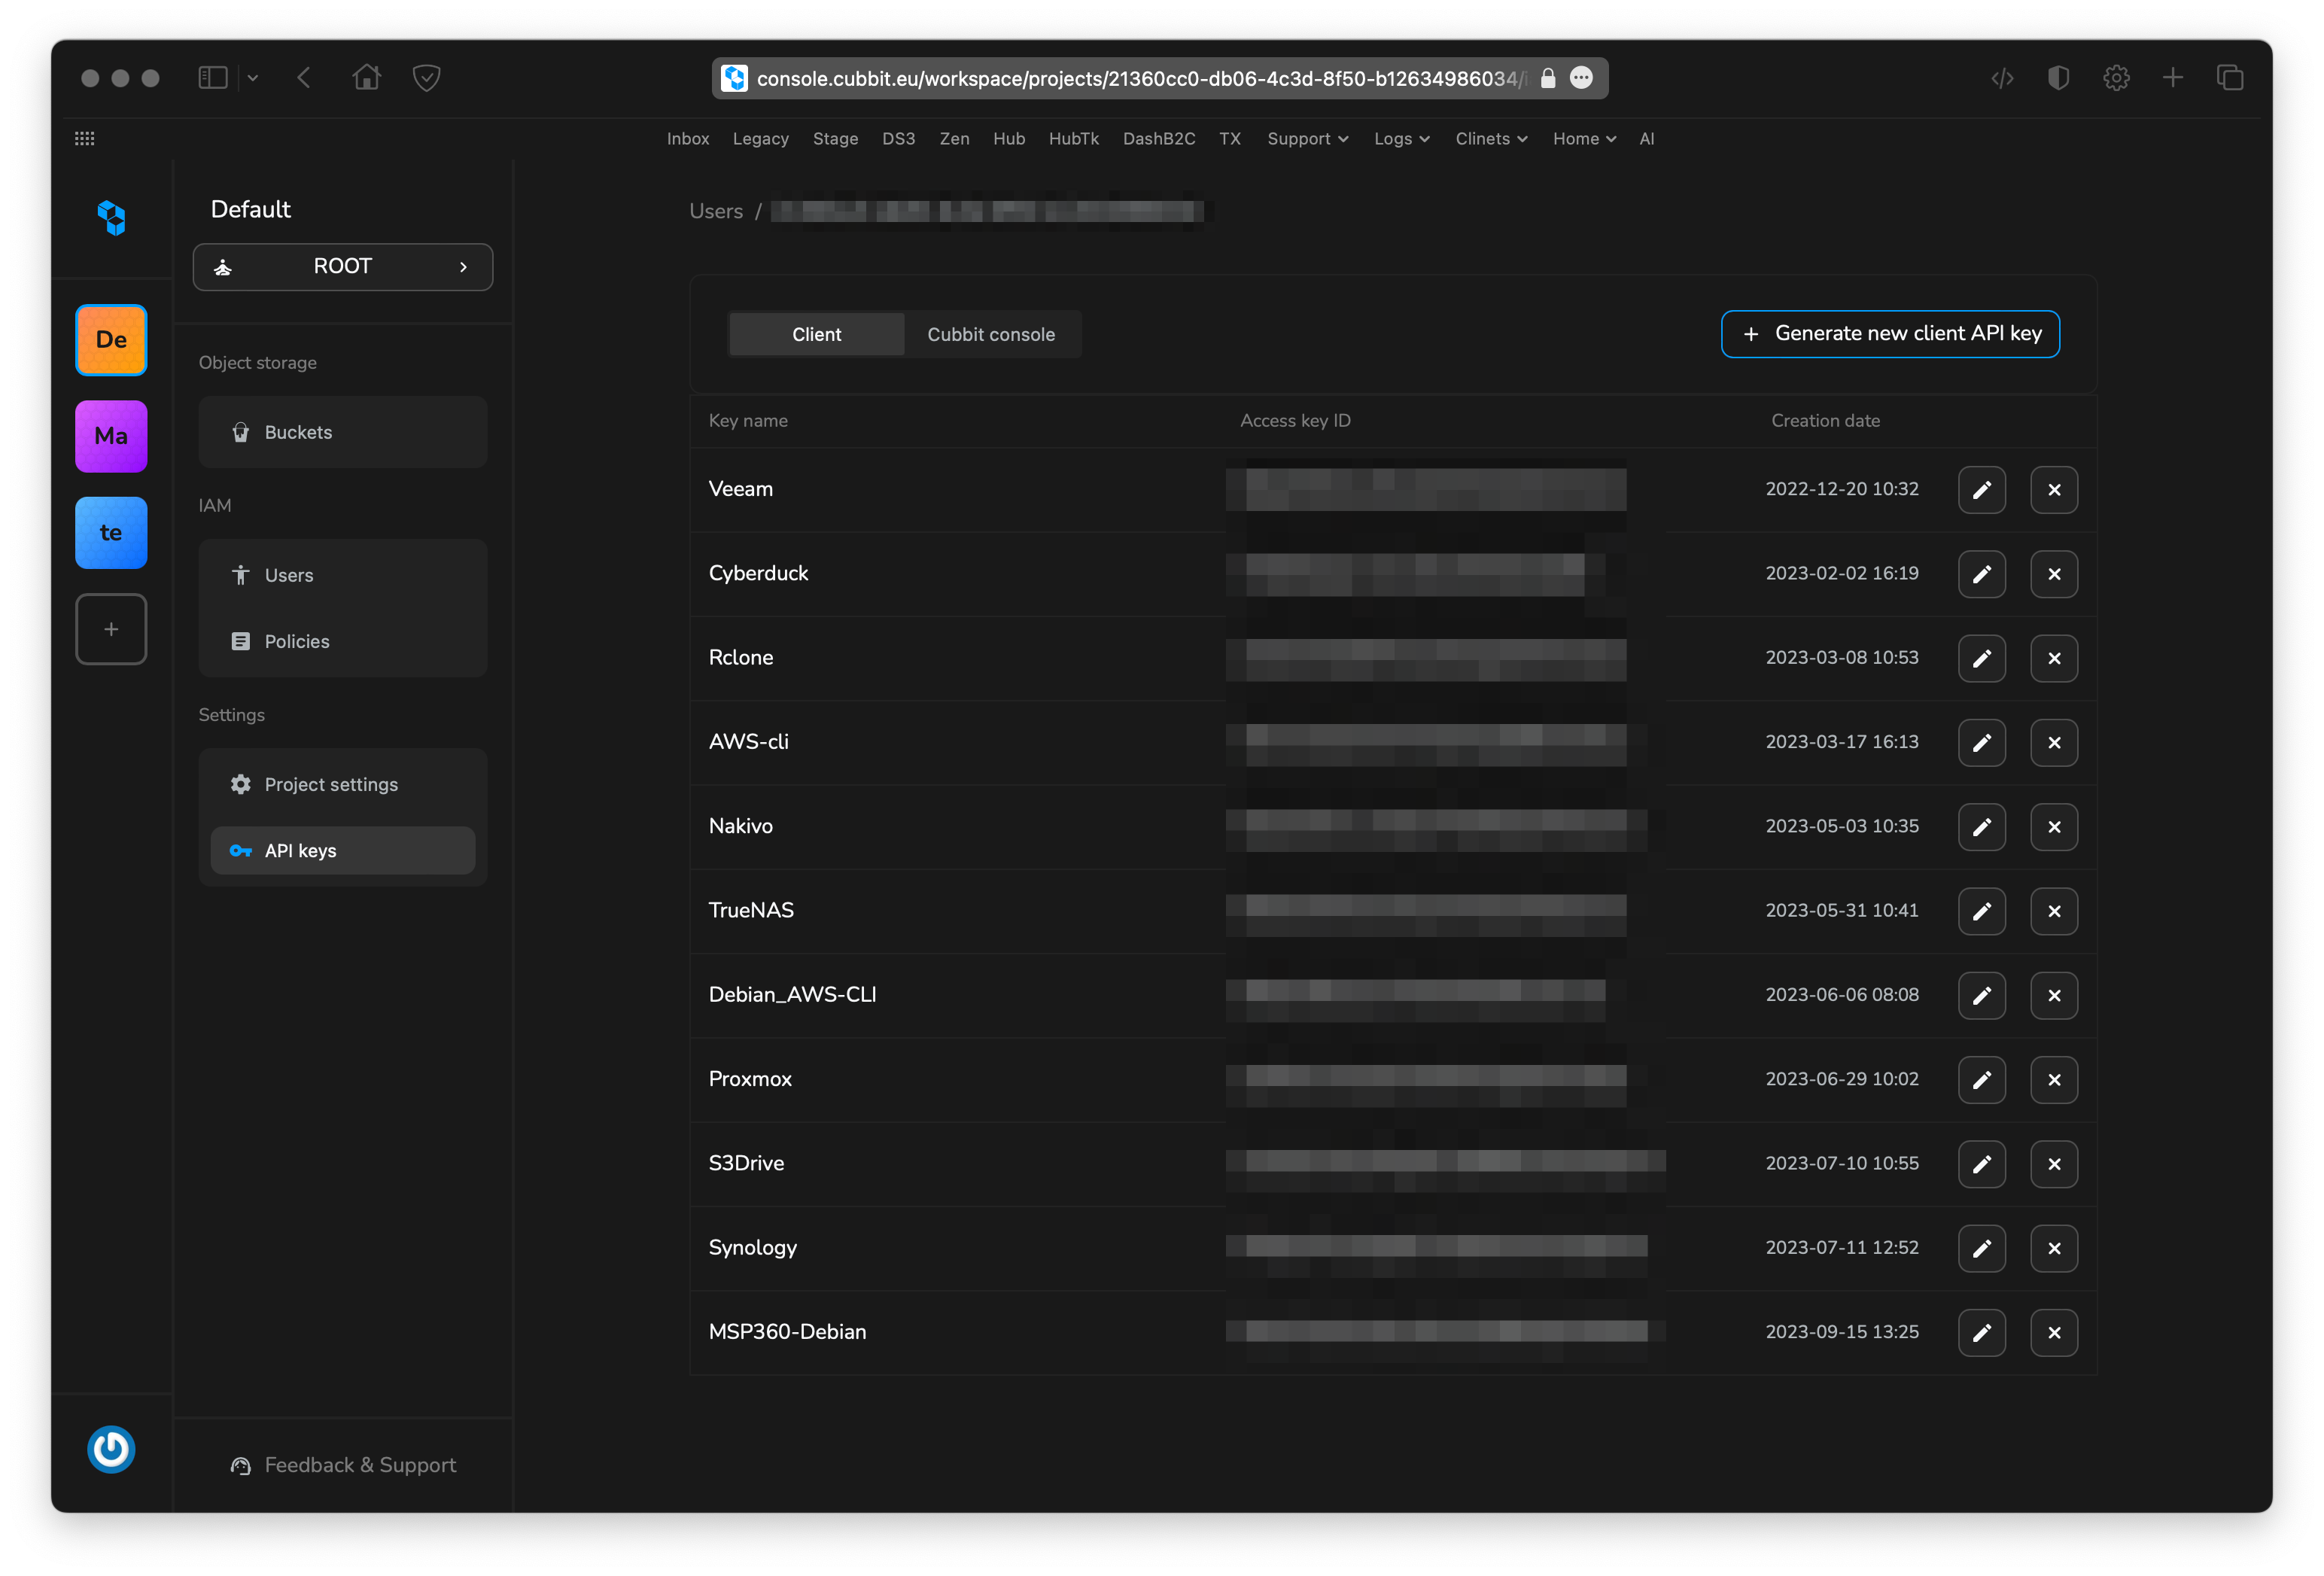
-
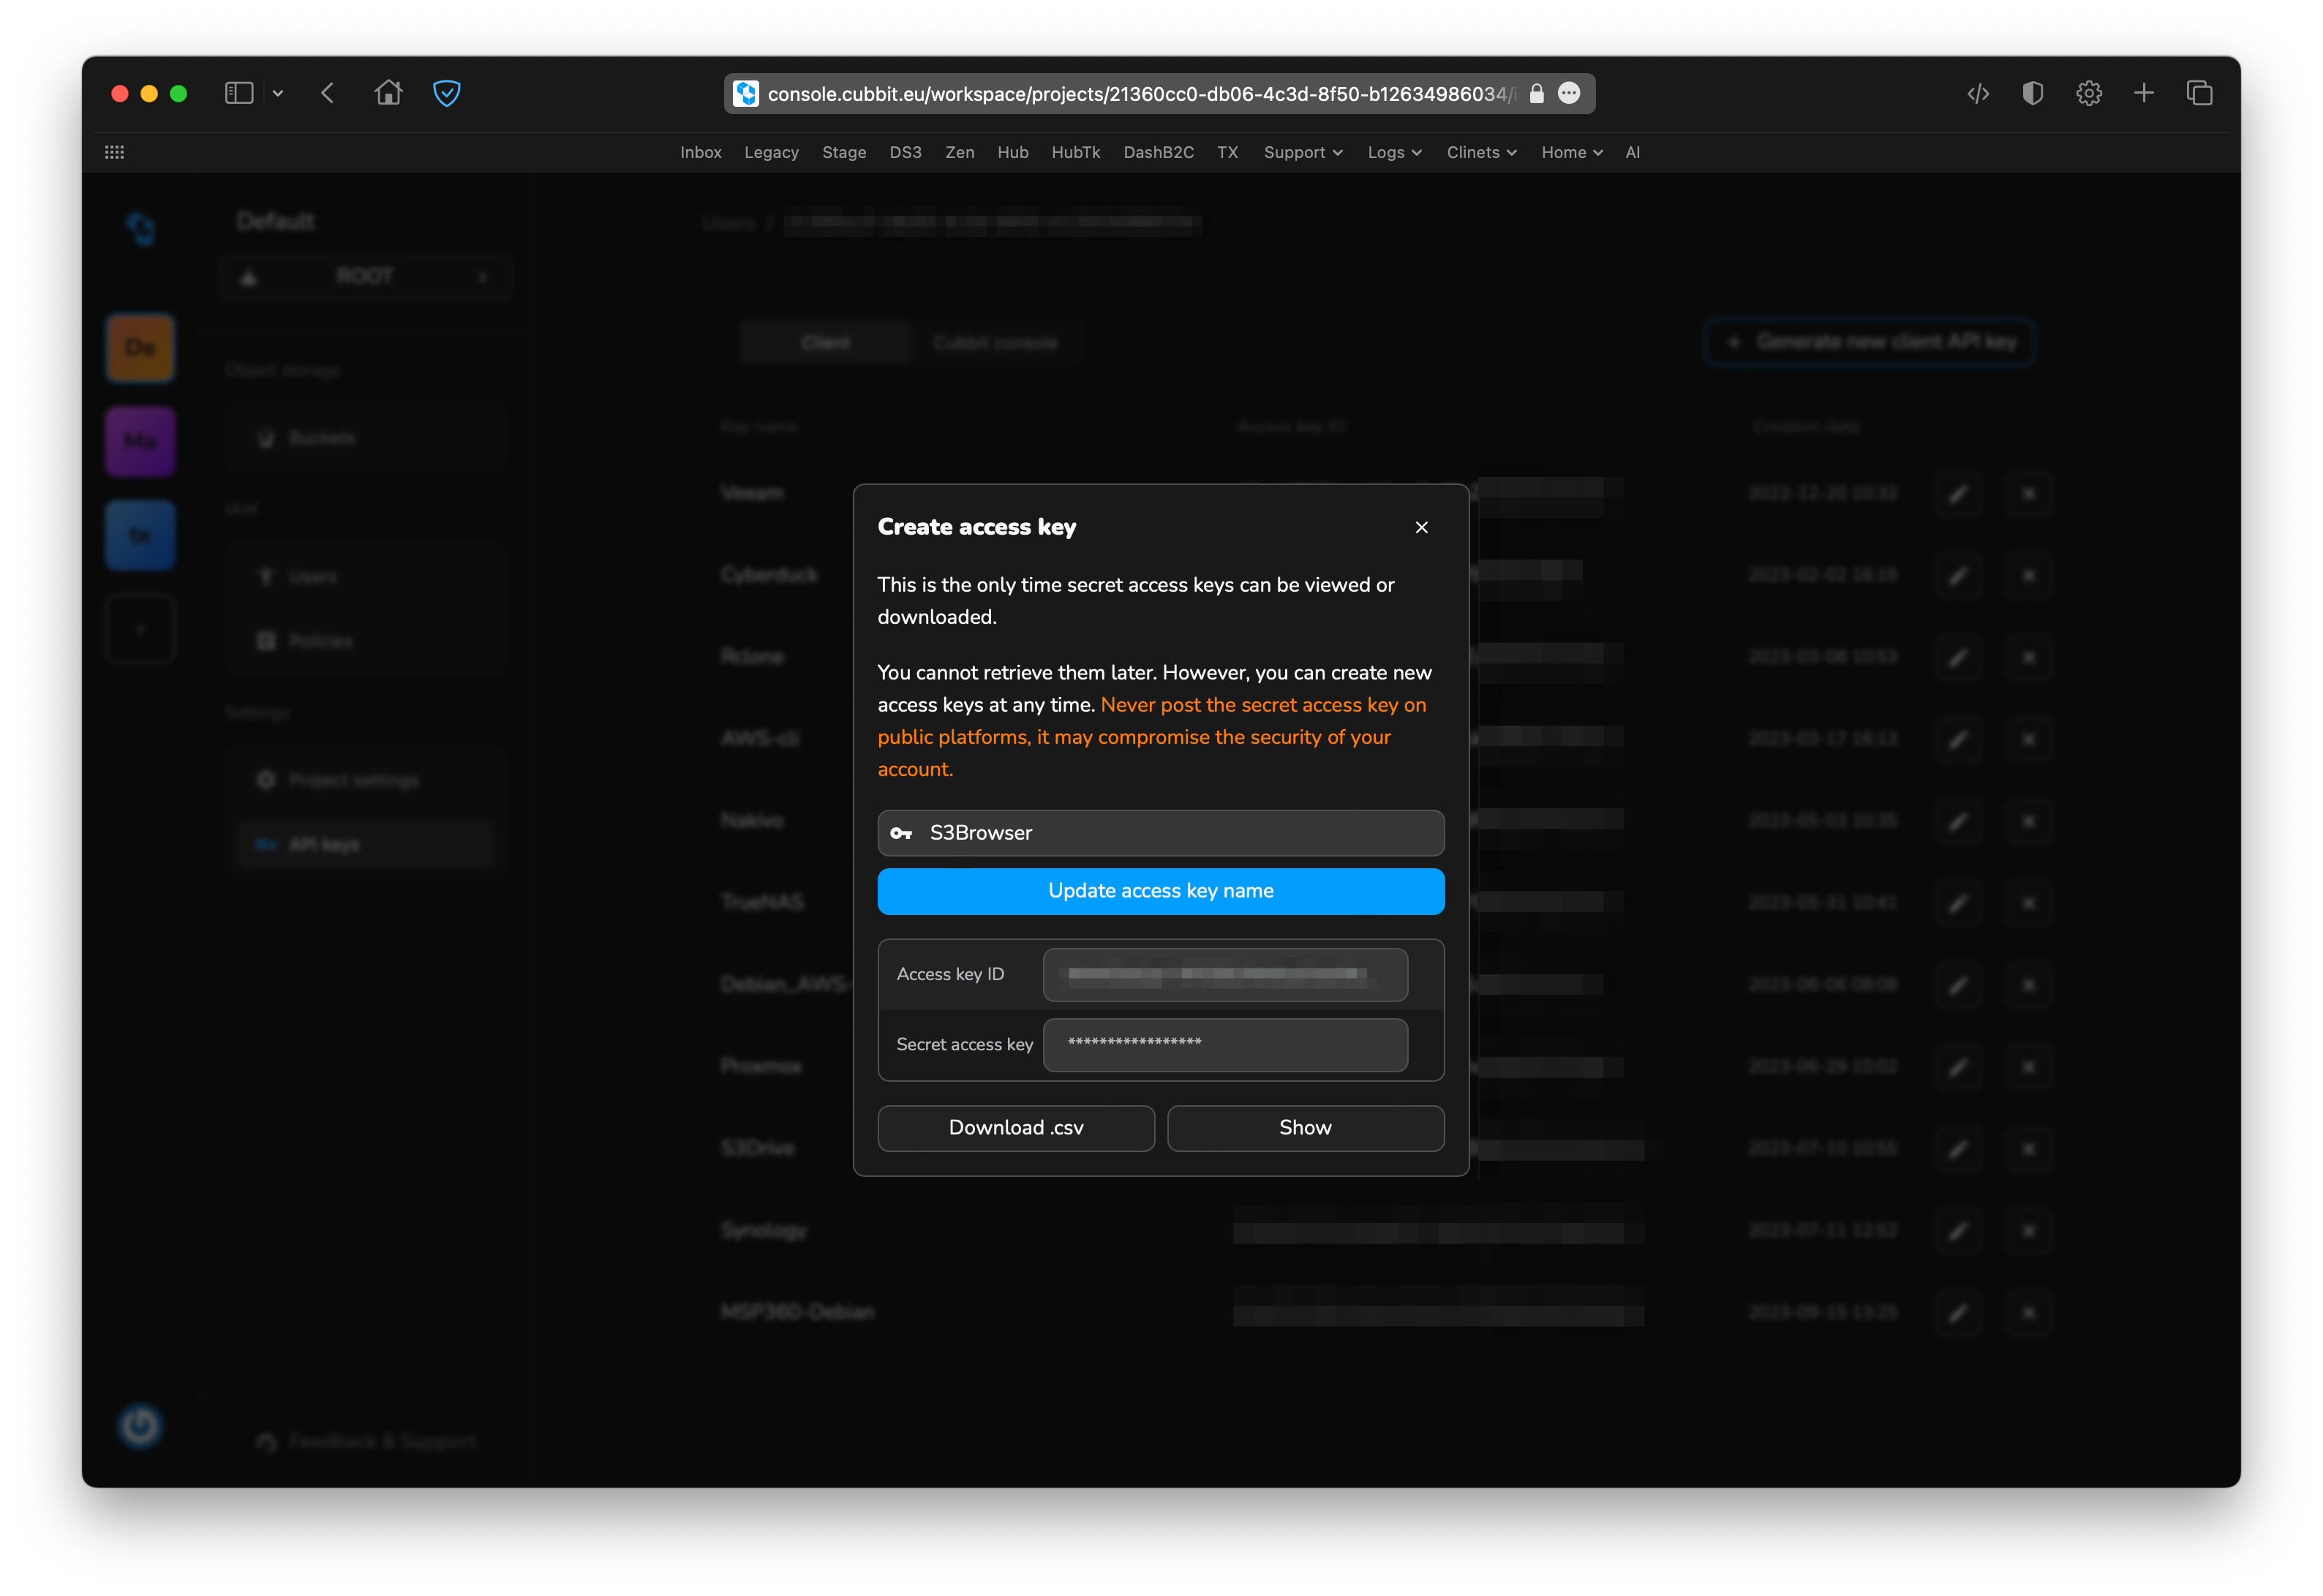
Click on the Create access key button.
-
Download the CSV and keep it safe.
-
Show the Secret key.
-
Copy and paste it into your client settings.
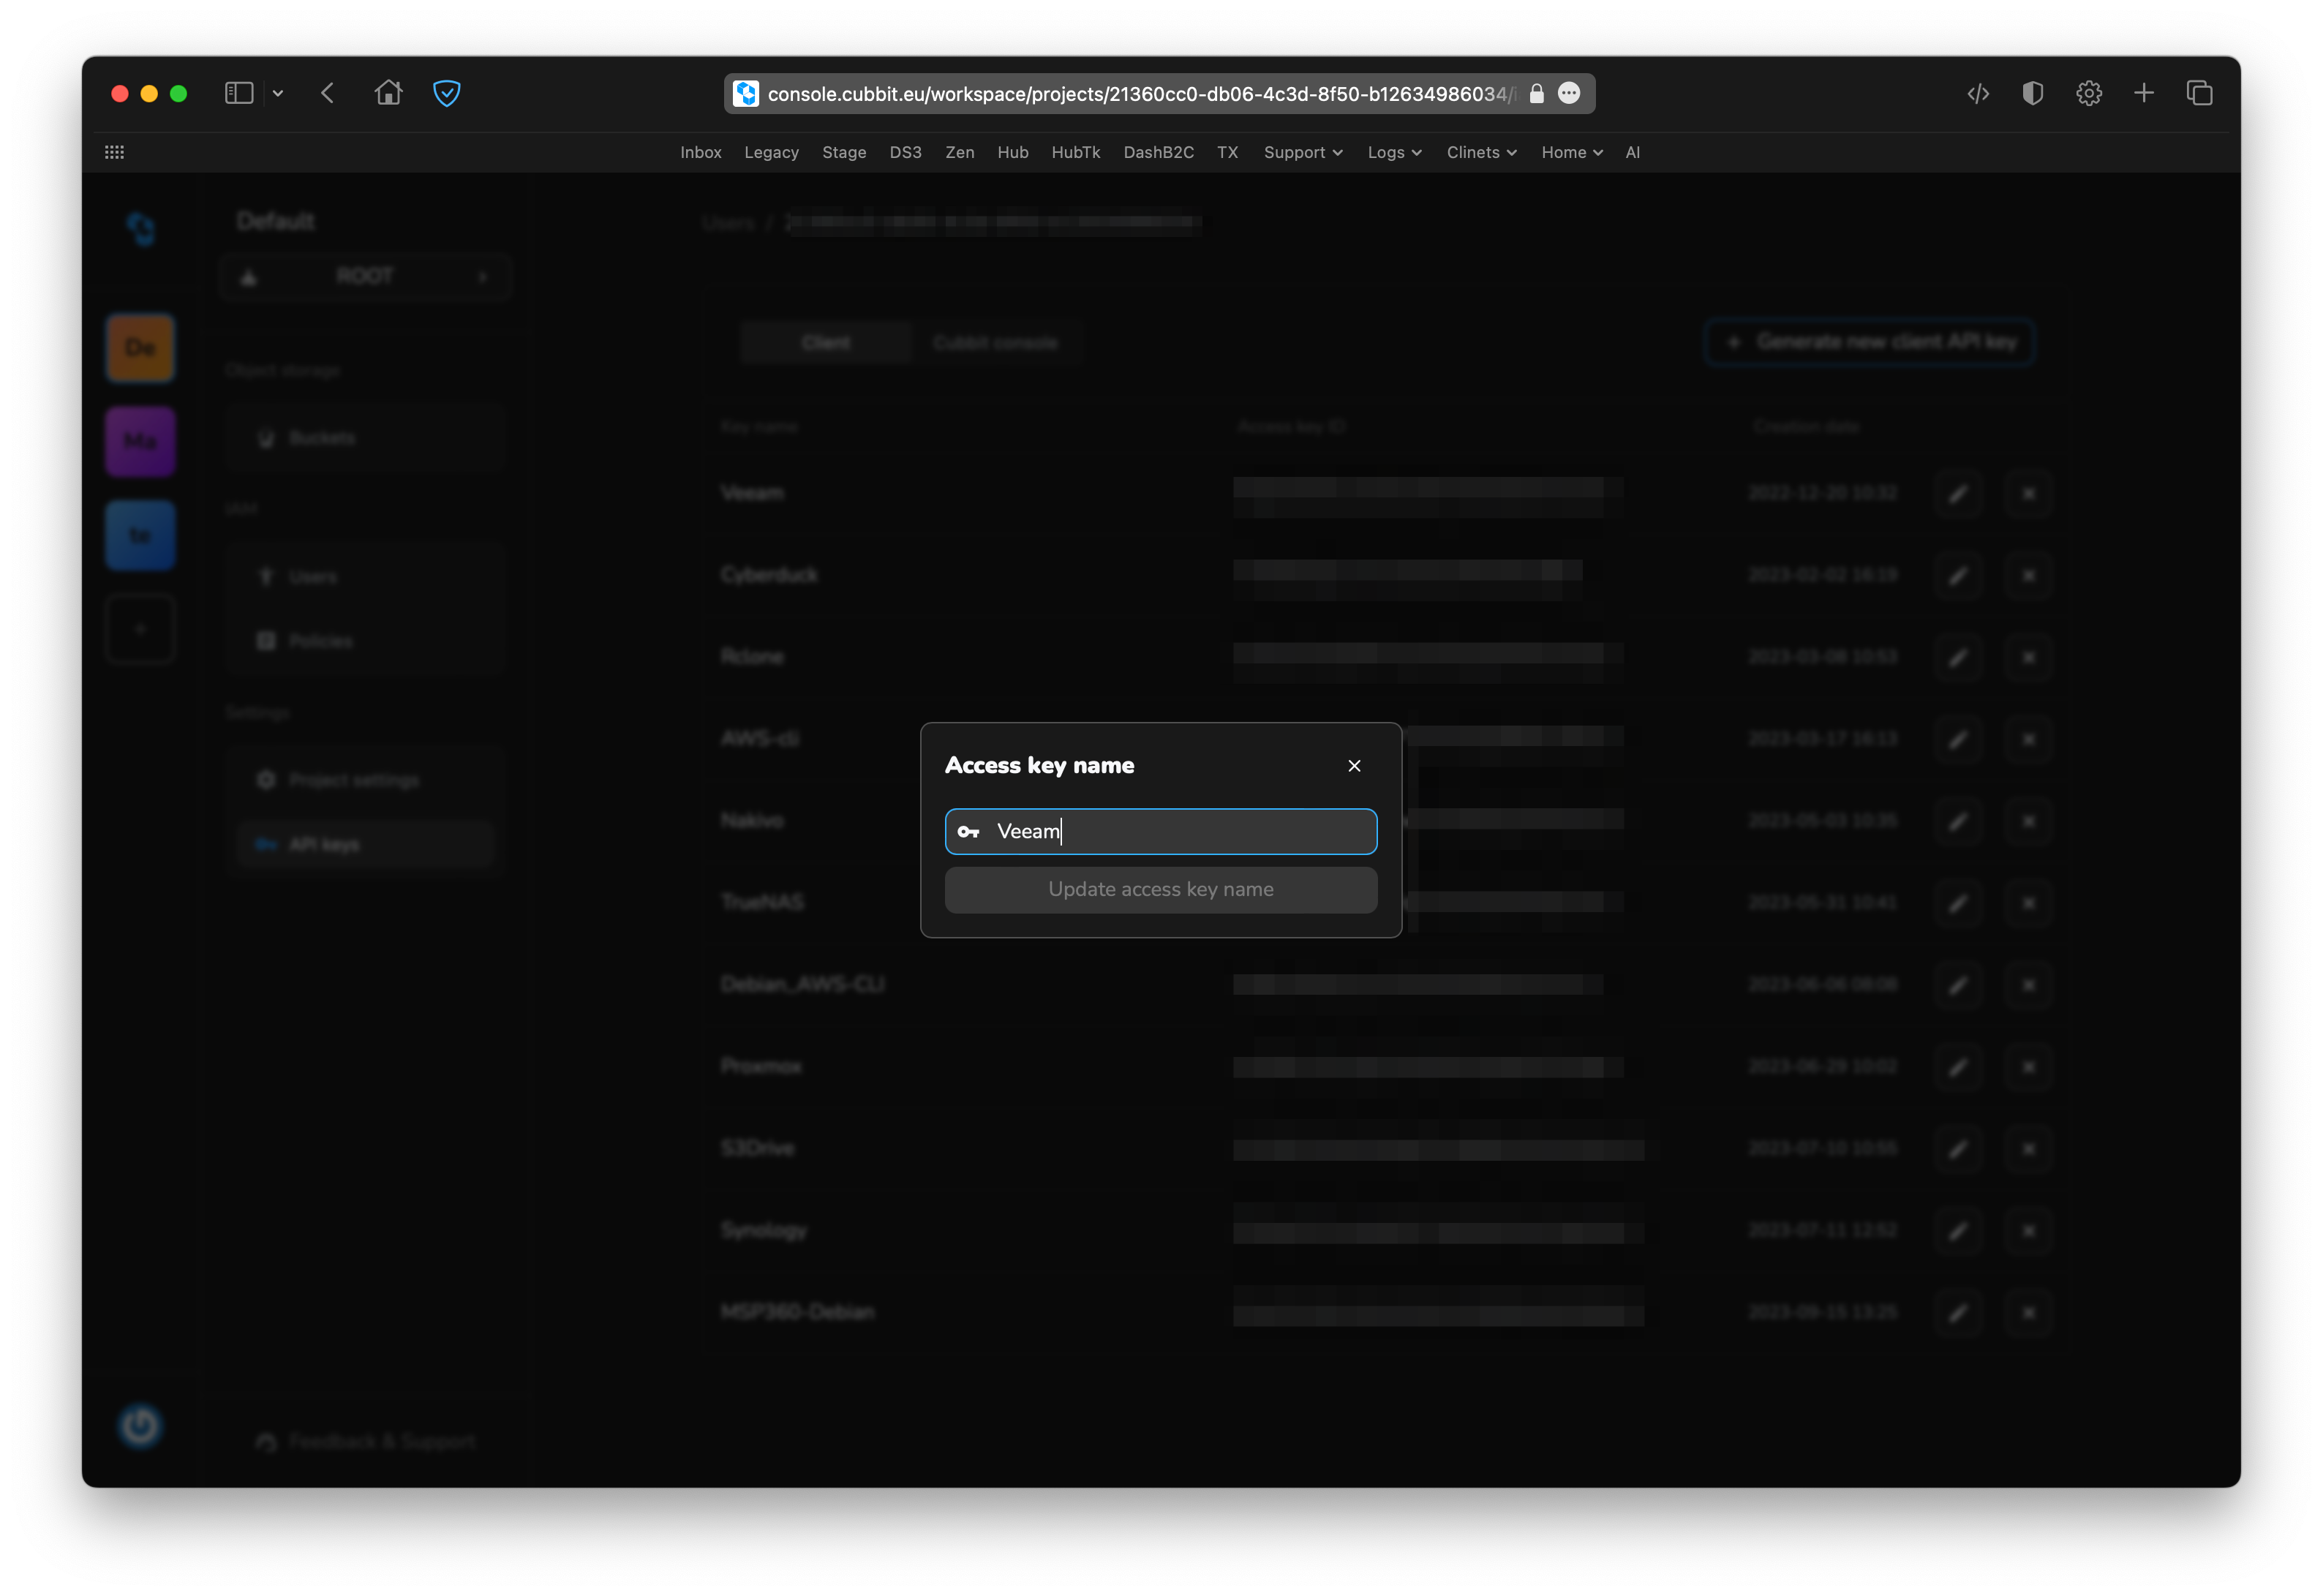
Rename the key using a specific name to easily remember what it is associated with. You can always rename the Access key by clicking on the button displayed inline.
You can generate as many keys as you want.
The API key that grants you access to interact with your buckets and objects will already be included in the list. This key is also needed by the web client for easy interaction. Your session securely stores this key, and it will be automatically regenerated after each sign-in.