CloudBerry Backup VM Edition
Intro
CloudBerry Backup for Windows is a backup and data restore solution that enables users to automate data protection routines for several environments, with local and cloud storage destinations. Advanced features like encryption, compression, and retention policy, provide efficient and secure data exchange between backup sources and cloud destinations.
With the Virtual Machine (VM) Edition you can back up and recover VMware and Hyper-V virtual machines. It supports Amazon S3, Microsoft Azure, Google Cloud, OpenStack, Cubbit, and other providers and is available in both a 15-day free trial and paid licensing option.
Prerequisites
First, you need to get your access key and secret key, from the Cubbit Web Console or https://console.[your-tenant].cubbit.eu. Please follow these instructions on how to get started with a Cubbit account and generate these keys.
Installation
To install CloudBerry Backup VM Edition you can proceed directly from the official website.
Configuration
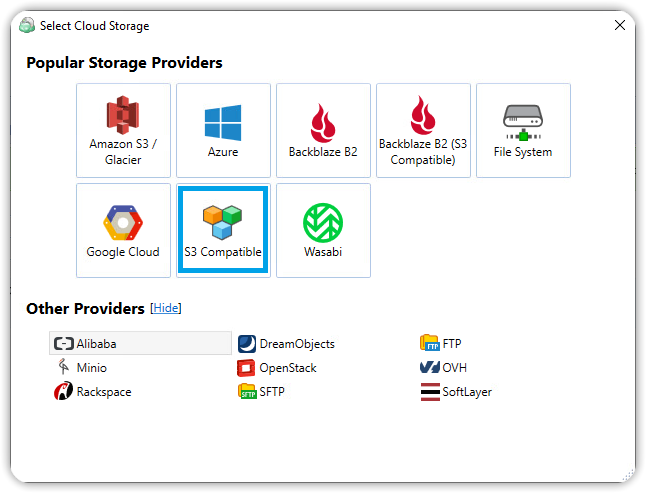
Run CloudBerry Backup VM Edition, open the application menu, then click Add Storage Account. In the Select Cloud Storage window that will open, click on S3 Compatible.
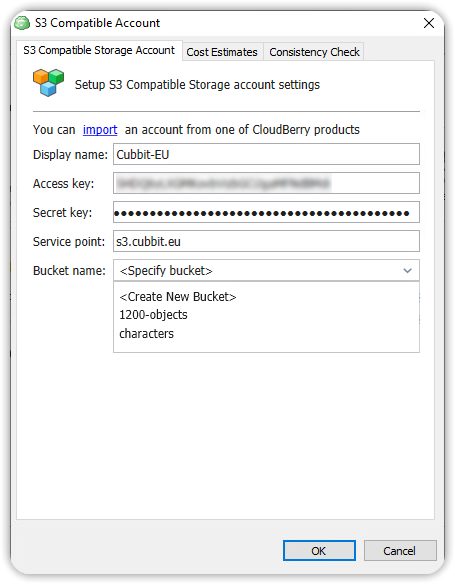
In the next window, proceed as follows:
- Enter a Display name of your choice
- Copy the access key and the secret key in the respective fields
- In Service point type
s3.cubbit.euor if you have a custom tenants3.[your-tenant].cubbit.eu - As Bucket name select the name of a previously created bucket (e.g. via Cubbit Web Console) or choose Create New Bucket
- Click OK to confirm the new account creation.
How to
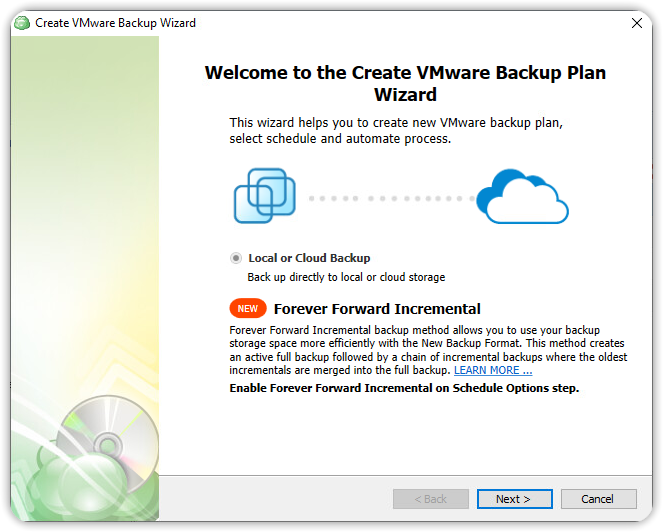
Once you configure CloudBerry Backup VM Edition, you can create a new Backup Wizard for your VMs, by right-clicking on one of the Storage Accounts created and choosing New Backup Plan or from the Home Tab (choosing VMware backup e.g.).
For additional information about CloudBerry Backup VM Edition please visit the official documentation page.