Cloudberry MSP360 Backup
Intro
Cloudberry MSP360 is a powerful tool that allows the management and backup of computers and virtual machines from an online dashboard without the need to access the computer directly.
Prerequisites
To set up Cloudberry MSP360 with Cubbit, you must first obtain access and secret keys from the Cubbit Web Console or https://console.[your-tenant].cubbit.eu. You can follow the instructions provided to create a new Cubbit account and generate these keys. It is also highly recommended to create a new empty bucket.
Configuration
To start the configuration open sign-in on MSP360 Backup and from the top menu go to Backup, Storage Account, and click Add Account in the top right corner.
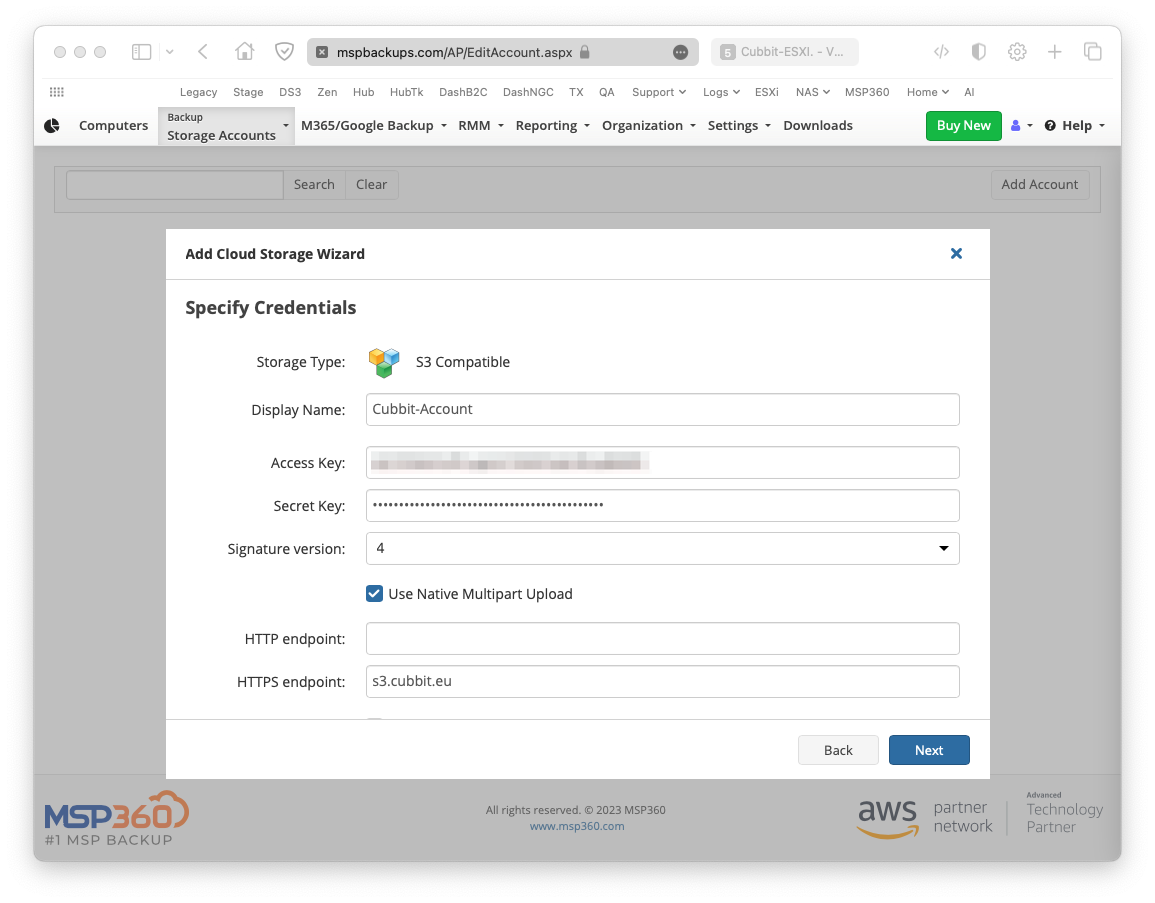
In the Storage Wizard select the S3 Compatible storage, click next, and insert the API keys created earlier as well as the HTTPS endpoint s3.cubbit.eu or if you have a custom tenant s3.[your-tenant].cubbit.eu.
Next enter the name of a new bucket to create one or choose an existing one.
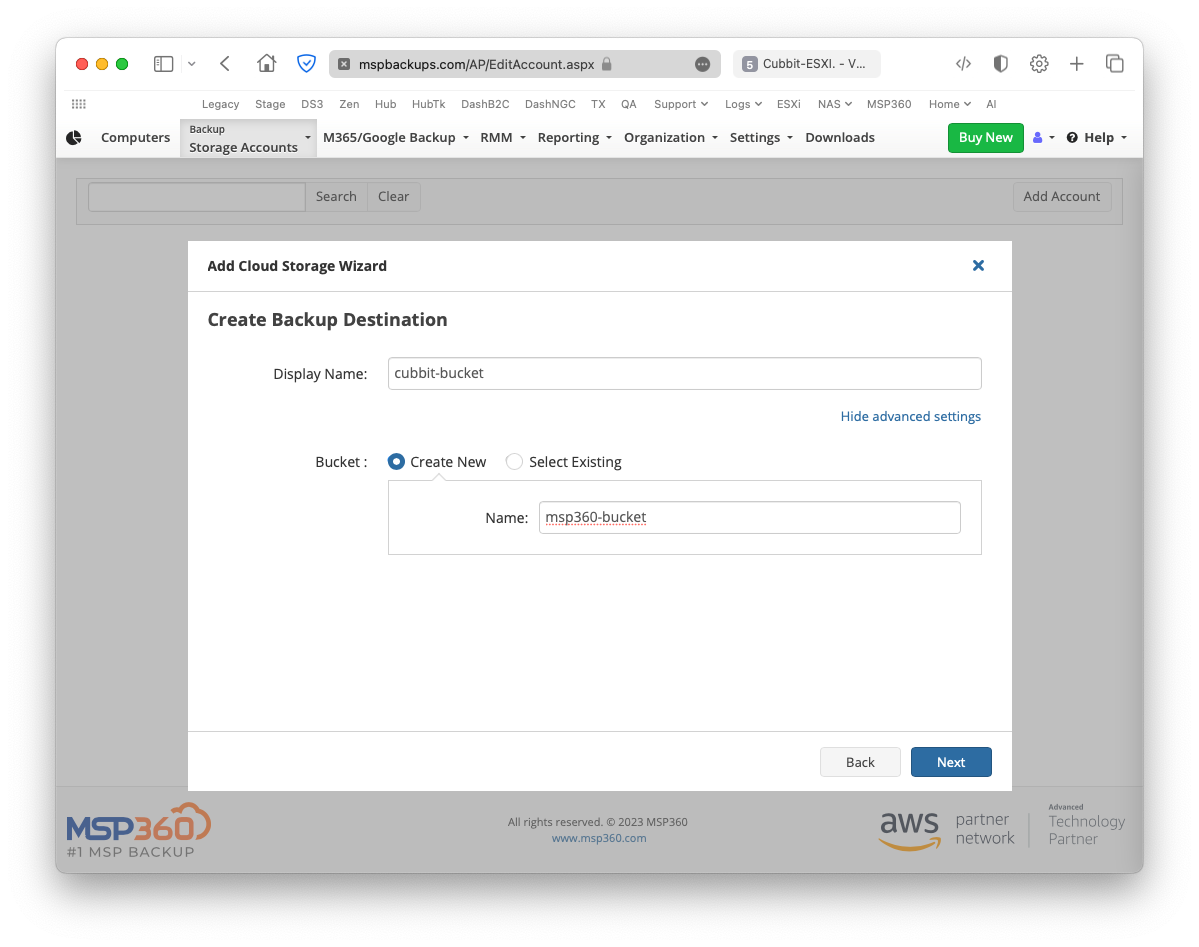
Then continue the configuration by assigning it to a company and once the configuration is completed Cubbit will be listed in Storage Accounts.
Currently, MSP360 does not support the S3 Object Lock feature of Cubbit DS3. For more information regarding the S3 Object Lock and MSP360 Immutability please visit the official page.
Cloudberry Online Backup installation
Before using MSP360 it's required to create a user and install the backup software.
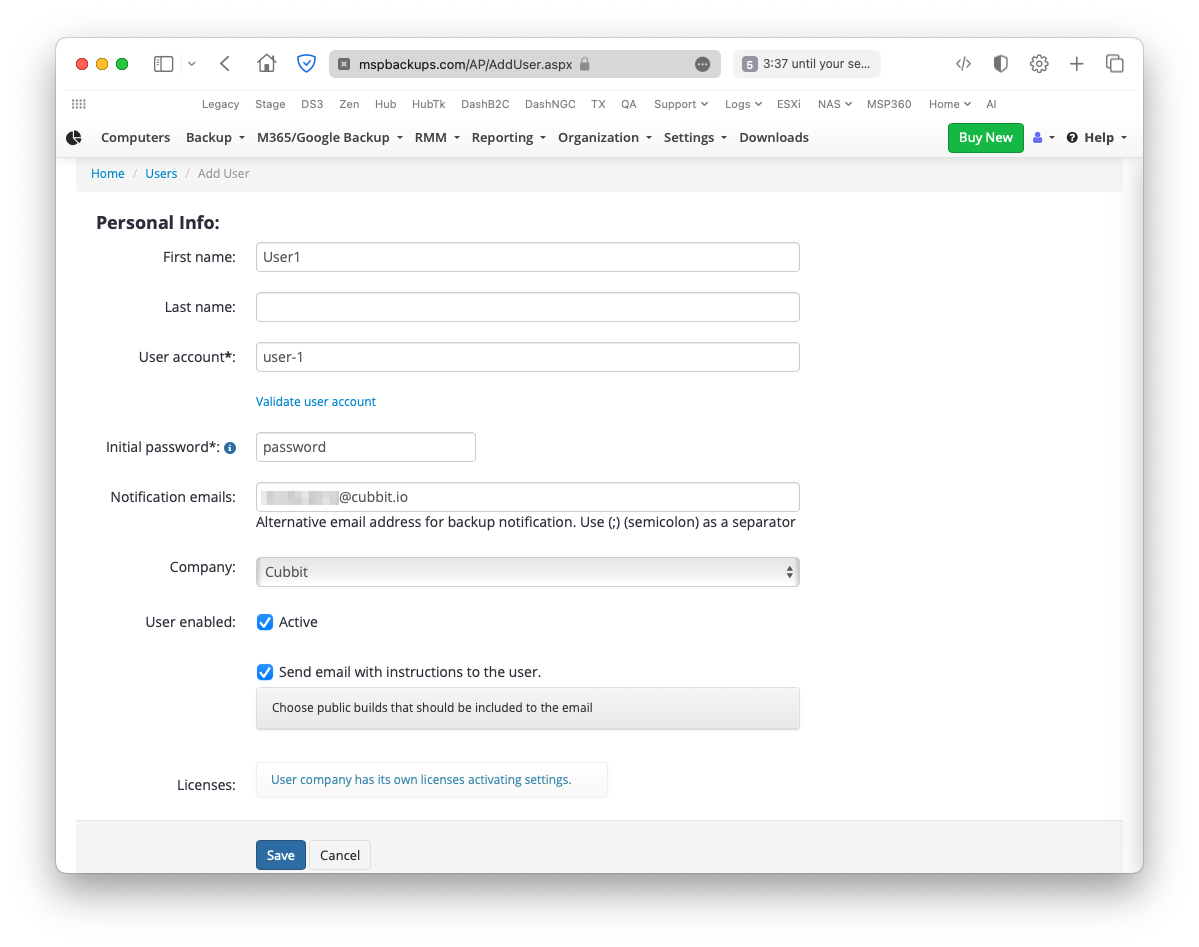
To do so, from the top menu, go to Organizations, Users and click the Create User button. While creating the user, assign it to the same company that was assigned to the storage account.
After doing so, go to Computers, click the Download Build button, and download the edition you need (in this example Backup Virtual Machine).
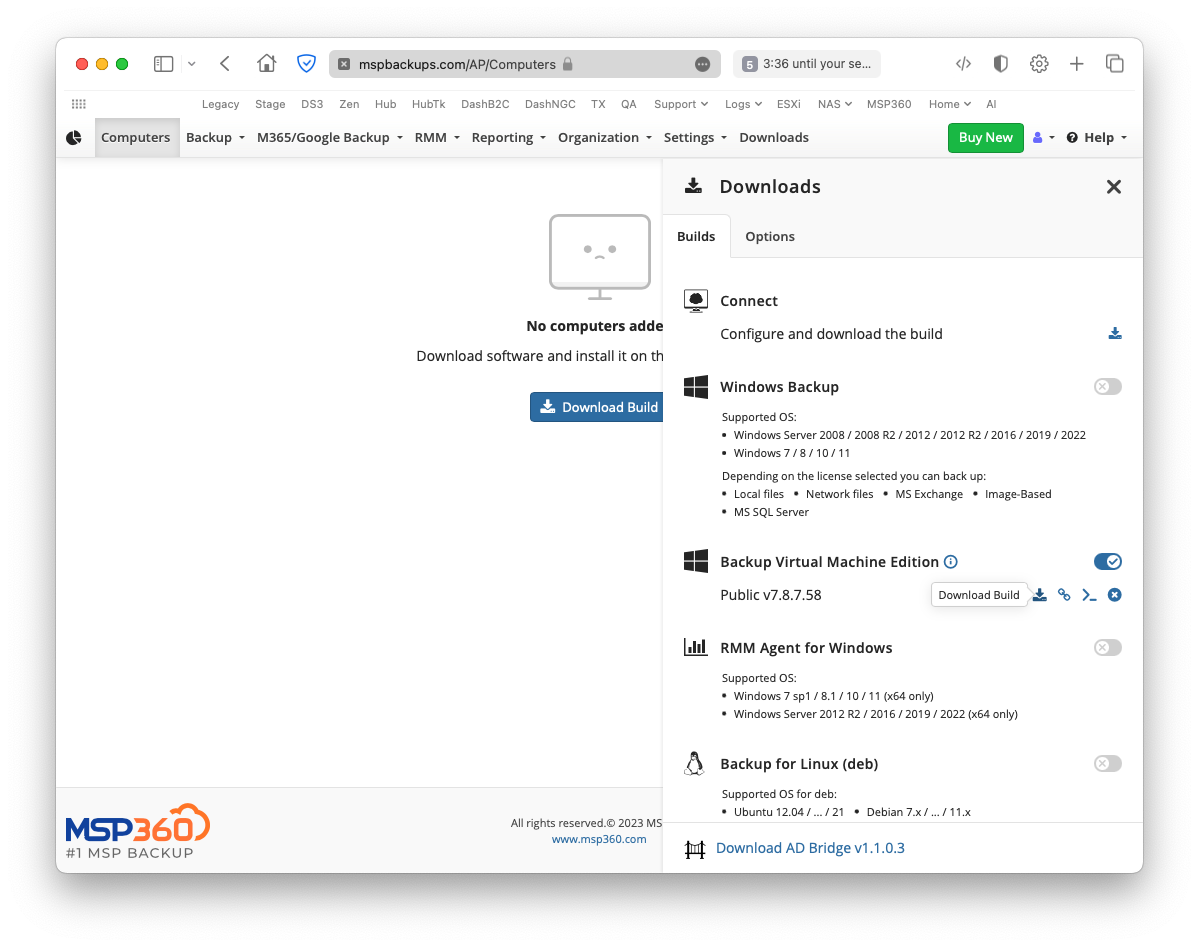
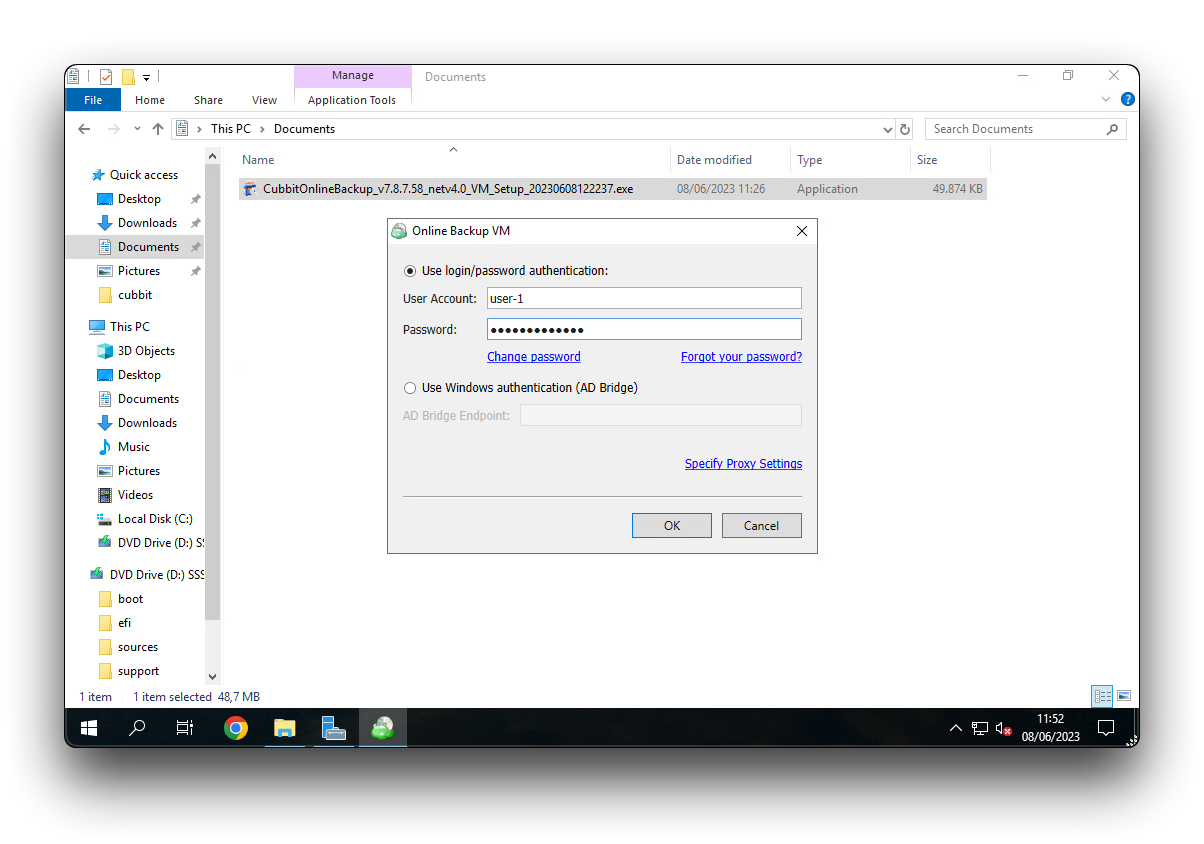
After the download is complete, move the executable to the virtual machine, install it, and sign in with the user created earlier.
Backup
After the program has been successfully installed the virtual machine will show up under Backups and Computers.
From here, click on the computer's name, go to Backup Plans, click Add New Plan and select the desired option.
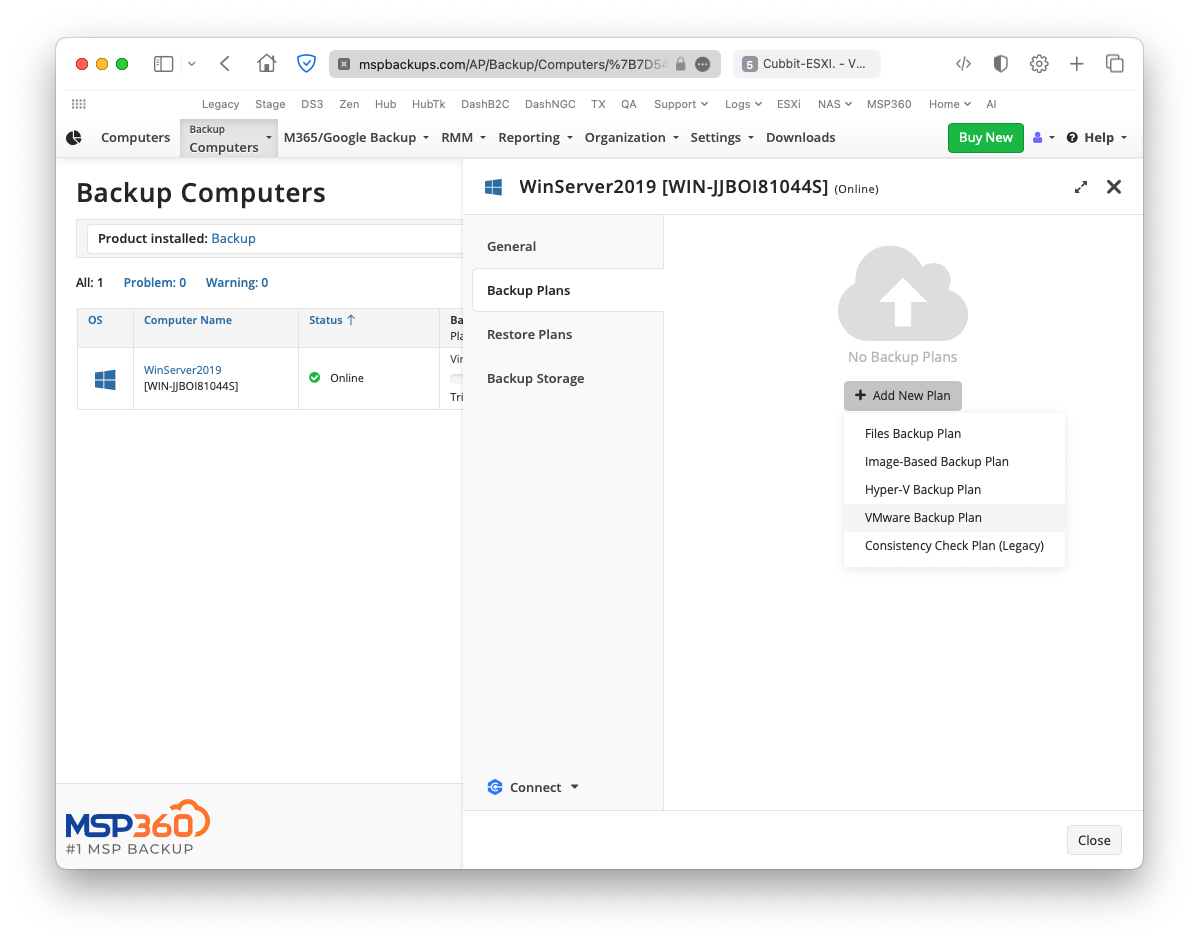
Then continue the configuration by selecting the preferred Schedule options and the list of virtual machines to backup.
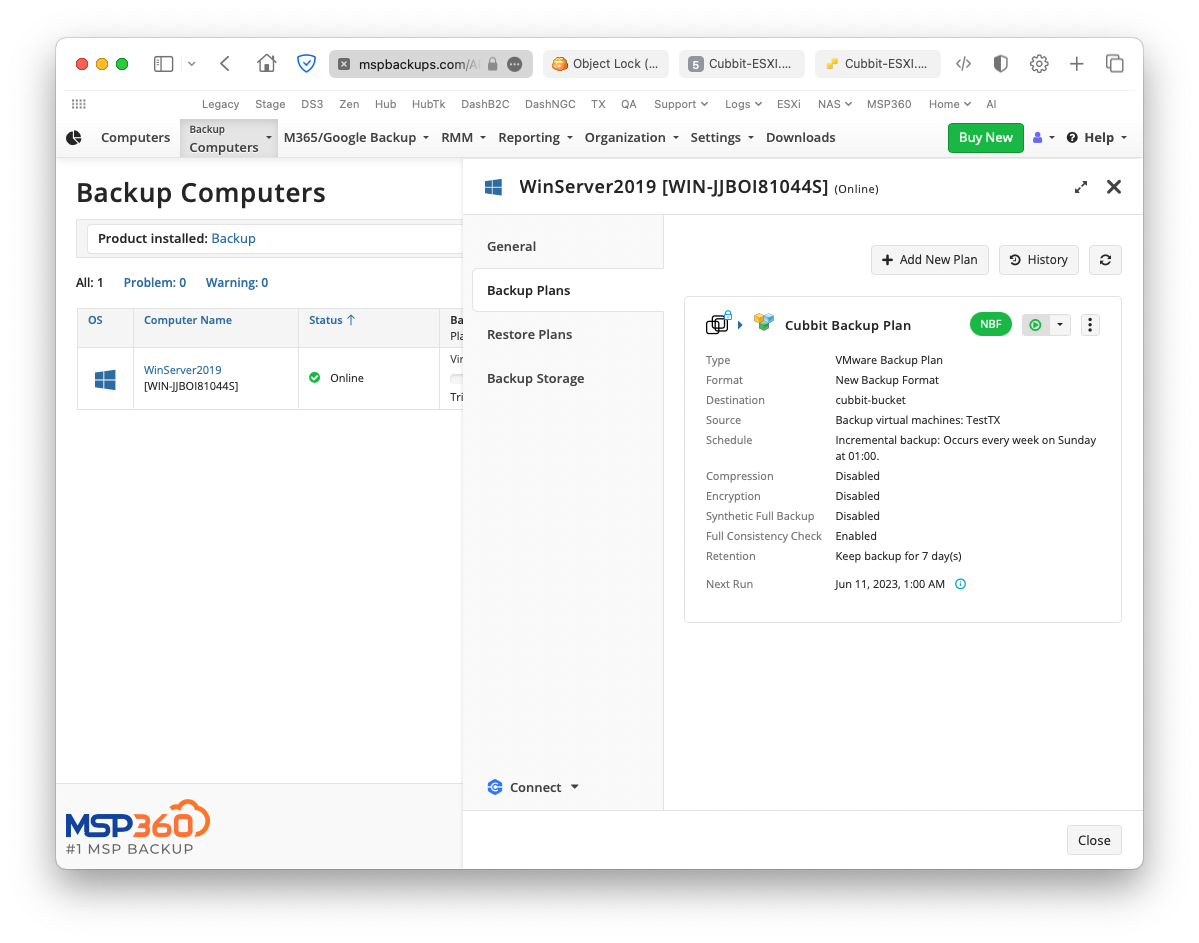
Finally, to start the backup job click the play button inside Backup Plans.
Restore
On the other hand, to create and start a restore job it's necessary to use the software installed on the virtual machine because the online dashboard doesn't support the restore of the New Backup Format (it can be identified by the green NBF tag next to the backup button).
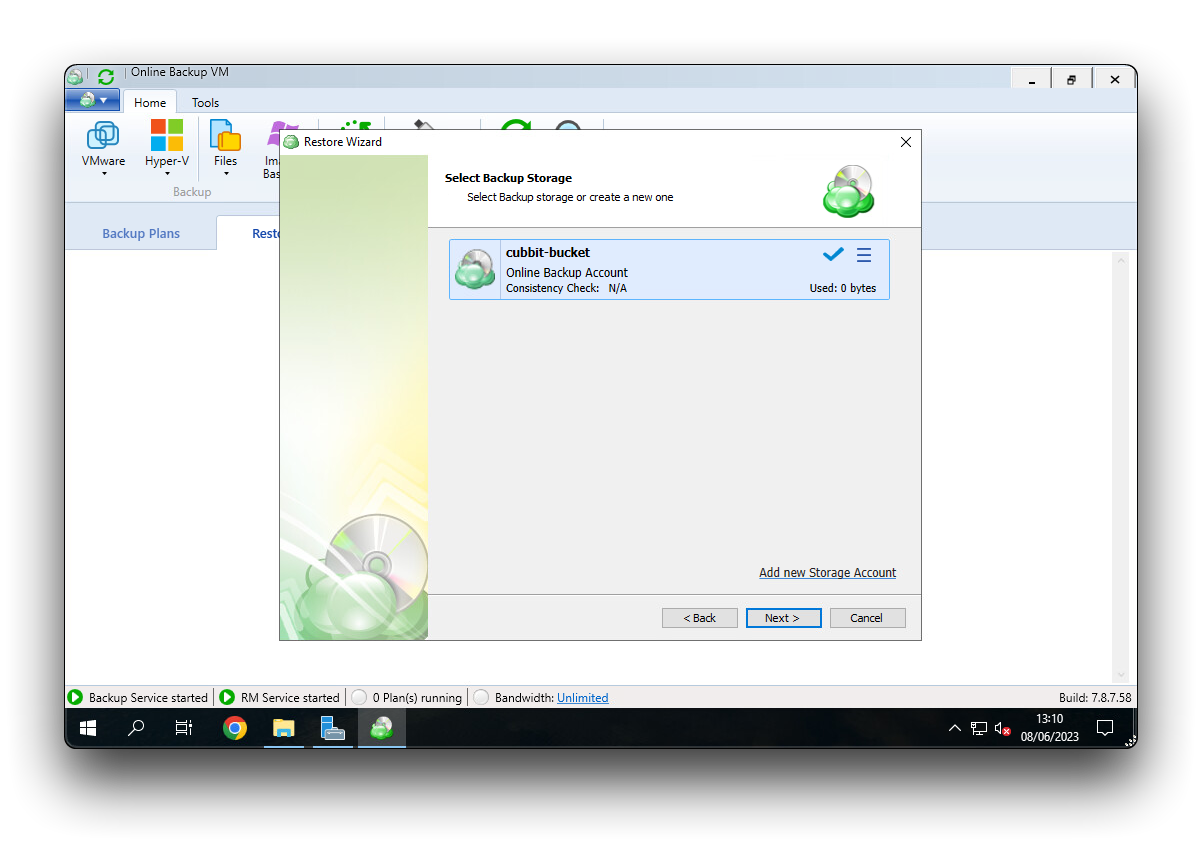
After opening the program, go to Restore Plans and click Restore.
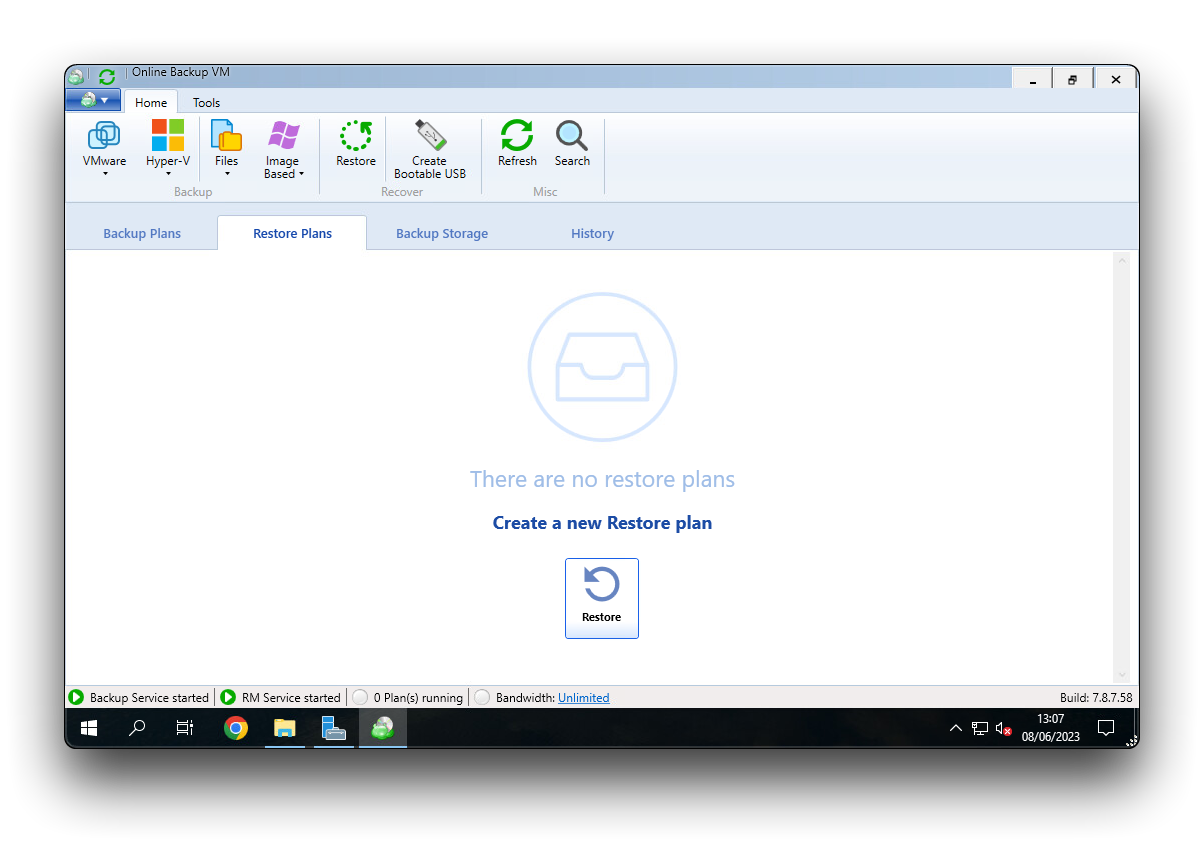
From the Restore Wizard follow the guided steps and select the Cubbit storage account, computer in use, backup plan, and finally the desired restore point as well as the VM to restore and its destination.
For more information on using MSP360 please visit the official documentation.