Swarms quickstart
Create your first Swarm
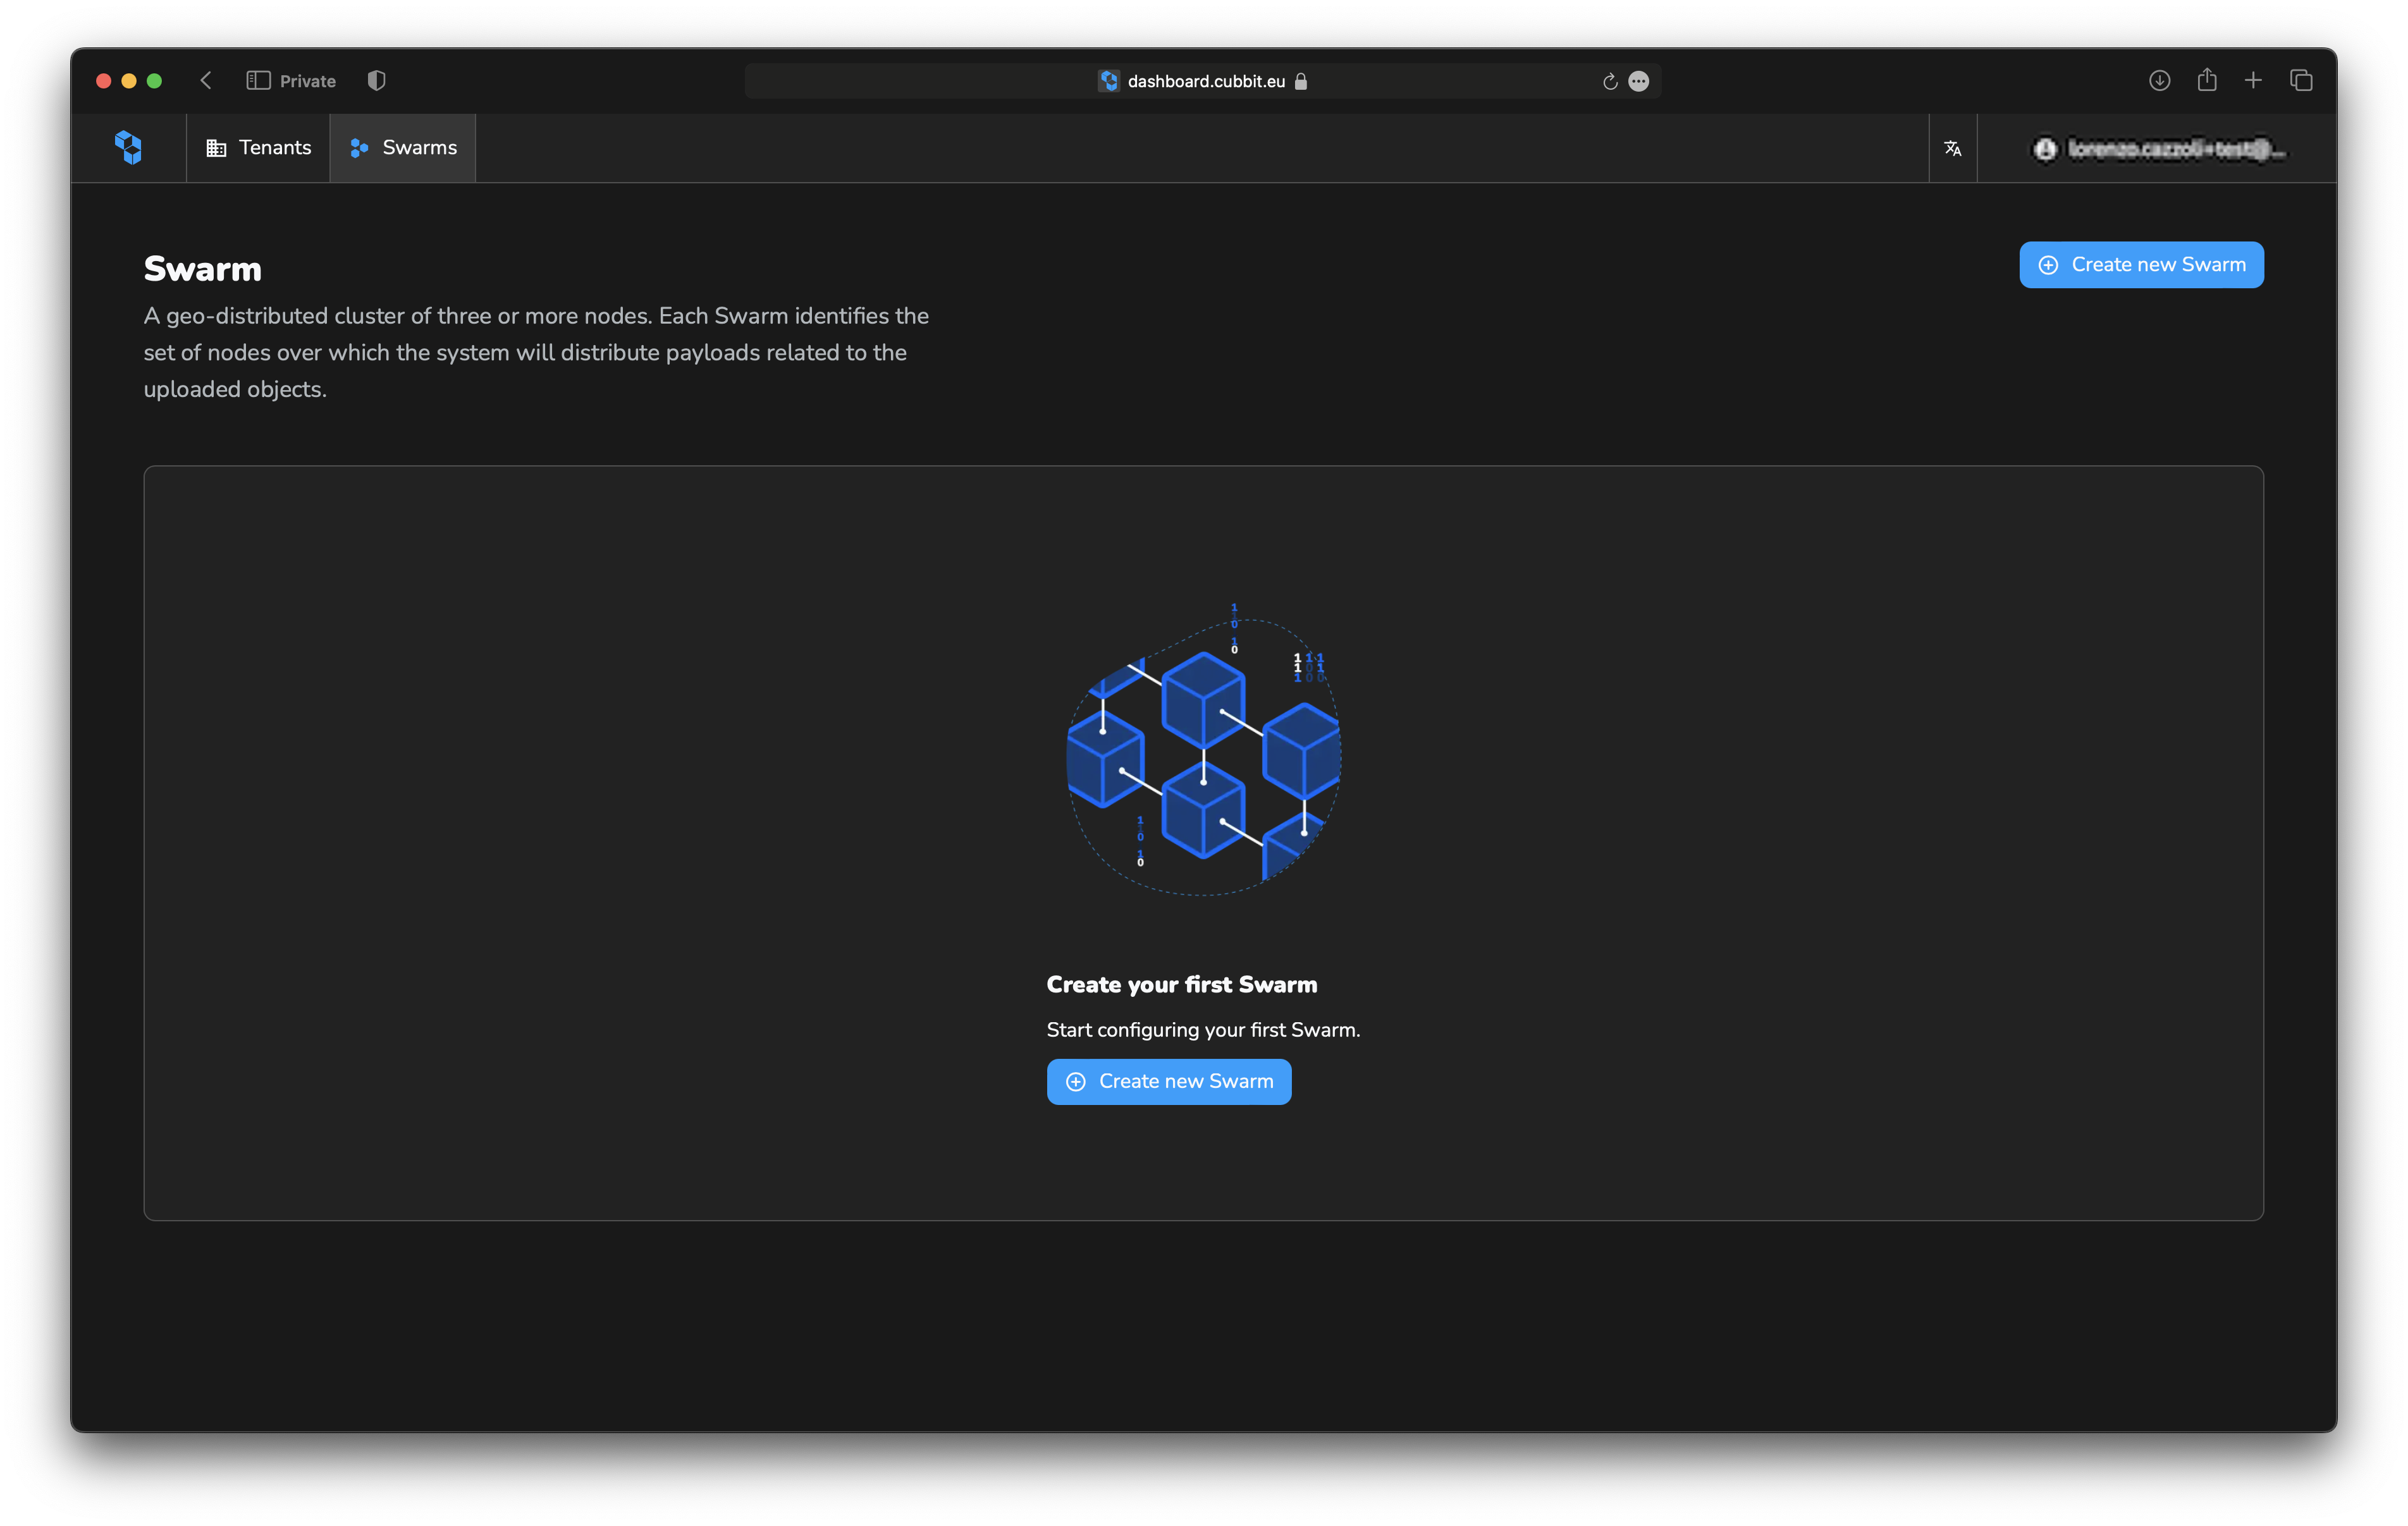
Starting from the Swarm list click one of the Create new Swarm button to open the creation form.
Fill the form with the required information about the selected name and description then move forward to complete the swarm configuration. The next step is the Nexus configuration.
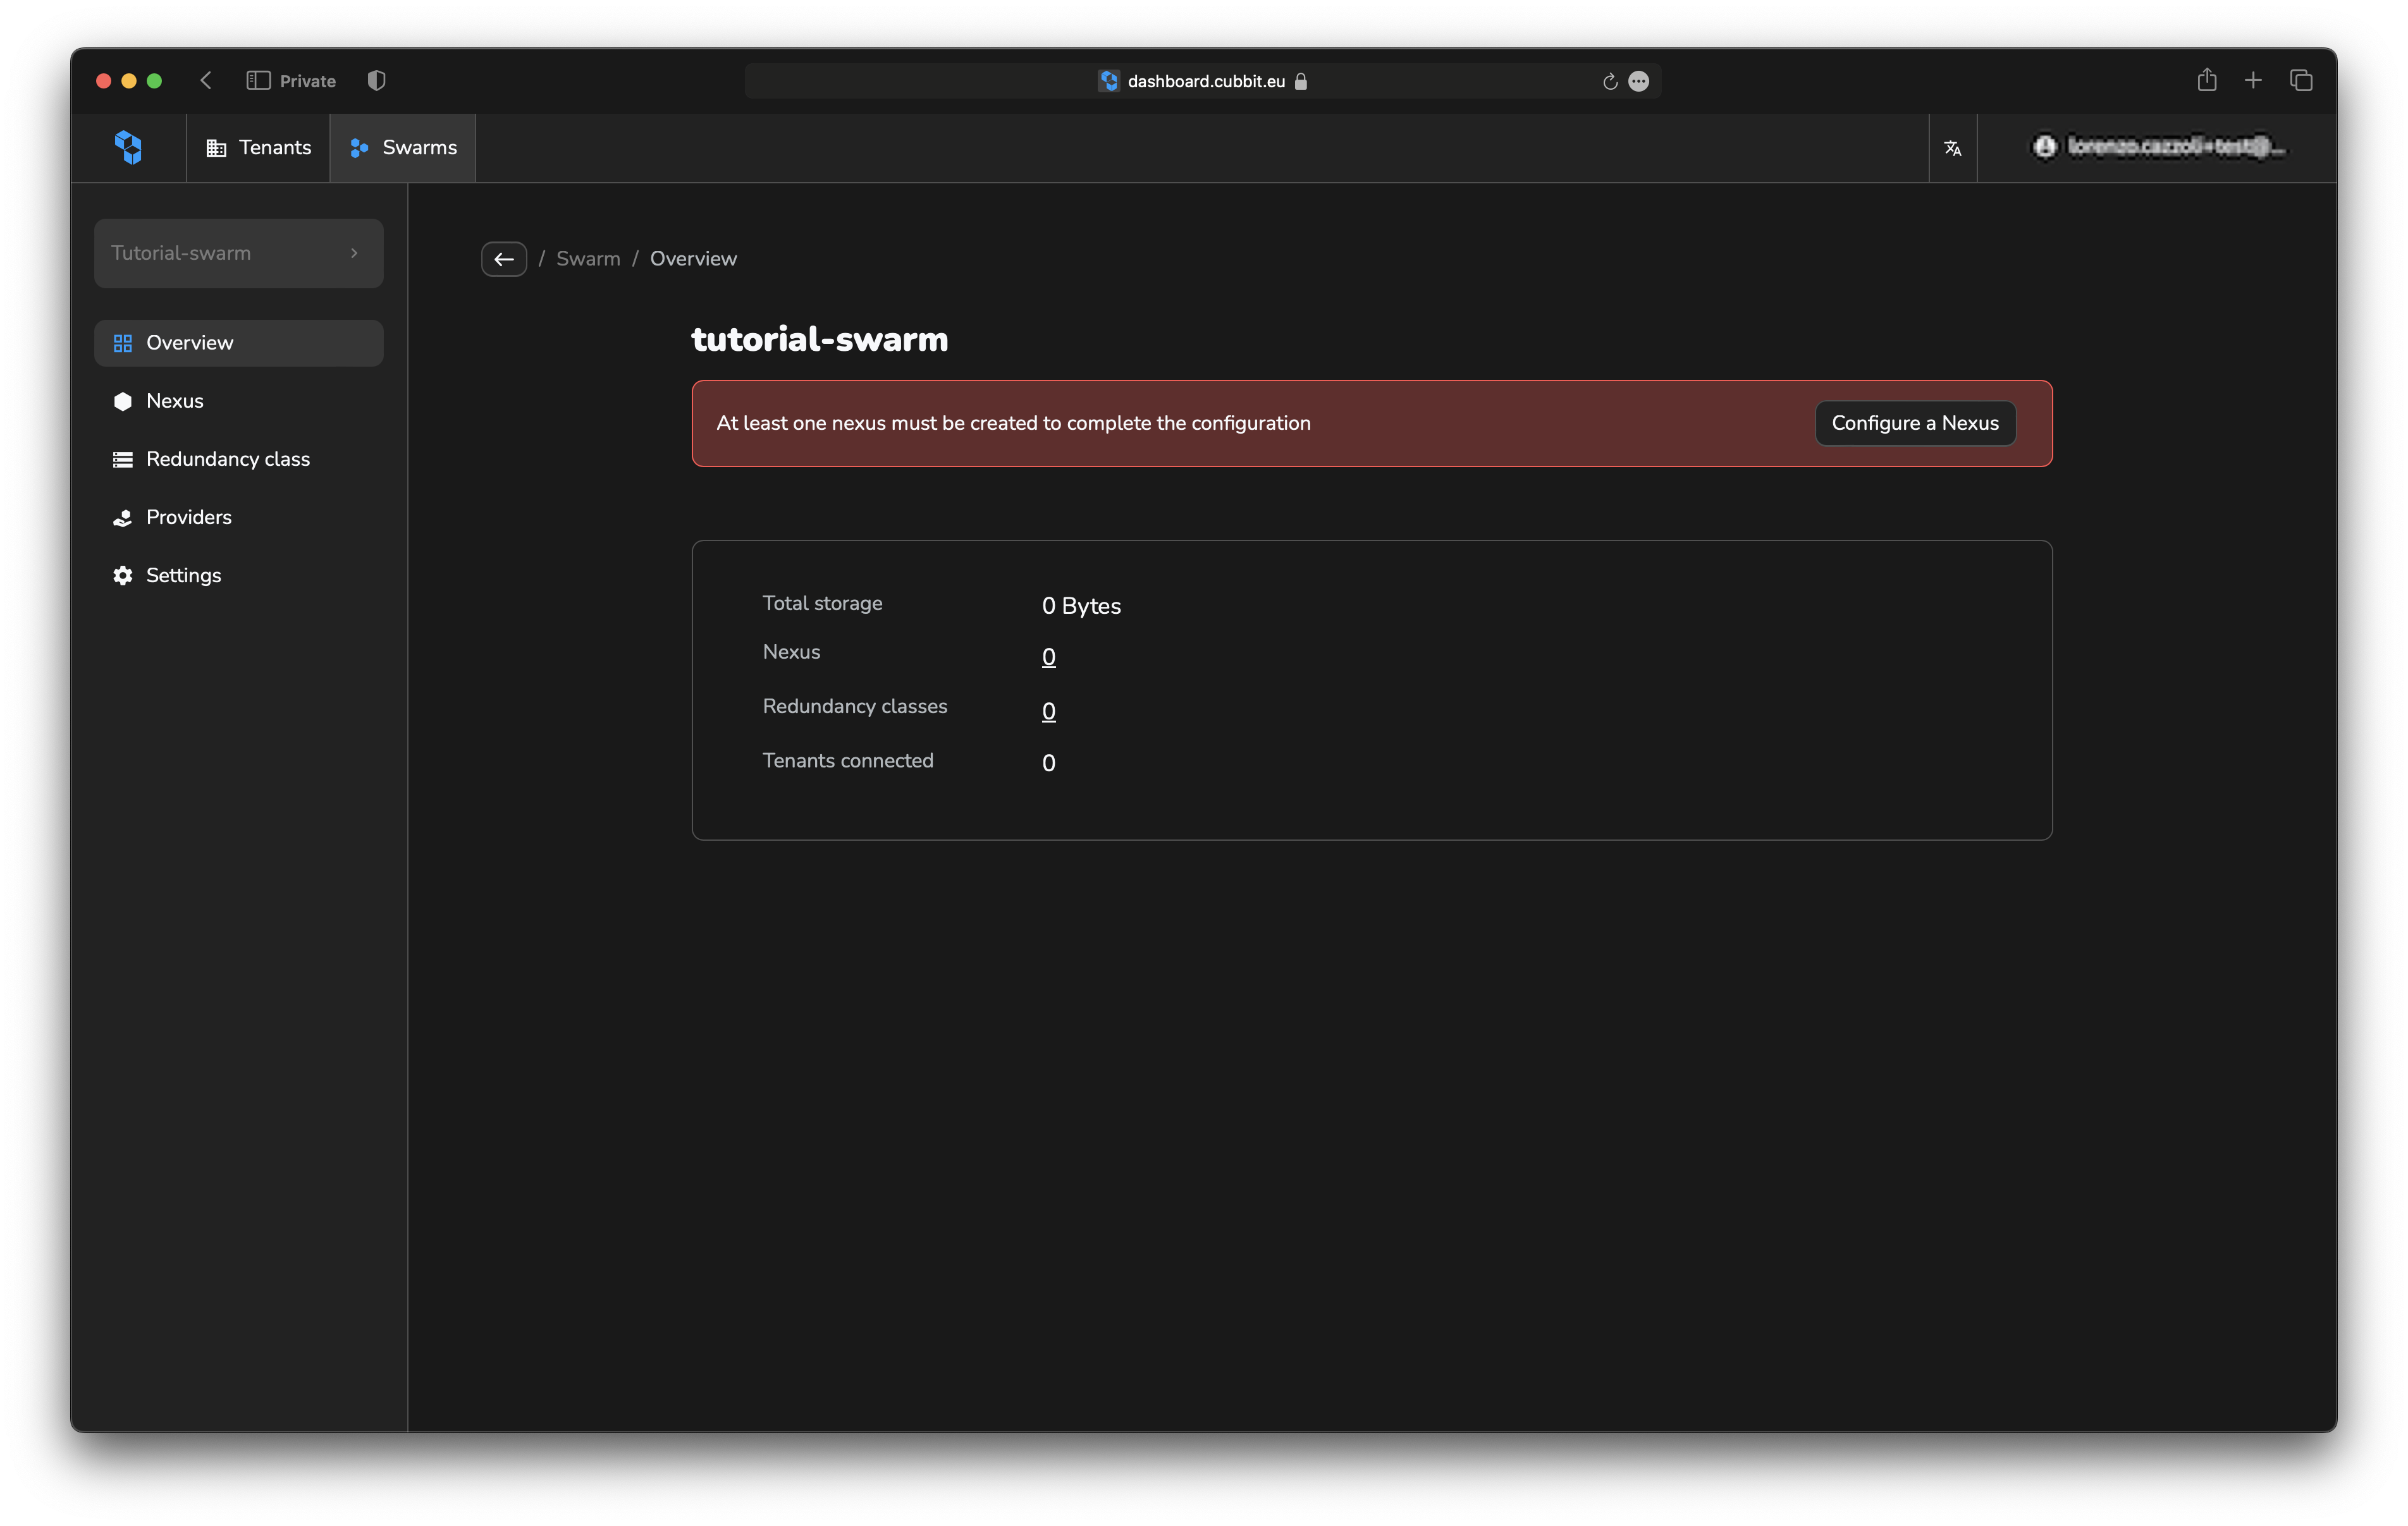
Create your first Nexus
Ensure you are inside the Swarm you want and select Nexus in the sidebar. We can consider Nexus as an equivalent of an availability zone. We also suggest including in the same Nexus server with the same topology and performances. That will simplify the creation of the Redundancy classes in the next step.
Creating a Nexus is basic and can be performed by clicking the button Create new Nexus from the Nexus List. A few details are required:
- Name
- Description
- Location
- Provider
The provider is the user in charge of the physical machines in the Nexus, who will be notified if issues are detected. You can use the default one (Swarm owner email) or configure a custom provider in the Provider section.
Location is currently a simple label, but in the future will be used as the position of the Nexus, and all the servers into it, to better evaluate data protection strategy.
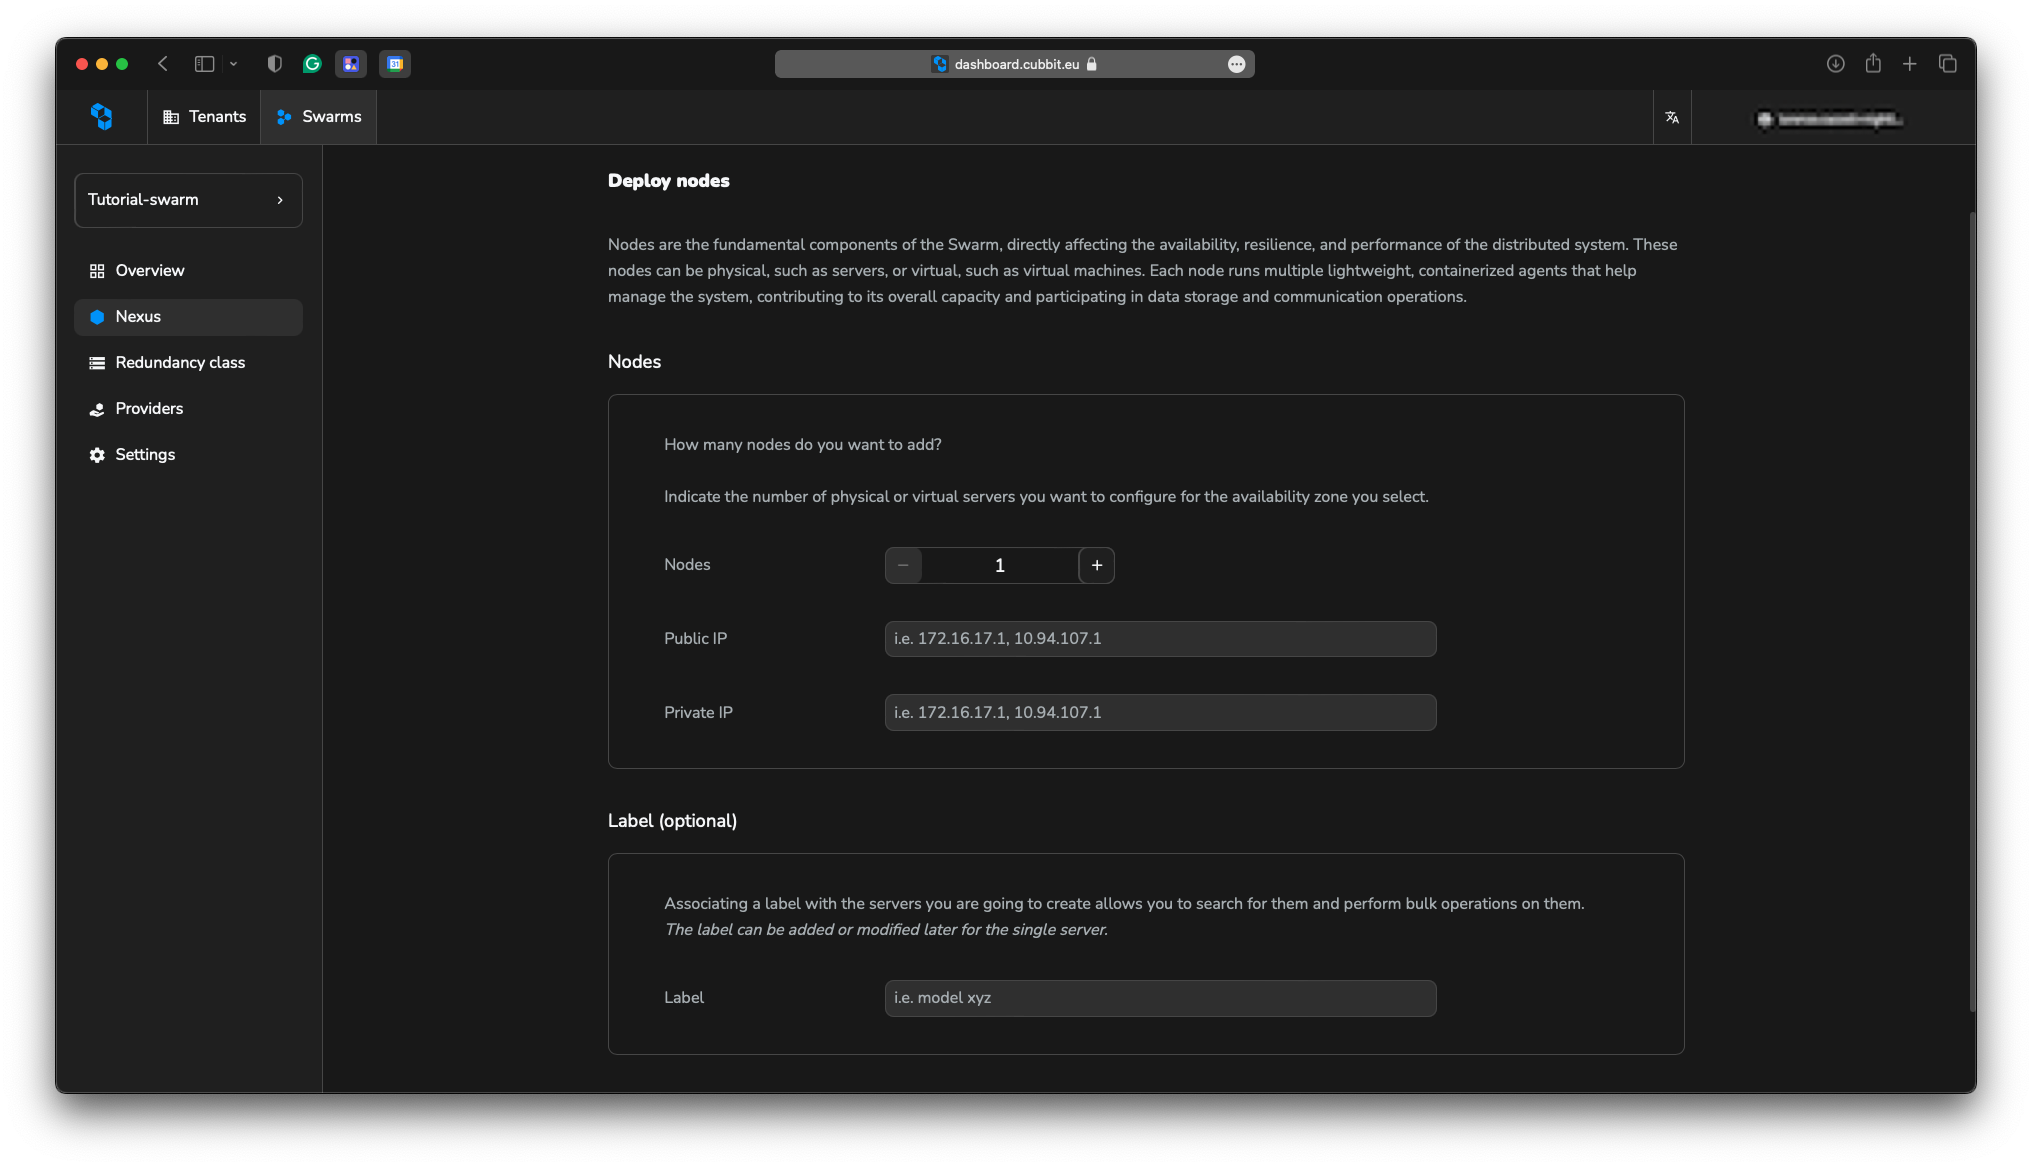
Once you have created your Nexus, it is now time to configure the servers inside it. If not already visible, open the node list by clicking over the Nexus.
It is recommended that you group the servers by topology and configure them in bulk. If not possible, you can configure each one individually using the same flow. In the current implementation, every Node represents a server, and each agent represents a disk.
Press Deploy nodes to start the bulk procedure. That flow is composed of 2 steps. In the first one, we insert information about the servers we will configure. For that step, the following information is required:
- Public IP address
- Private IP address (optional)
If the servers are not sharing the same disk number, configure them at different times.
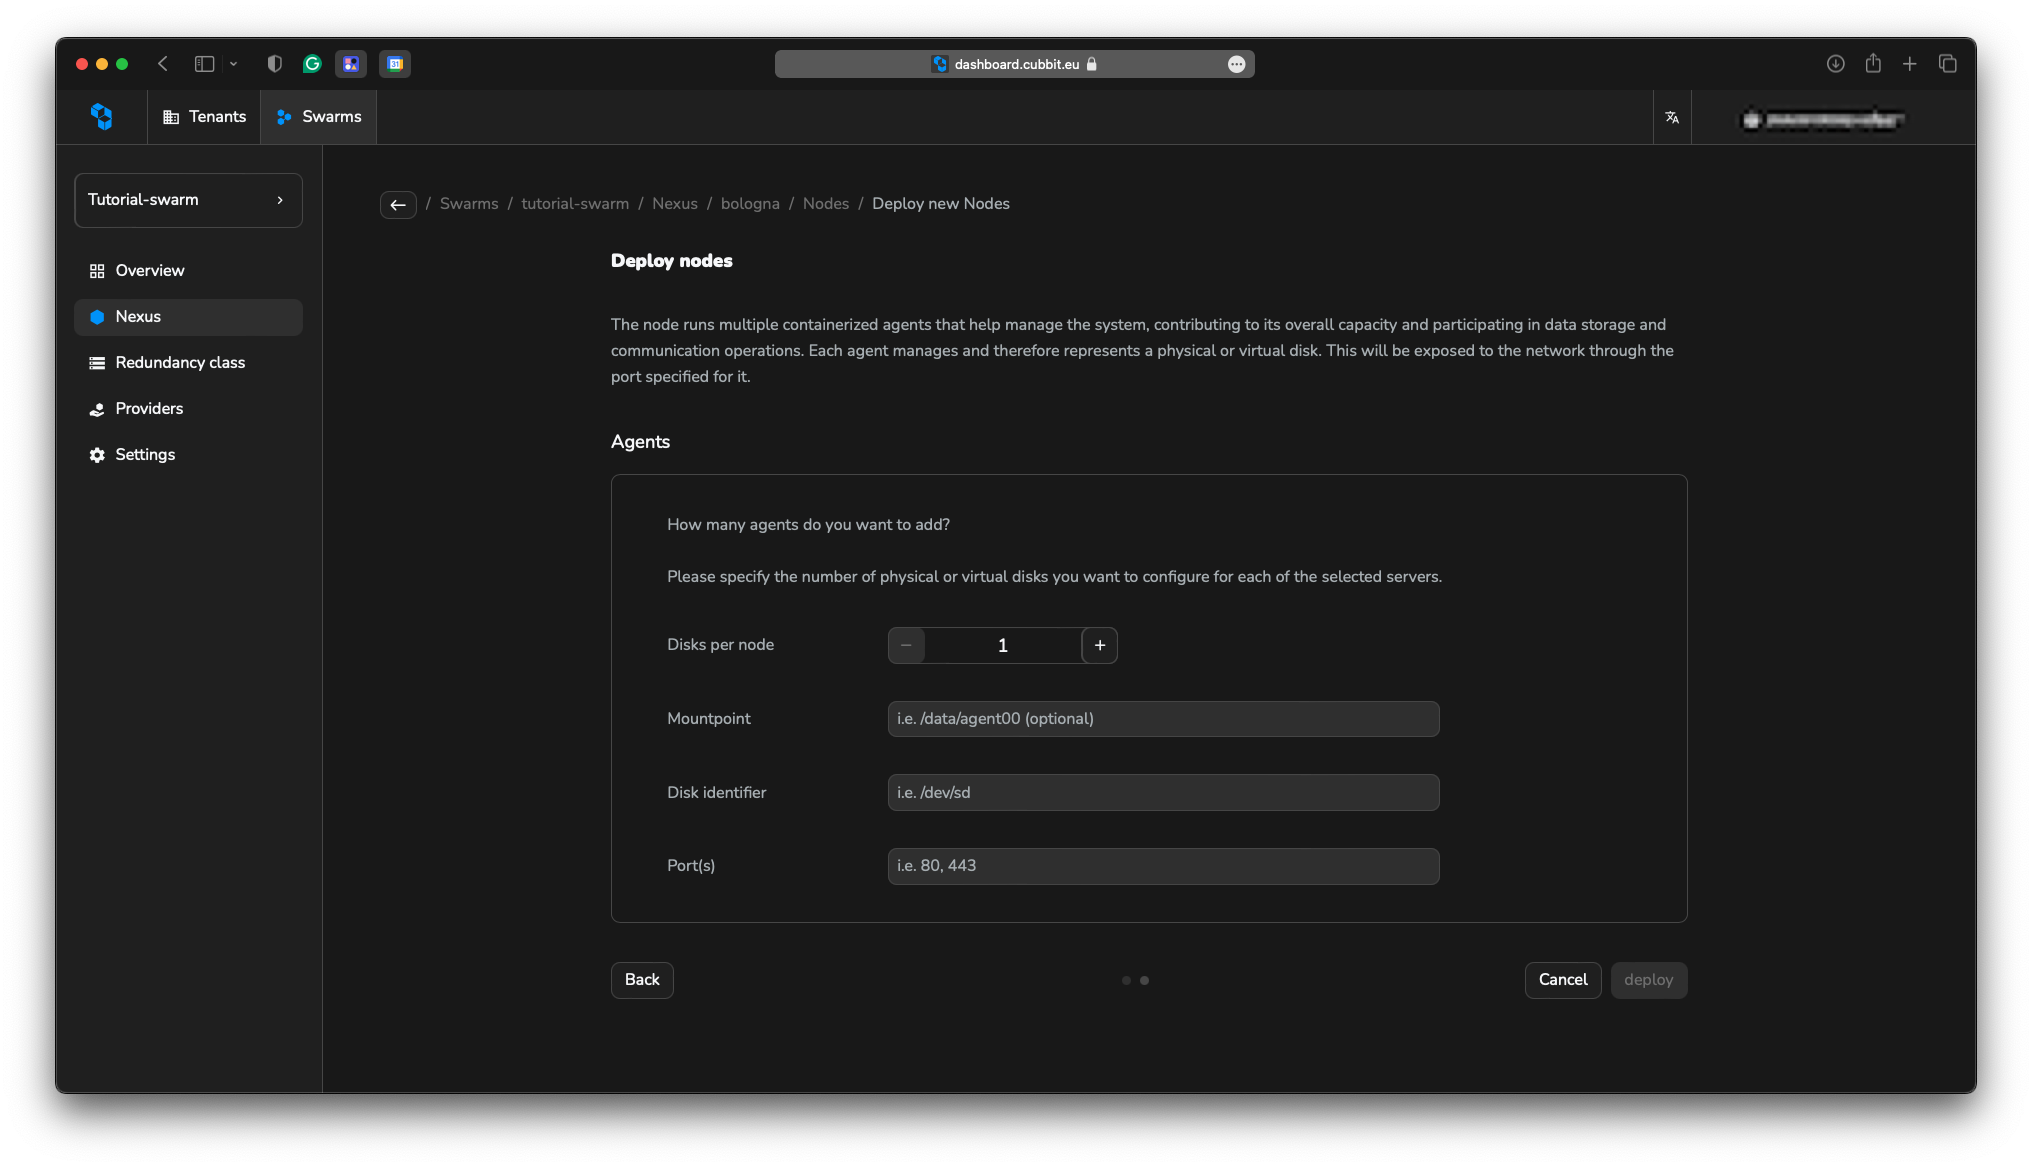
In the second step we need to specify the disk configuration of each server. We suppose all the server are sharing the same topology and the same disk configuration. If not, we suggest to configure them one by one. We are gonna require the following information:
- disk number
- disk prefix
- designed port
The final disks result are generated starting from the disk prefix and the disk number. The system will automatically generate the disks using an incremental pattern. The same approach is used for the ports. The system will automatically generate the ports starting from the first one and incrementing it by 1 for each disk.
If the automatic generation does not match the reality, you can move forward and manually edit the values in agent panel.
The inputs accepts the following option:
- A list of comma-separated values
- The first value. In this case, all the other values will be sequentially generated from the first one
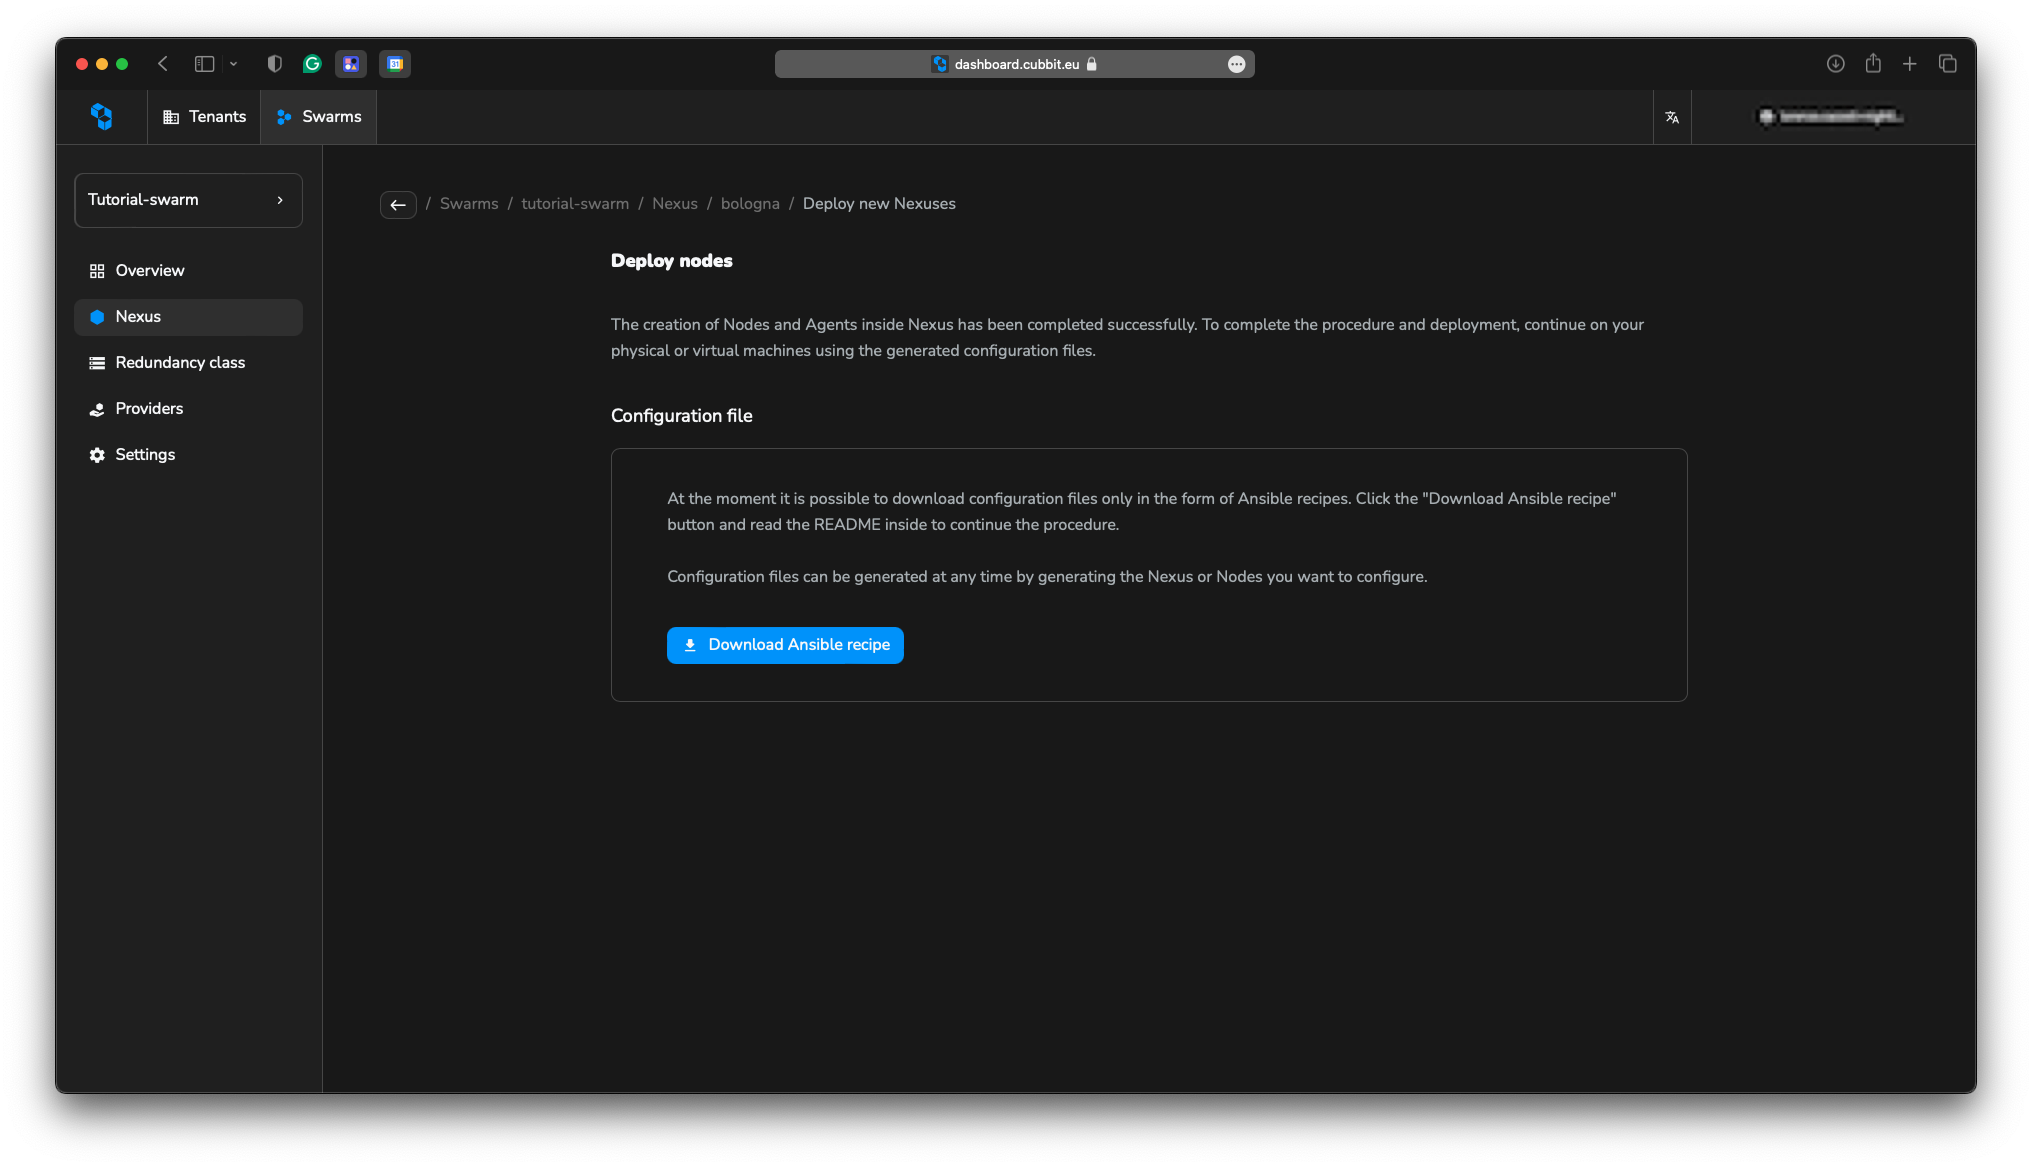
Once all the steps have been completed, the recap automatically downloads and shows a preview of the generated tar file containing all the Ansible recipes. You can regenerate it for the selected resources at any time by clicking the Deploy button in the resource list.
The Ansible recipes are automatically generated and can be used to configure the servers.
If you are new about Ansible check these links:
The readme file inside the tar file contains all the information you need to run the Ansible recipes.
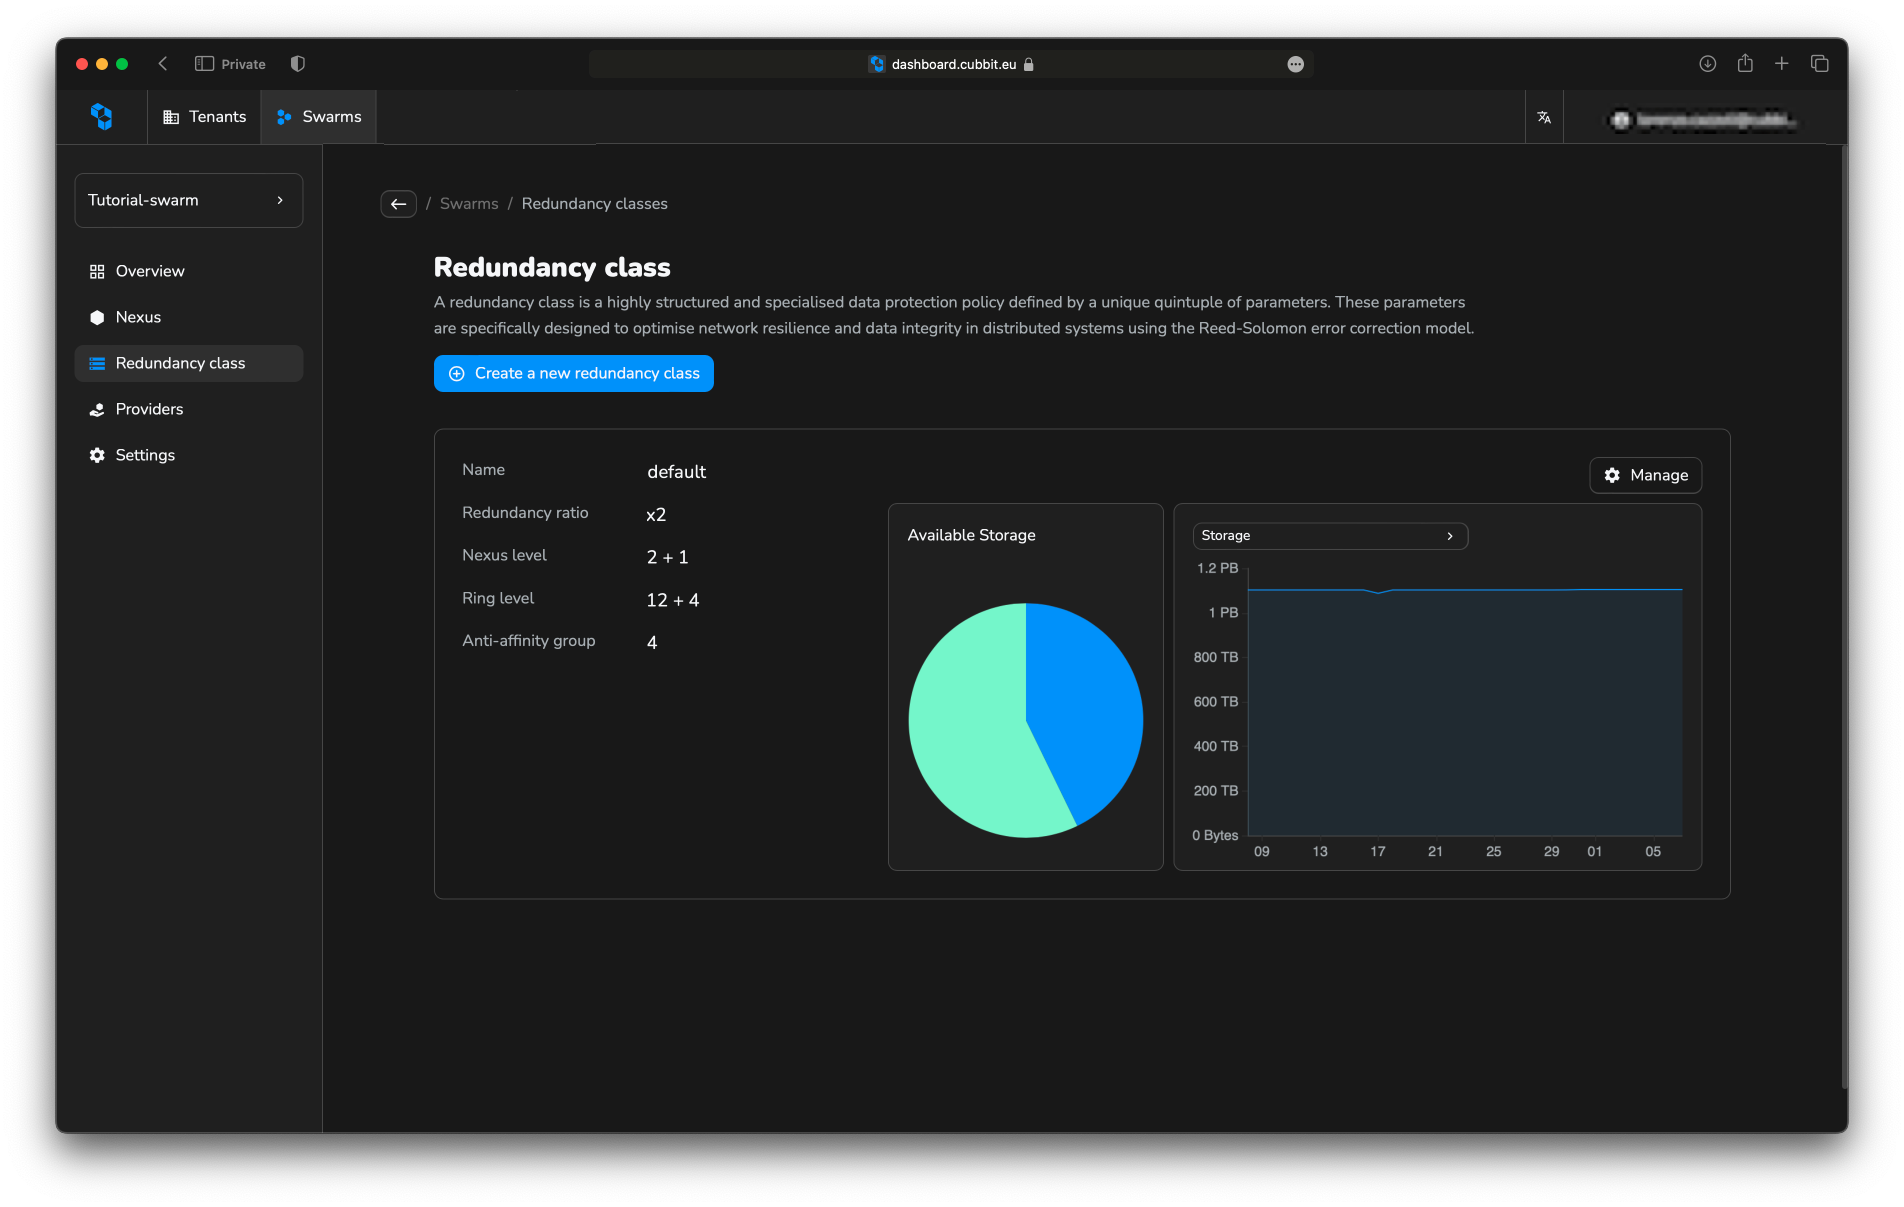
Create your first Redundancy Class
It's not possible to create a Redundancy Class if at least one Nexus and one Node inside it have not been fully configured. Return to the steps before if you have not completed them.
In the sidebar of the Swarm section, click Redundancy Class to open the dedicated section. Then, in the list, select the dedicated button to start the creation flow.
The creation process consists of a single step, focusing solely on defining the RC details. The system will automatically handle the Rings creation.
To optimize RC, review how Rings function on the concepts page.
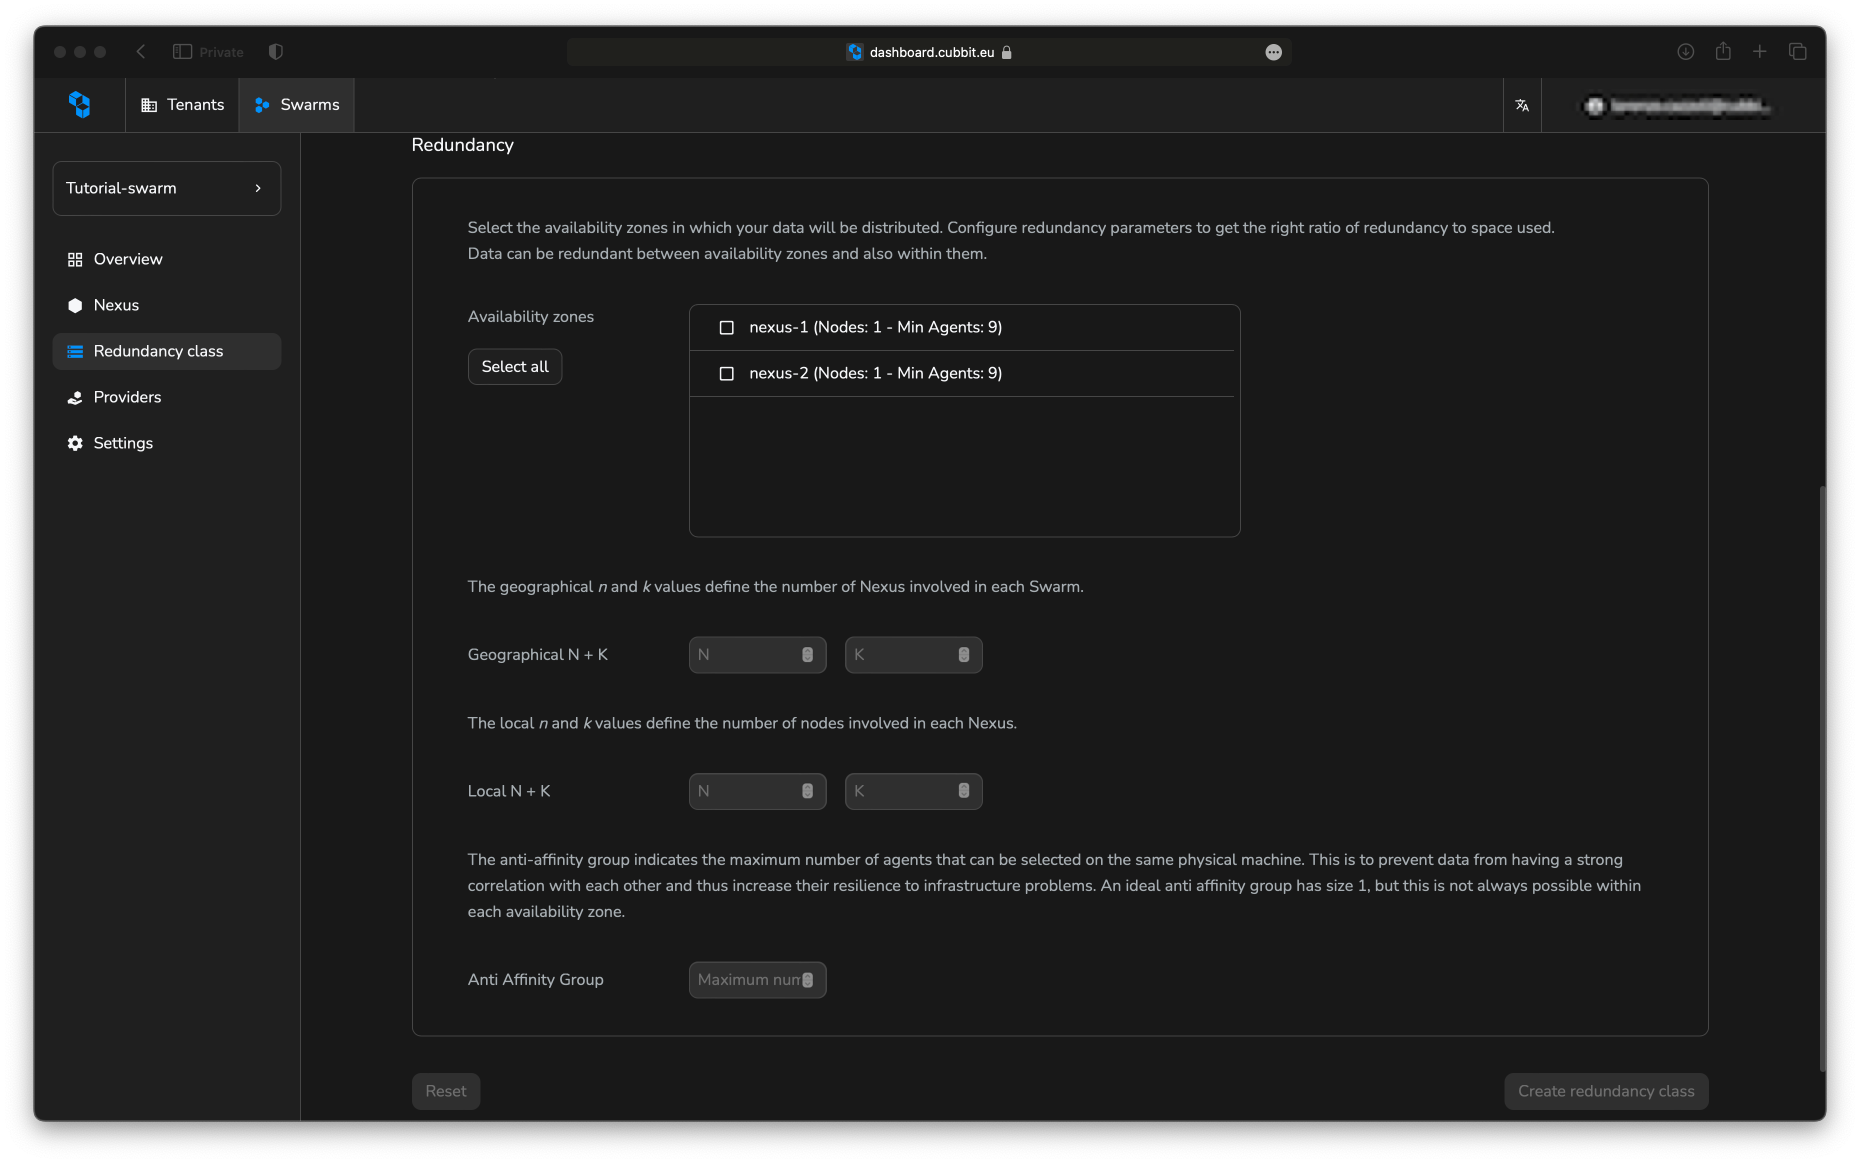
To create an RC we need:
- Name - RC name
- Availability Zones – The designated Nexuses where the Rings will be created.
- Geographical N+K - Number of availability zones (Nexus) used by the RC. Data are available for download until at least N availability zones are reachable
- Local N+K - Number of disks used for every Nexus. Data can be retrieved from the availability zone until at least N disks are reachable
- Anti Affinity Group (AAG) - It represents the number of disks we can use on the same machine. Machines are identified by the Server ID. The more the machines are paired, the more the RC is vulnerable to the issue of the single machine.
The size overhead introduced by the redundancy class is called ratio and is equal to .
The Redundancy Class is directly tied to the chosen Nexus. To apply the same configuration to a different Nexus, you must create a new RC with identical parameters.
Once confirmed, the RC is created along with the maximum possible number of Rings. It is now ready to be connected and used by a Tenant.