Cloudflare
Intro
Cloudflare è una rete di distribuzione di contenuti (CDN) e una piattaforma di sicurezza che protegge e velocizza siti web, applicazioni e API. Agisce come un reverse proxy tra i visitatori e i siti web, filtrando il traffico dannoso, memorizzando nella cache i contenuti e ottimizzando le prestazioni. Questa guida è destinata agli utenti che utilizzano la CDN di Cloudflare e desiderano distribuire i dati archiviati in un bucket Cubbit attraverso l'infrastruttura globale di Cloudflare. Integrando Cubbit con Cloudflare, è possibile migliorare la disponibilità dei contenuti, ridurre la latenza e migliorare l'esperienza utente durante l'accesso ai file. Questa guida fornisce istruzioni dettagliate per garantire una distribuzione di contenuti senza interruzioni, offrendo sicurezza, ridondanza e scalabilità per diversi tipi di dati.
Prerequisiti
Per prima cosa, è necessario ottenere accesso alla Cubbit Web Console oppure https://console.[your-tenant].cubbit.eu. Si possono seguire queste istruzioni su come iniziare con un account Cubbit.
Installazione
Quindi, è necessario registrarsi ed eseguire il login sulla dashboard Cloudflare.
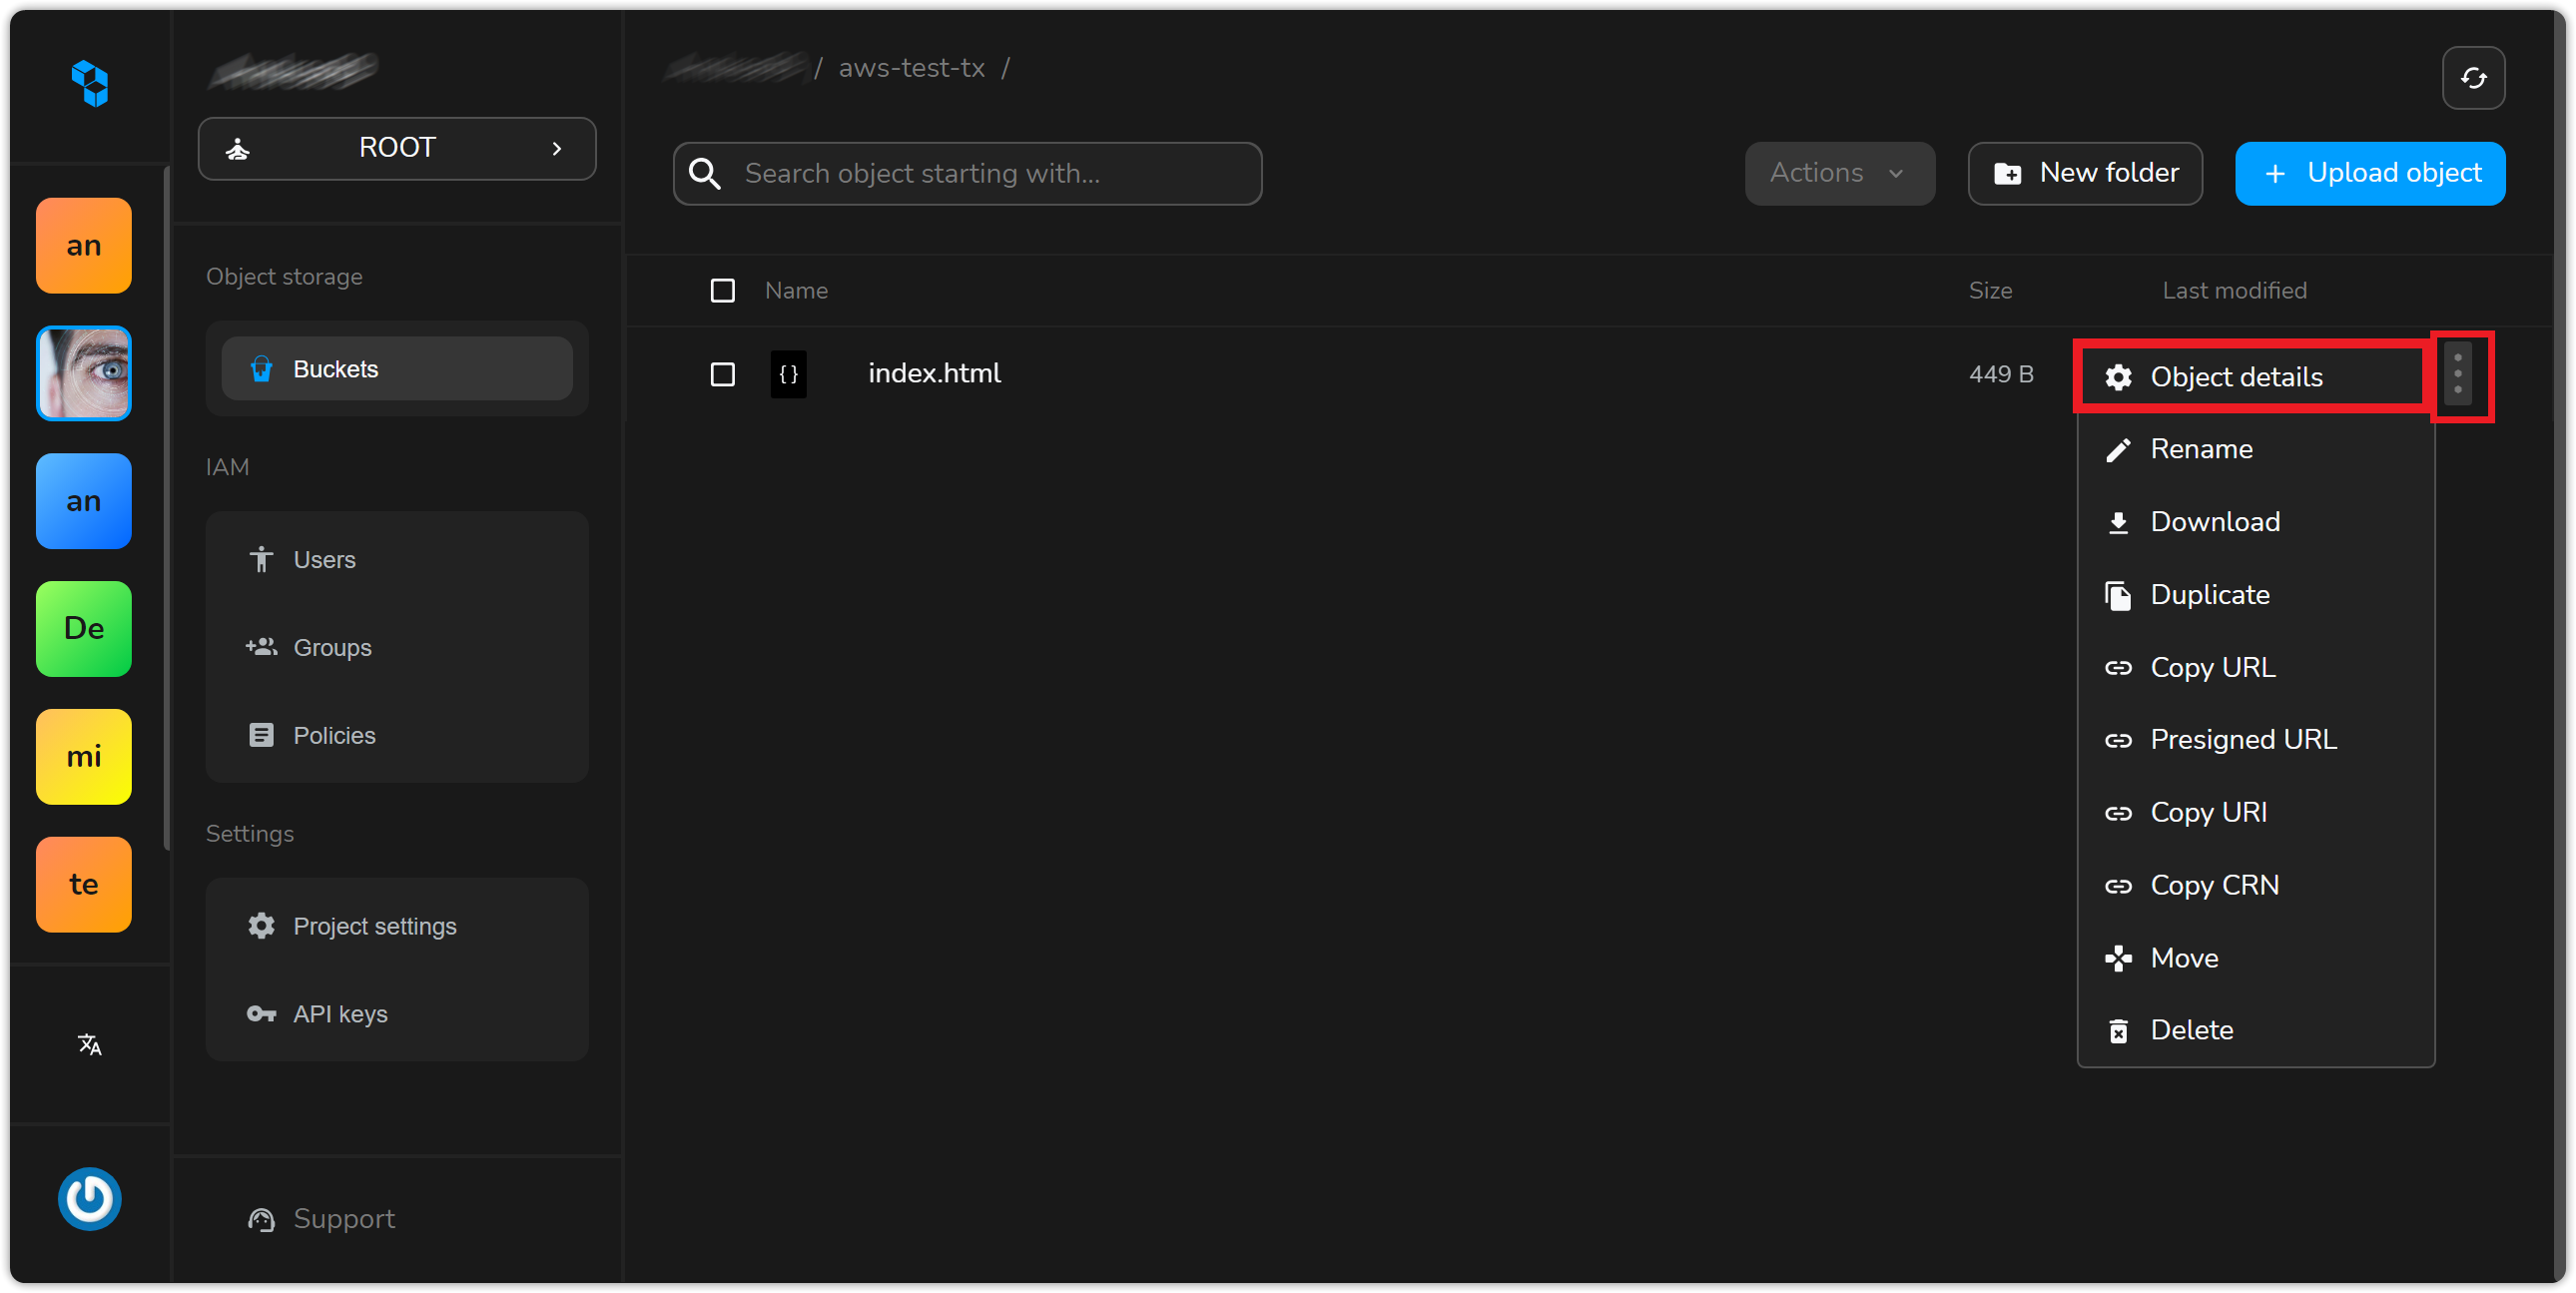
Cubbit permessi public read
Per accedere a un oggetto pubblicamente all'interno di un bucket S3, è necessario concedere i permessi di lettura pubblica all'oggetto. Gli screenshot seguenti illustrano come assegnare questo permesso all'oggetto individuale dalla console di Cubbit. Seleziona "Object details" facendo clic sui tre punti sul lato destro dell'oggetto come mostrato di seguito
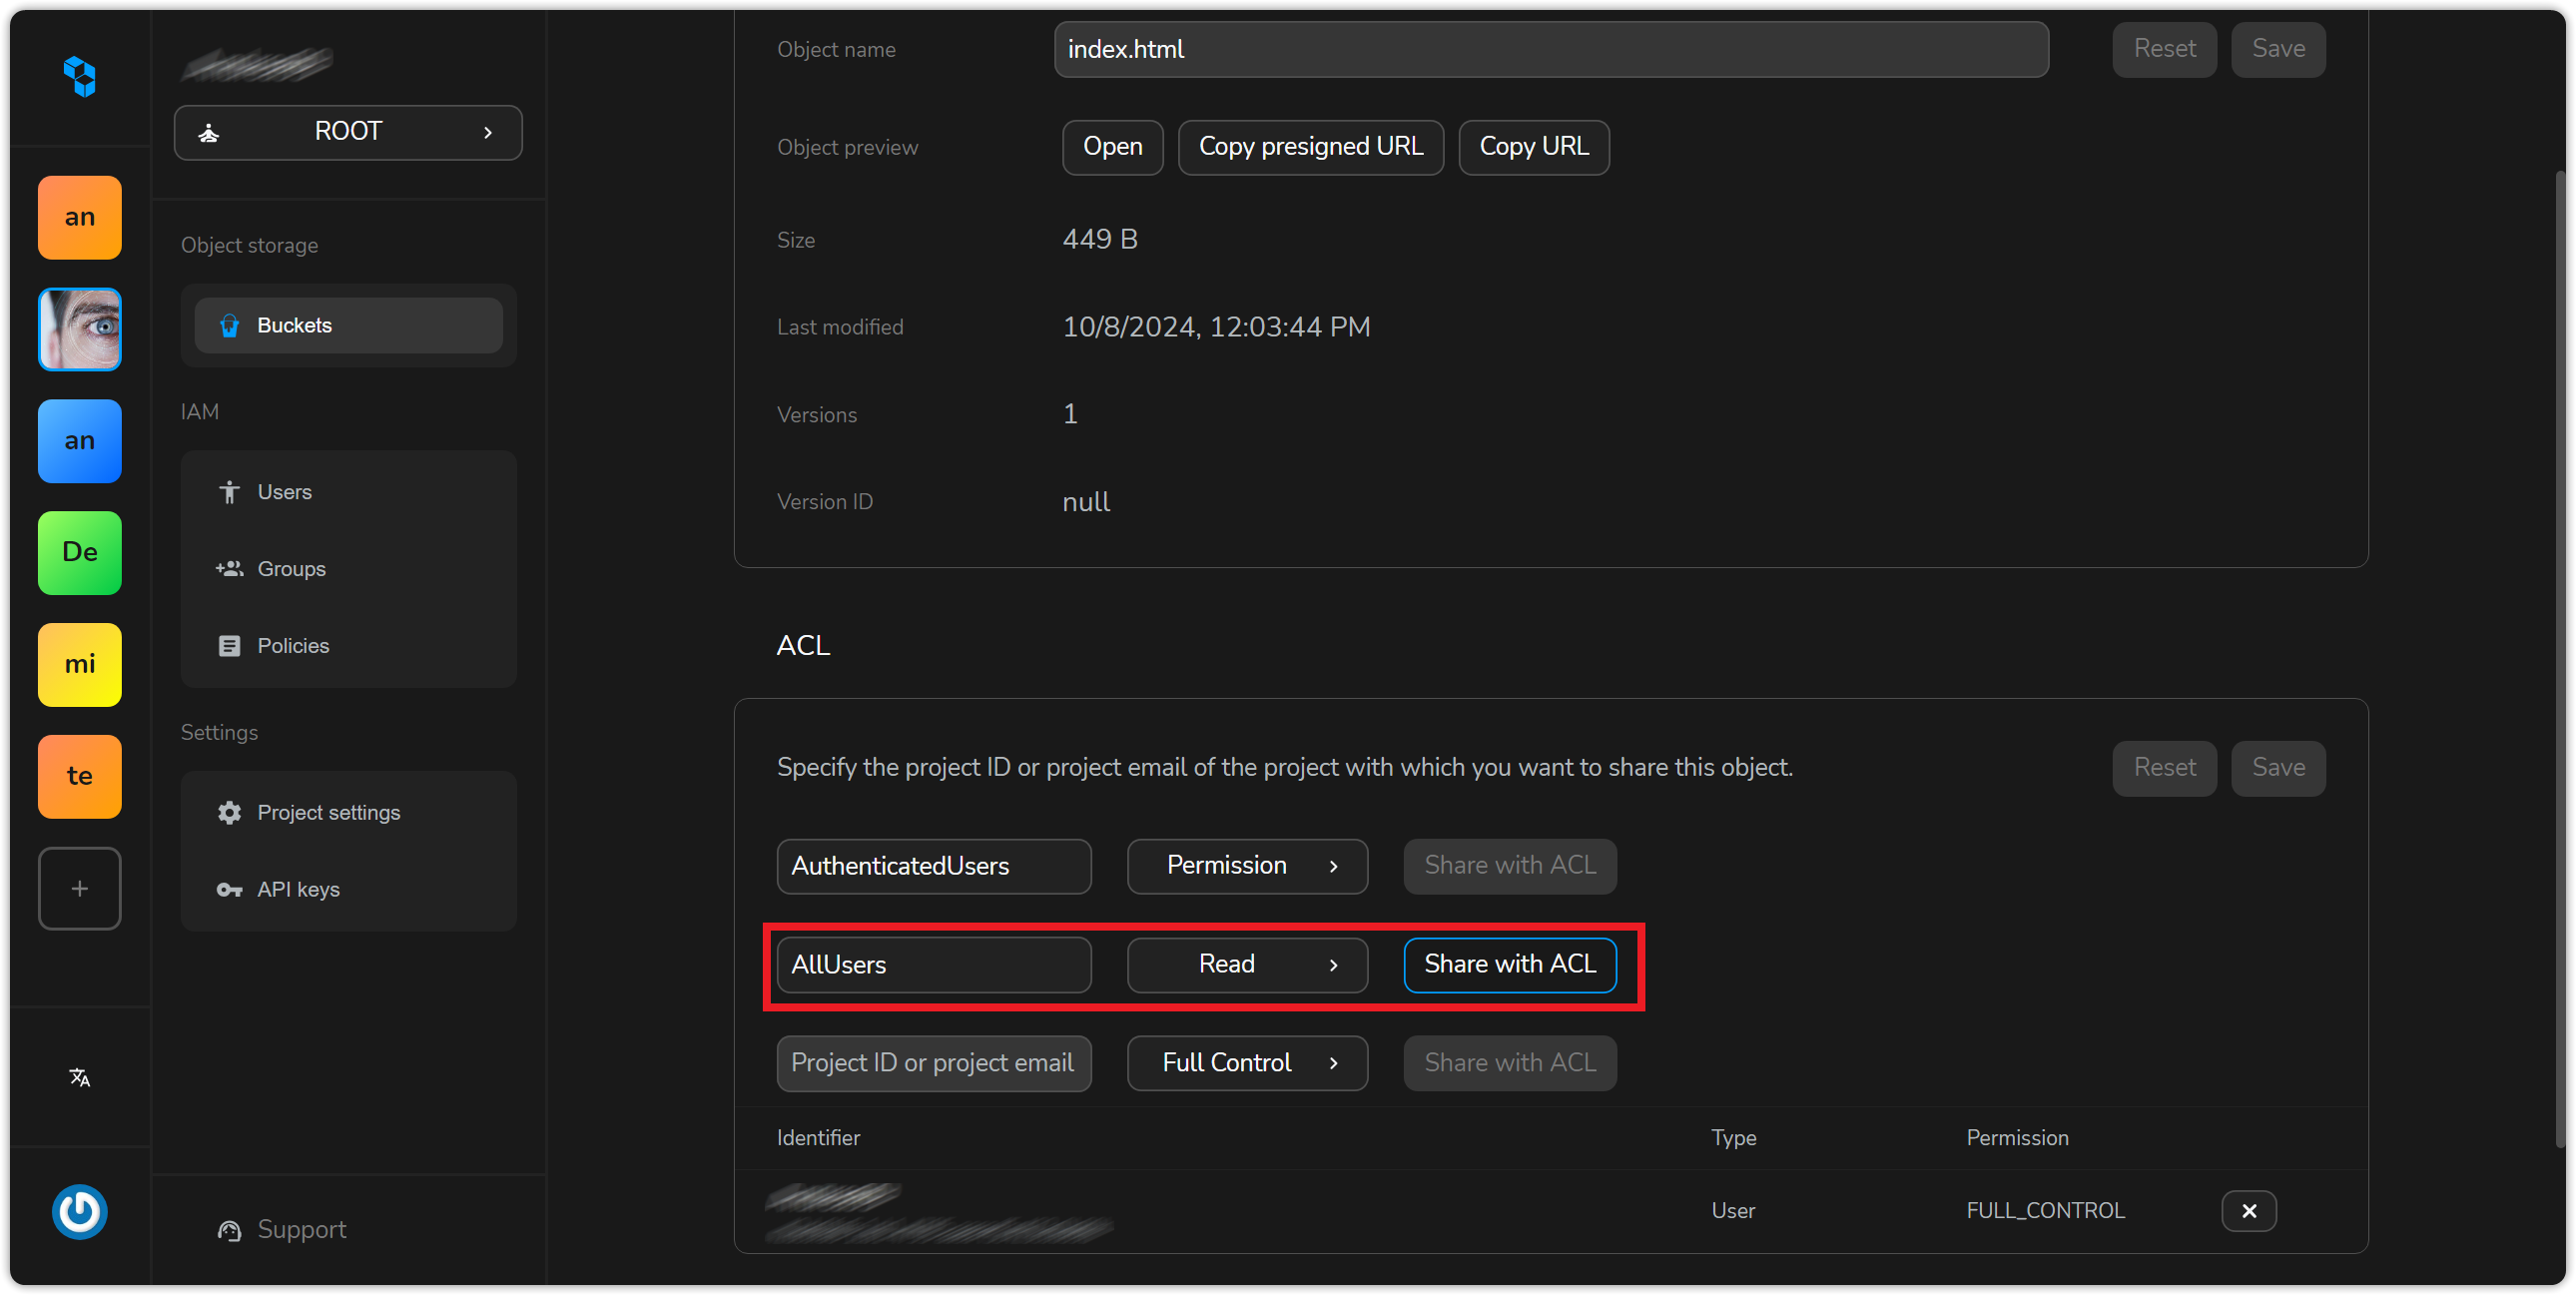
Poi, nel campo ACL, seleziona "All Users" e "Read" e seleziona "Share with ACL"
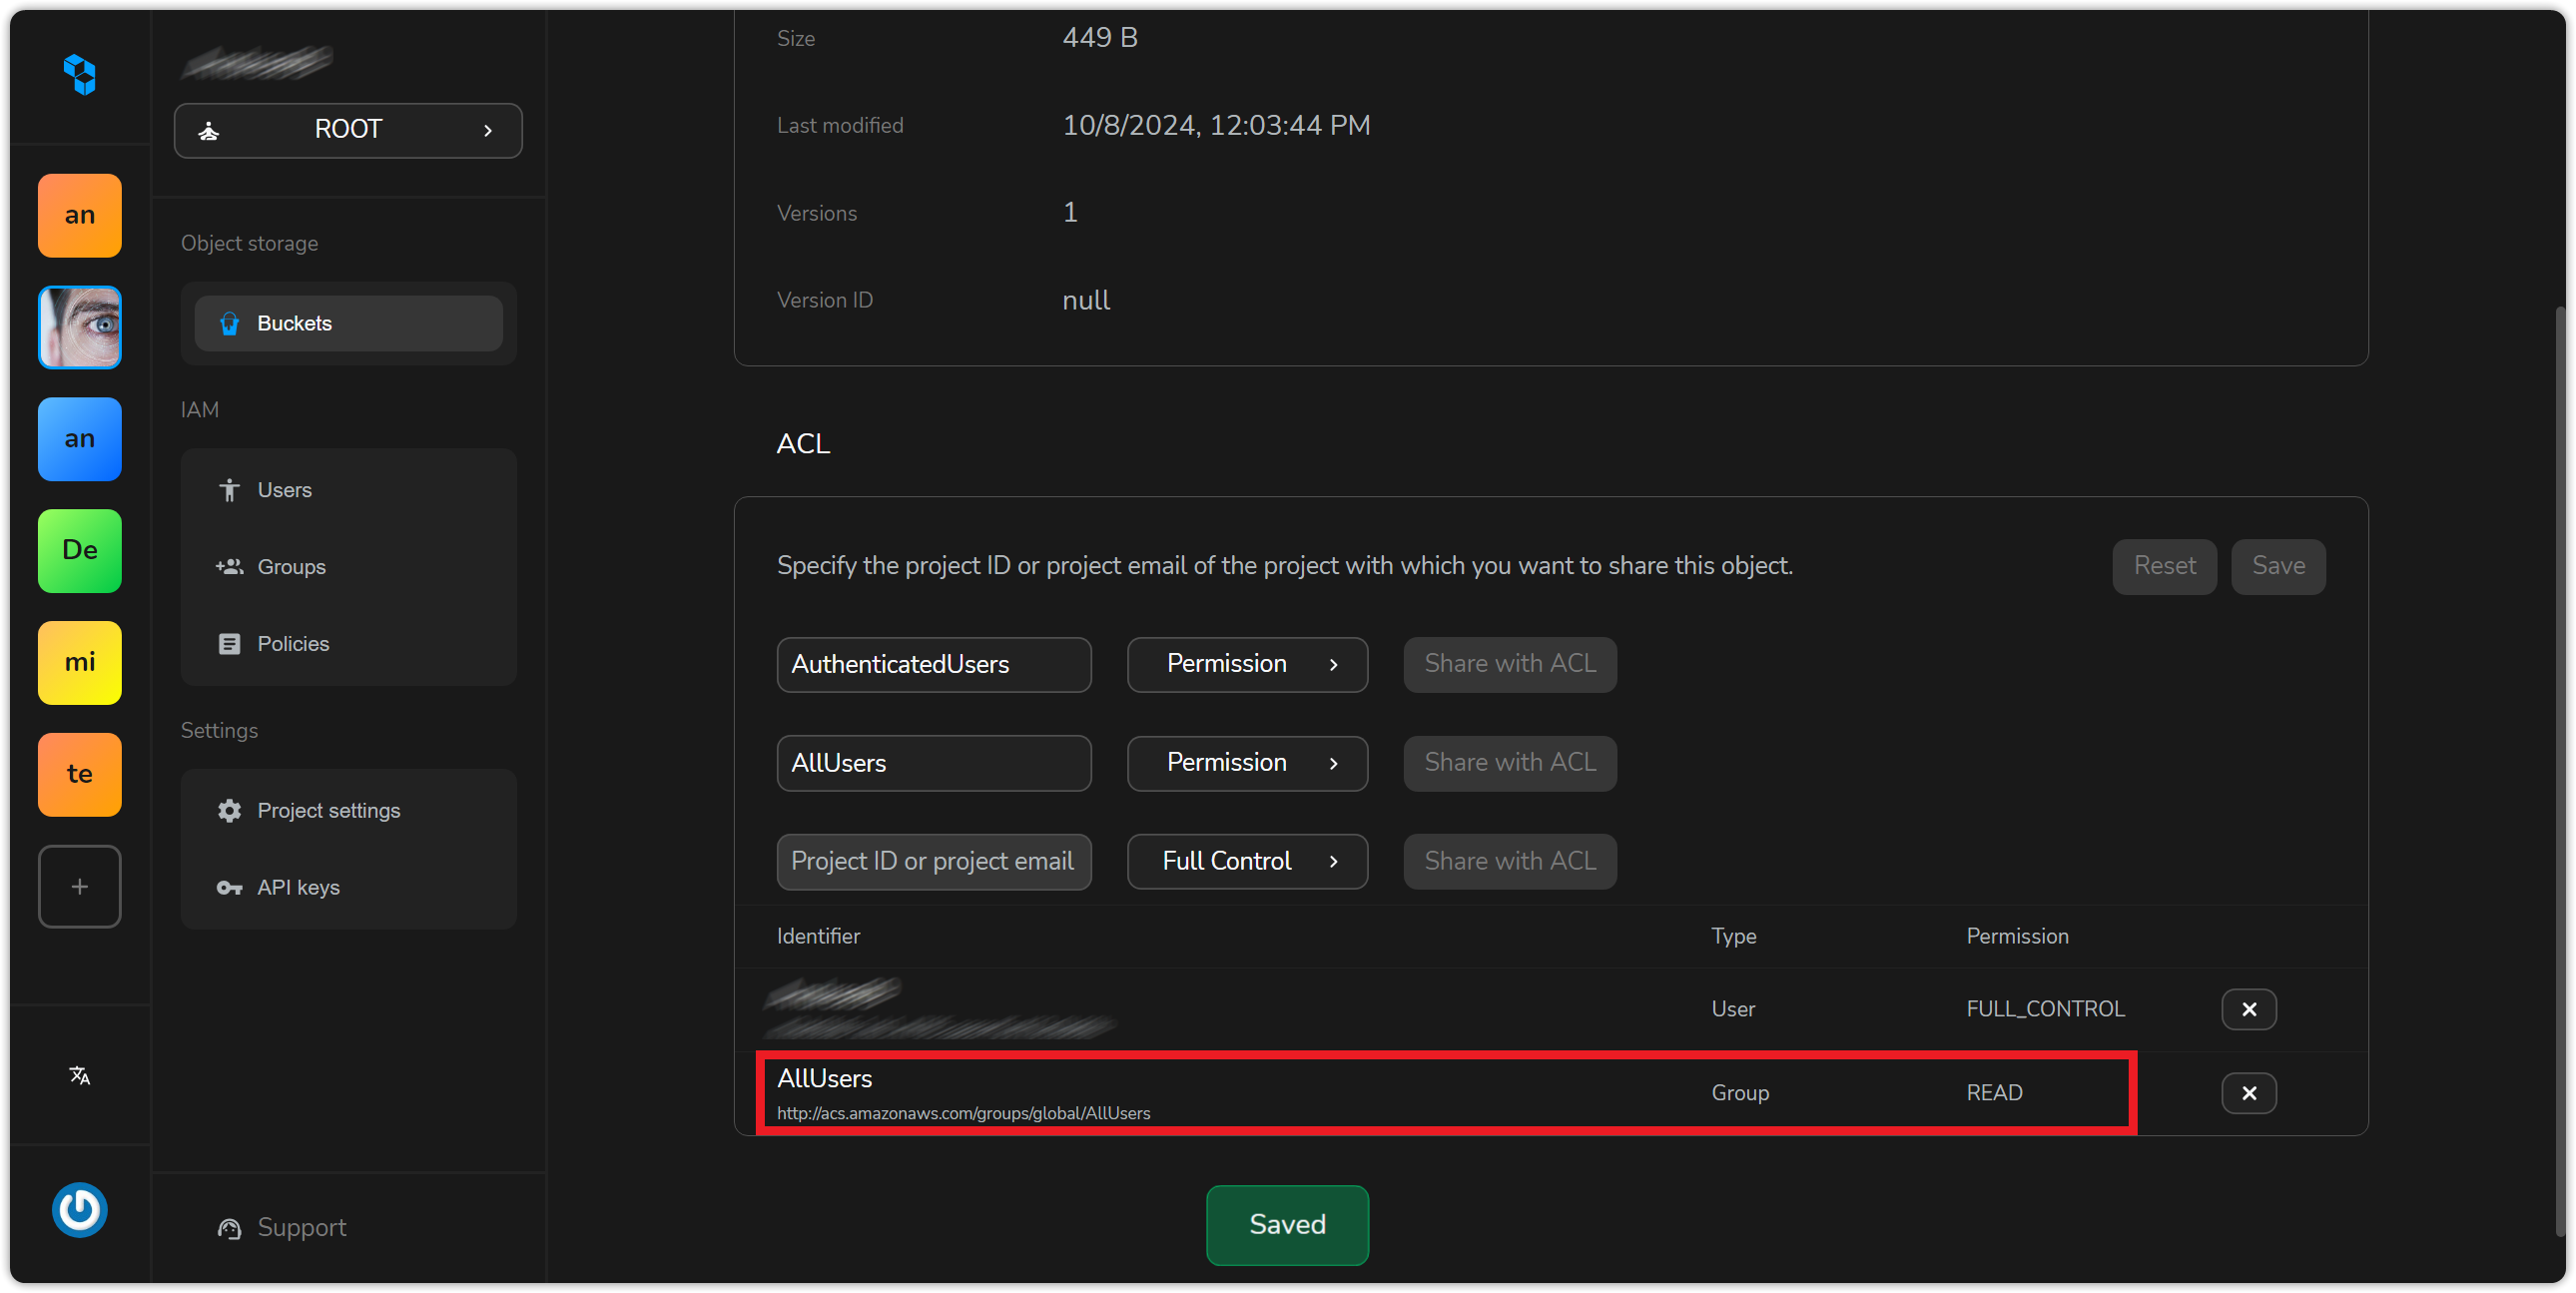
Clicca su save per applicare le impostazioni. Vedrai l'aggiunta della voce di autorizzazione all'ACL attivo.
Se preferisci, puoi anche concedere permessi di lettura pubblica su un oggetto utilizzando l'AWS CLI, puoi usare il comando AWS s3 con il sottocomando put-object-acl. Ecco la sintassi di base:
aws s3api put-object-acl --bucket <bucket-name> --key <object-key> --acl public-read
bucket-name è il nome del bucket S3 che contiene l'oggetto.
object-key è la chiave (o nome) dell'oggetto a cui si desidera concedere l'accesso di lettura pubblica.
In alternativa, puoi utilizzare l'opzione --acl public-read con il comando cp per caricare simultaneamente un oggetto e impostare le sue autorizzazioni come public read.
aws s3 cp index.html s3://aws-test-tx --endpoint-url=https://s3.cubbit.eu --acl public-read
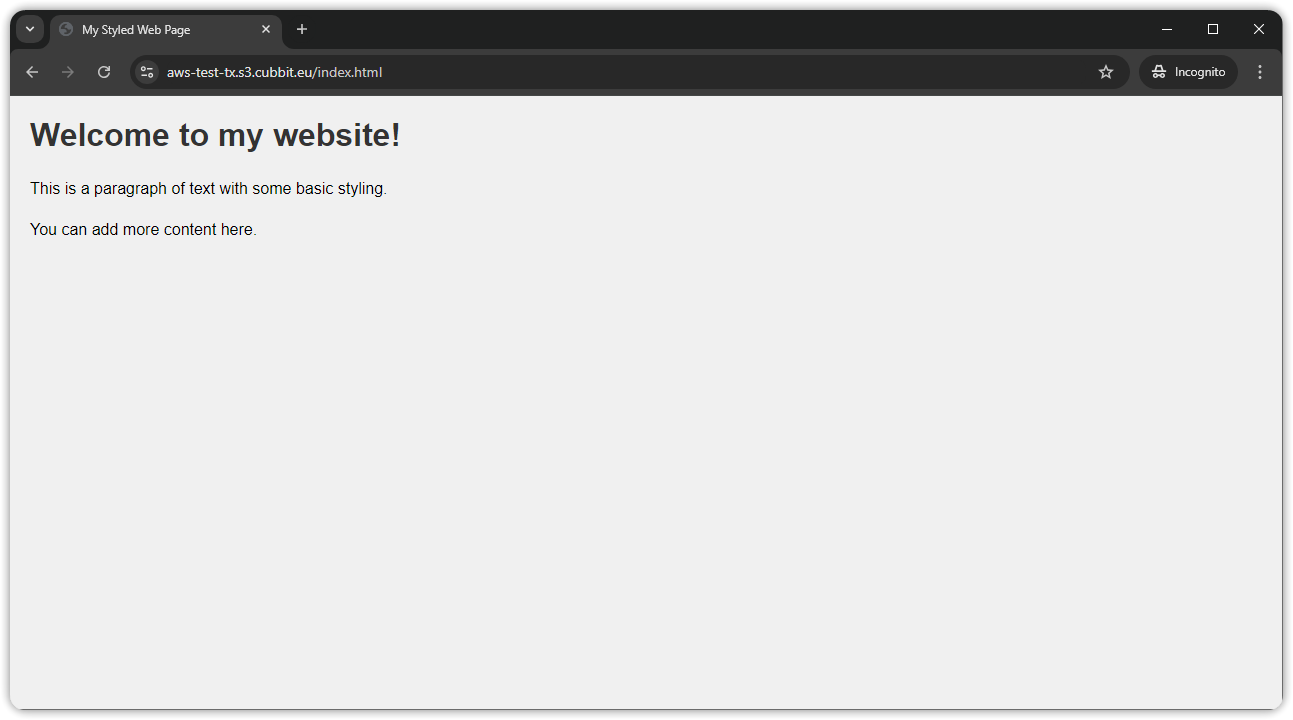
Questo comando aggiornerà l'Access Control List (ACL) dell'oggetto specificato per consentire l'accesso pubblico in lettura. Possiamo ora accedere al nostro oggetto pubblicamente sul web.
Cloudflare
Prima di iniziare con la configurazione di Cloudflare, assicurati di avere almeno un dominio gestito da Cloudflare.
Configura un Worker per riscrivere il nome di dominio
Crea il worker cliccando sul menu Workers & Pages Create quindi Create Worker.

Poi, cliccando su "deploy", puoi scegliere un nome per il tuo worker (ad esempio, "cubbit") e modificare il codice. Sostituisci il codice preconfigurato con il seguente:
export default {
  async fetch(request, env, ctx) {
    const url = new URL(request.url);
    url.hostname = 'bucket-name.s3.cubbit.eu';

    const modifiedRequest = new Request(url, {
      method: request.method,
      headers: request.headers,
      body: request.body,
      redirect: request.redirect,
    });

    // is it already in CF cache?
    let response = await caches.default.match(modifiedRequest);

    if (!response) {
      response = await fetch(modifiedRequest);

      // Valid response:
      if (response.ok) {
        // 2x stream for the answer
        const [stream1, stream2] = response.body.tee();

        const clientResponse = new Response(stream1, response);
        const cacheResponse = new Response(stream2, response);

        // Prepare the headers for CFcache:
        cacheResponse.headers.set('Cache-Control', 'public, max-age=31536000');

        // put in CF cache:
        ctx.waitUntil(caches.default.put(modifiedRequest, cacheResponse));

        // Response to client:
        return clientResponse;
      }
    }

    // it was in the cache:
    return response;
  },
};
Sostituisci il 'bucket-name' con il nome del bucket che hai preparato nel precedente paragrafo. O rimuovilo se vuoi mantenere il bucket come parte del percorso finale da esporre tramite Cloudflare. Nel secondo caso, le risorse CDN saranno disponibili all'URL: mydomain.com/nomebucket/
Collegare dominio al worker
Apri la sezione del sito web, scegli "Workers Routes", poi clicca su "Add route".

Seleziona il dominio attraverso il quale vuoi esporre i contenuti del bucket (ad esempio, mydomain.com/*). Poi, scegli il worker che hai configurato nel passaggio precedente (cubbit) dal menu a tendina dei worker.
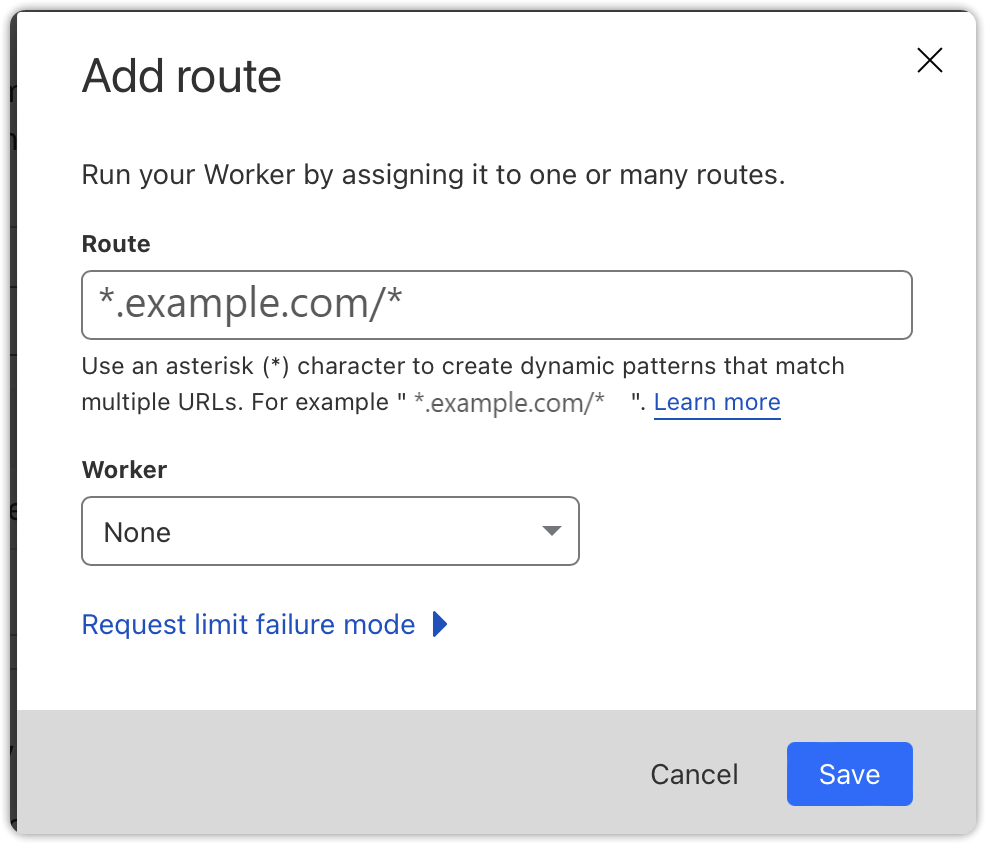
Una volta salvata la regola, Cloudflare inizierà a memorizzare nella cache e a servire le richieste.
Migliorare la sicurezza della distribuzione Cloudflare
Per migliorare la sicurezza nell'accesso ai dati archiviati nel sistema, si consiglia di limitare l'accesso ai contenuti statici di Cubbit a un elenco o sottoelenco di indirizzi IP pubblici di Cloudflare.
Ciò verrà applicato configurando le politiche di accesso del tenant nella sezione nginx del Cubbit Gateway, impedendo così l'esposizione diretta del contenuto originale agli utenti.
Proseguendo, un ulteriore livello di sicurezza (ad esempio, JWT) può essere aggiunto a Cloudflare attraverso un'implementazione specifica di Worker. Questo comporta la convalida dei token JWT direttamente a livello di edge prima di consentire l'accesso alle risorse, migliorando la protezione garantendo che solo le richieste autorizzate vengano elaborate.
Per ottenere ulteriori informazioni riguardo Cloudflare, raccomandiamo di consultare la documentazione ufficiale.