Users management
This guide describes how Organization owners create and manage IAM users in Cubbit Composer.
IAM users are organization-level collaborators invited by the Organization owner. They authenticate with a username and password (rather than an email) and can access the Composer dashboard with scoped permissions. For instructions on how IAM users sign in, refer to the Sign In Guide.
IAM users are organization-level collaborators. They are not DS3 Console users: DS3 Console users are the end users who access a Tenant from the console.
Prerequisites
Before managing IAM users, ensure you have:
- An active Cubbit organization with Organization owner privileges
Accessing the User List
From the Composer dashboard, navigate to the Users section by clicking Users in the sidebar. The users list shows all IAM users in your organization.
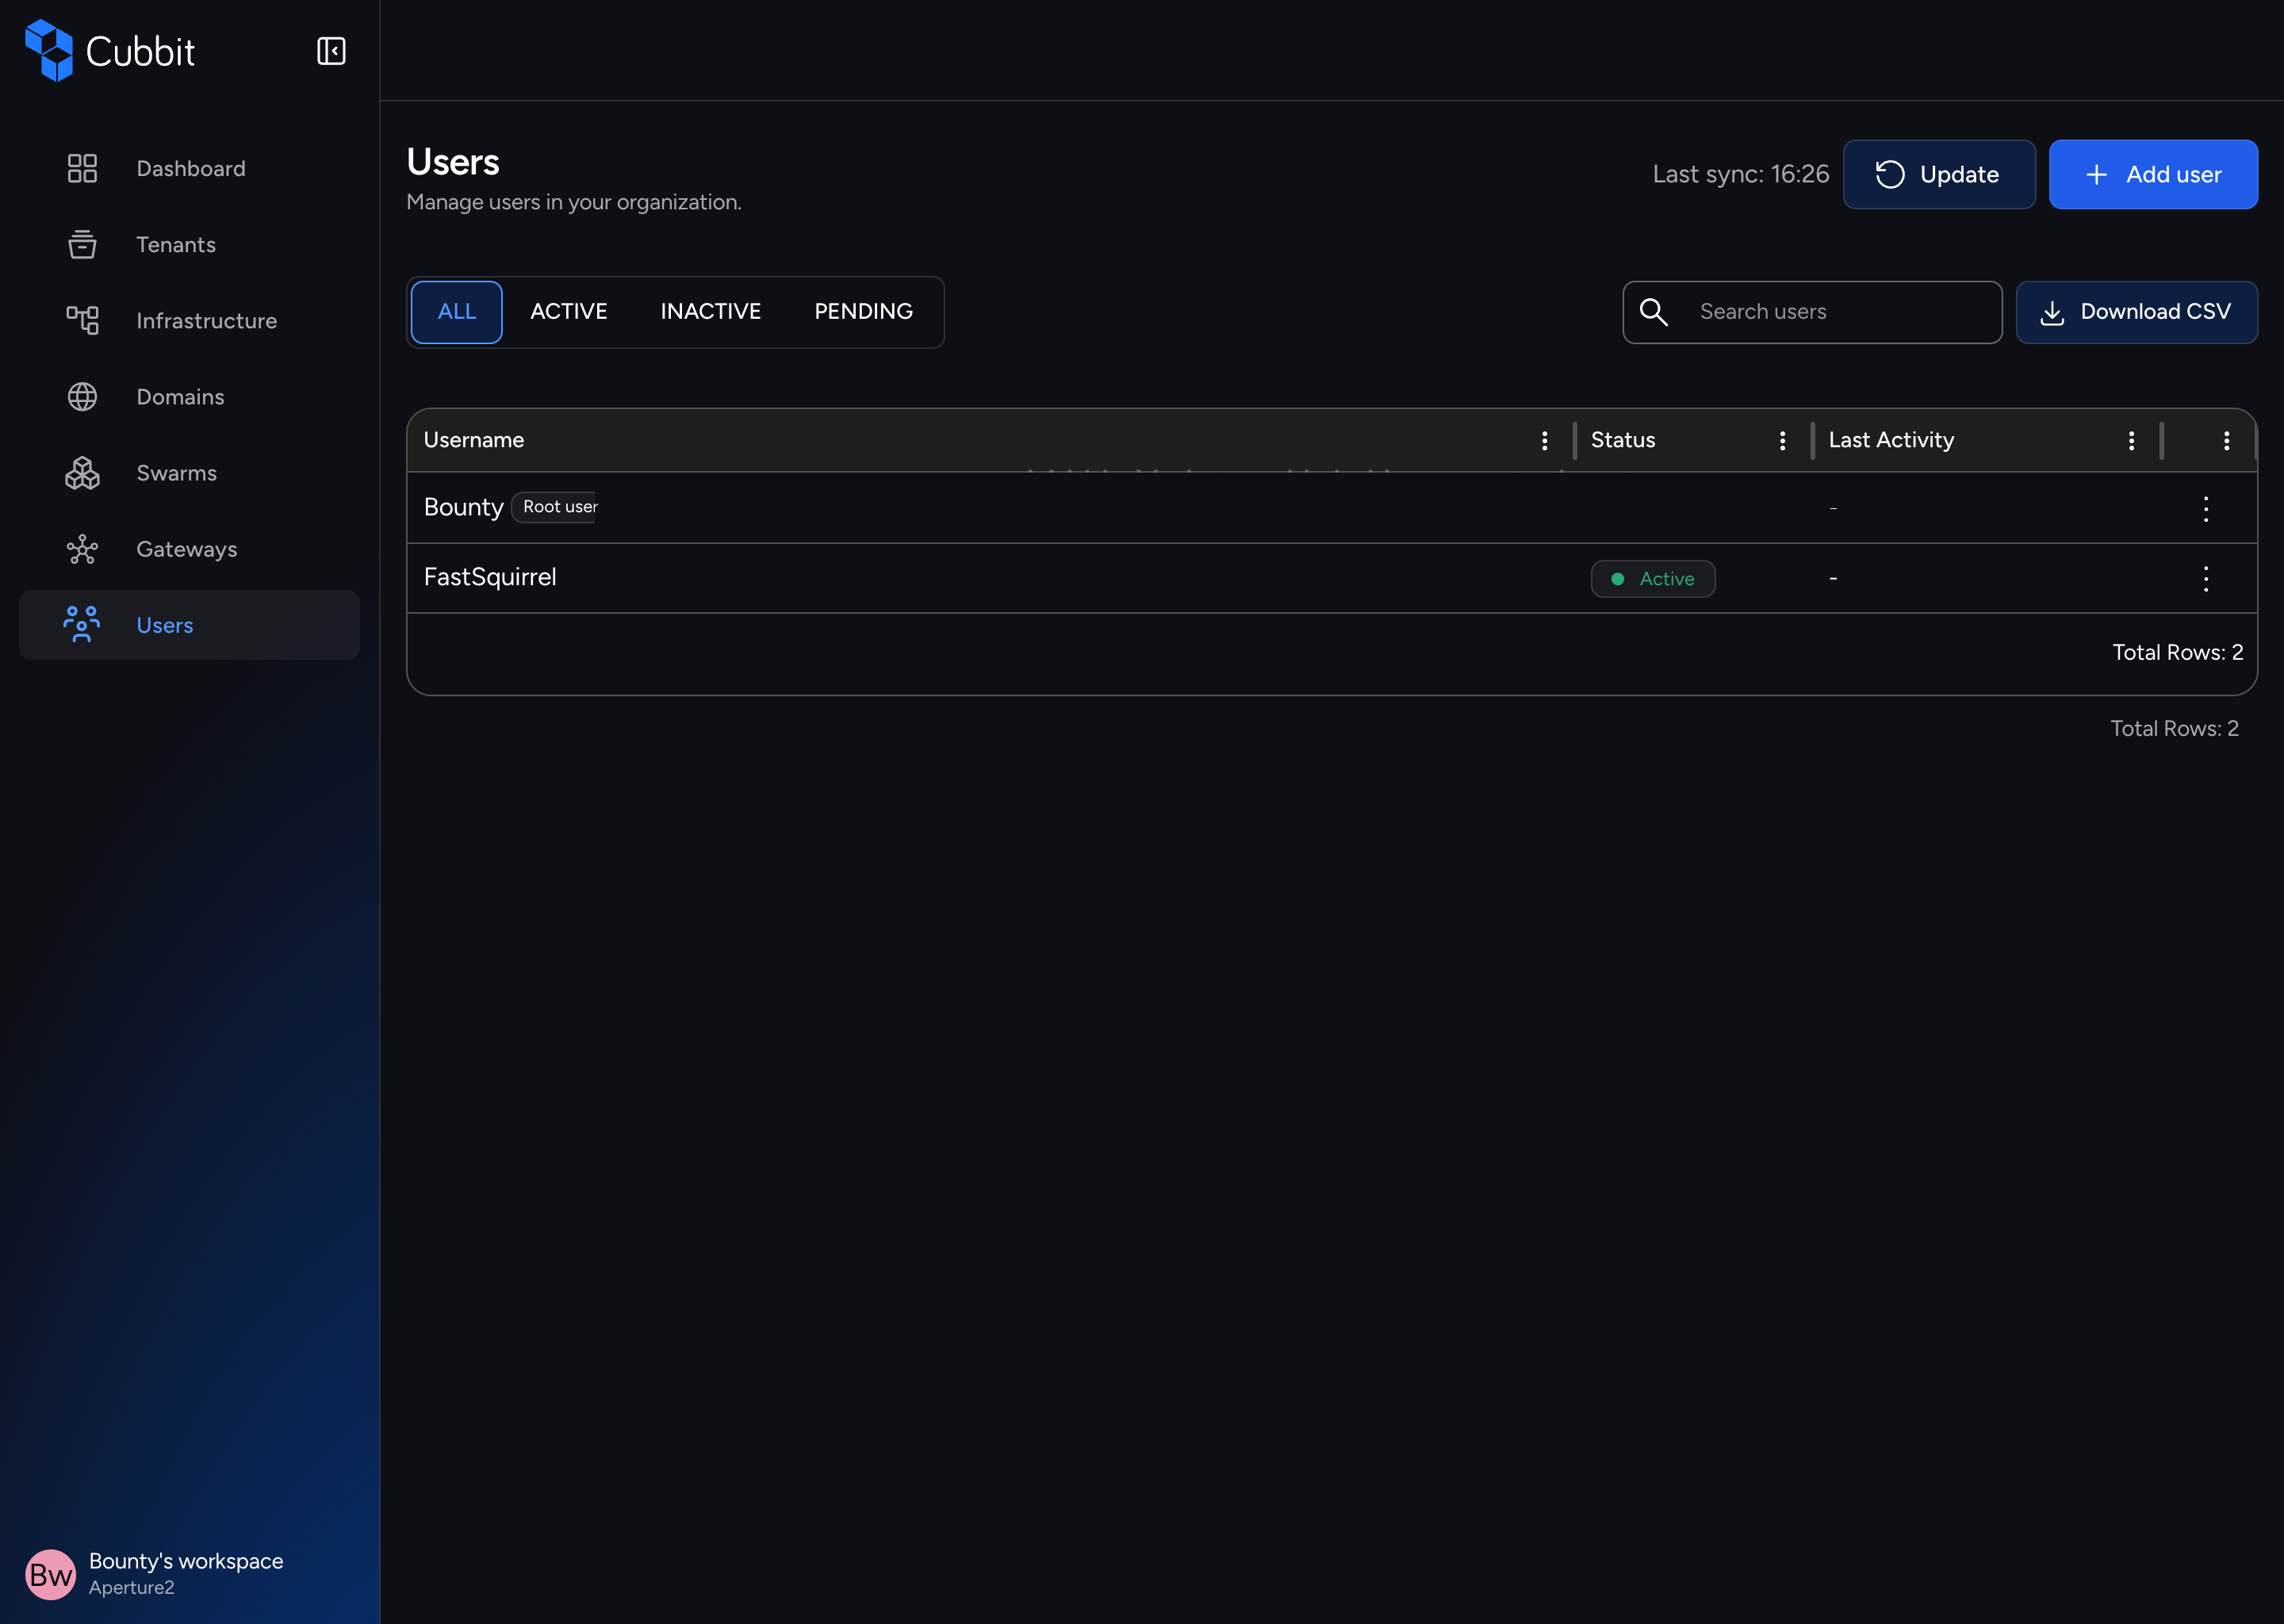
The user list displays the following columns:
| Column | Description |
|---|---|
| Username | The user's username. The Organization owner is marked with a Root user chip. |
| Status | The user's account status: Active (green), Inactive (red), or Pending (yellow). |
| Last Activity | The date of the user's last activity, or - if none. |
| Actions | A three-dot menu with options: Overview, Settings, and Create new password. |
Filtering and Searching
Use the toolbar above the table to:
- Filter by status: Toggle between ALL, ACTIVE, INACTIVE, and PENDING.
- Search: Type a username in the search field to filter the list.
- Download CSV: Export the user list as a CSV file.

The footer shows the total number of users: Total Rows: N.
Creating an IAM User
Click the Add user button in the Users page header to open the Add IAM user overlay.
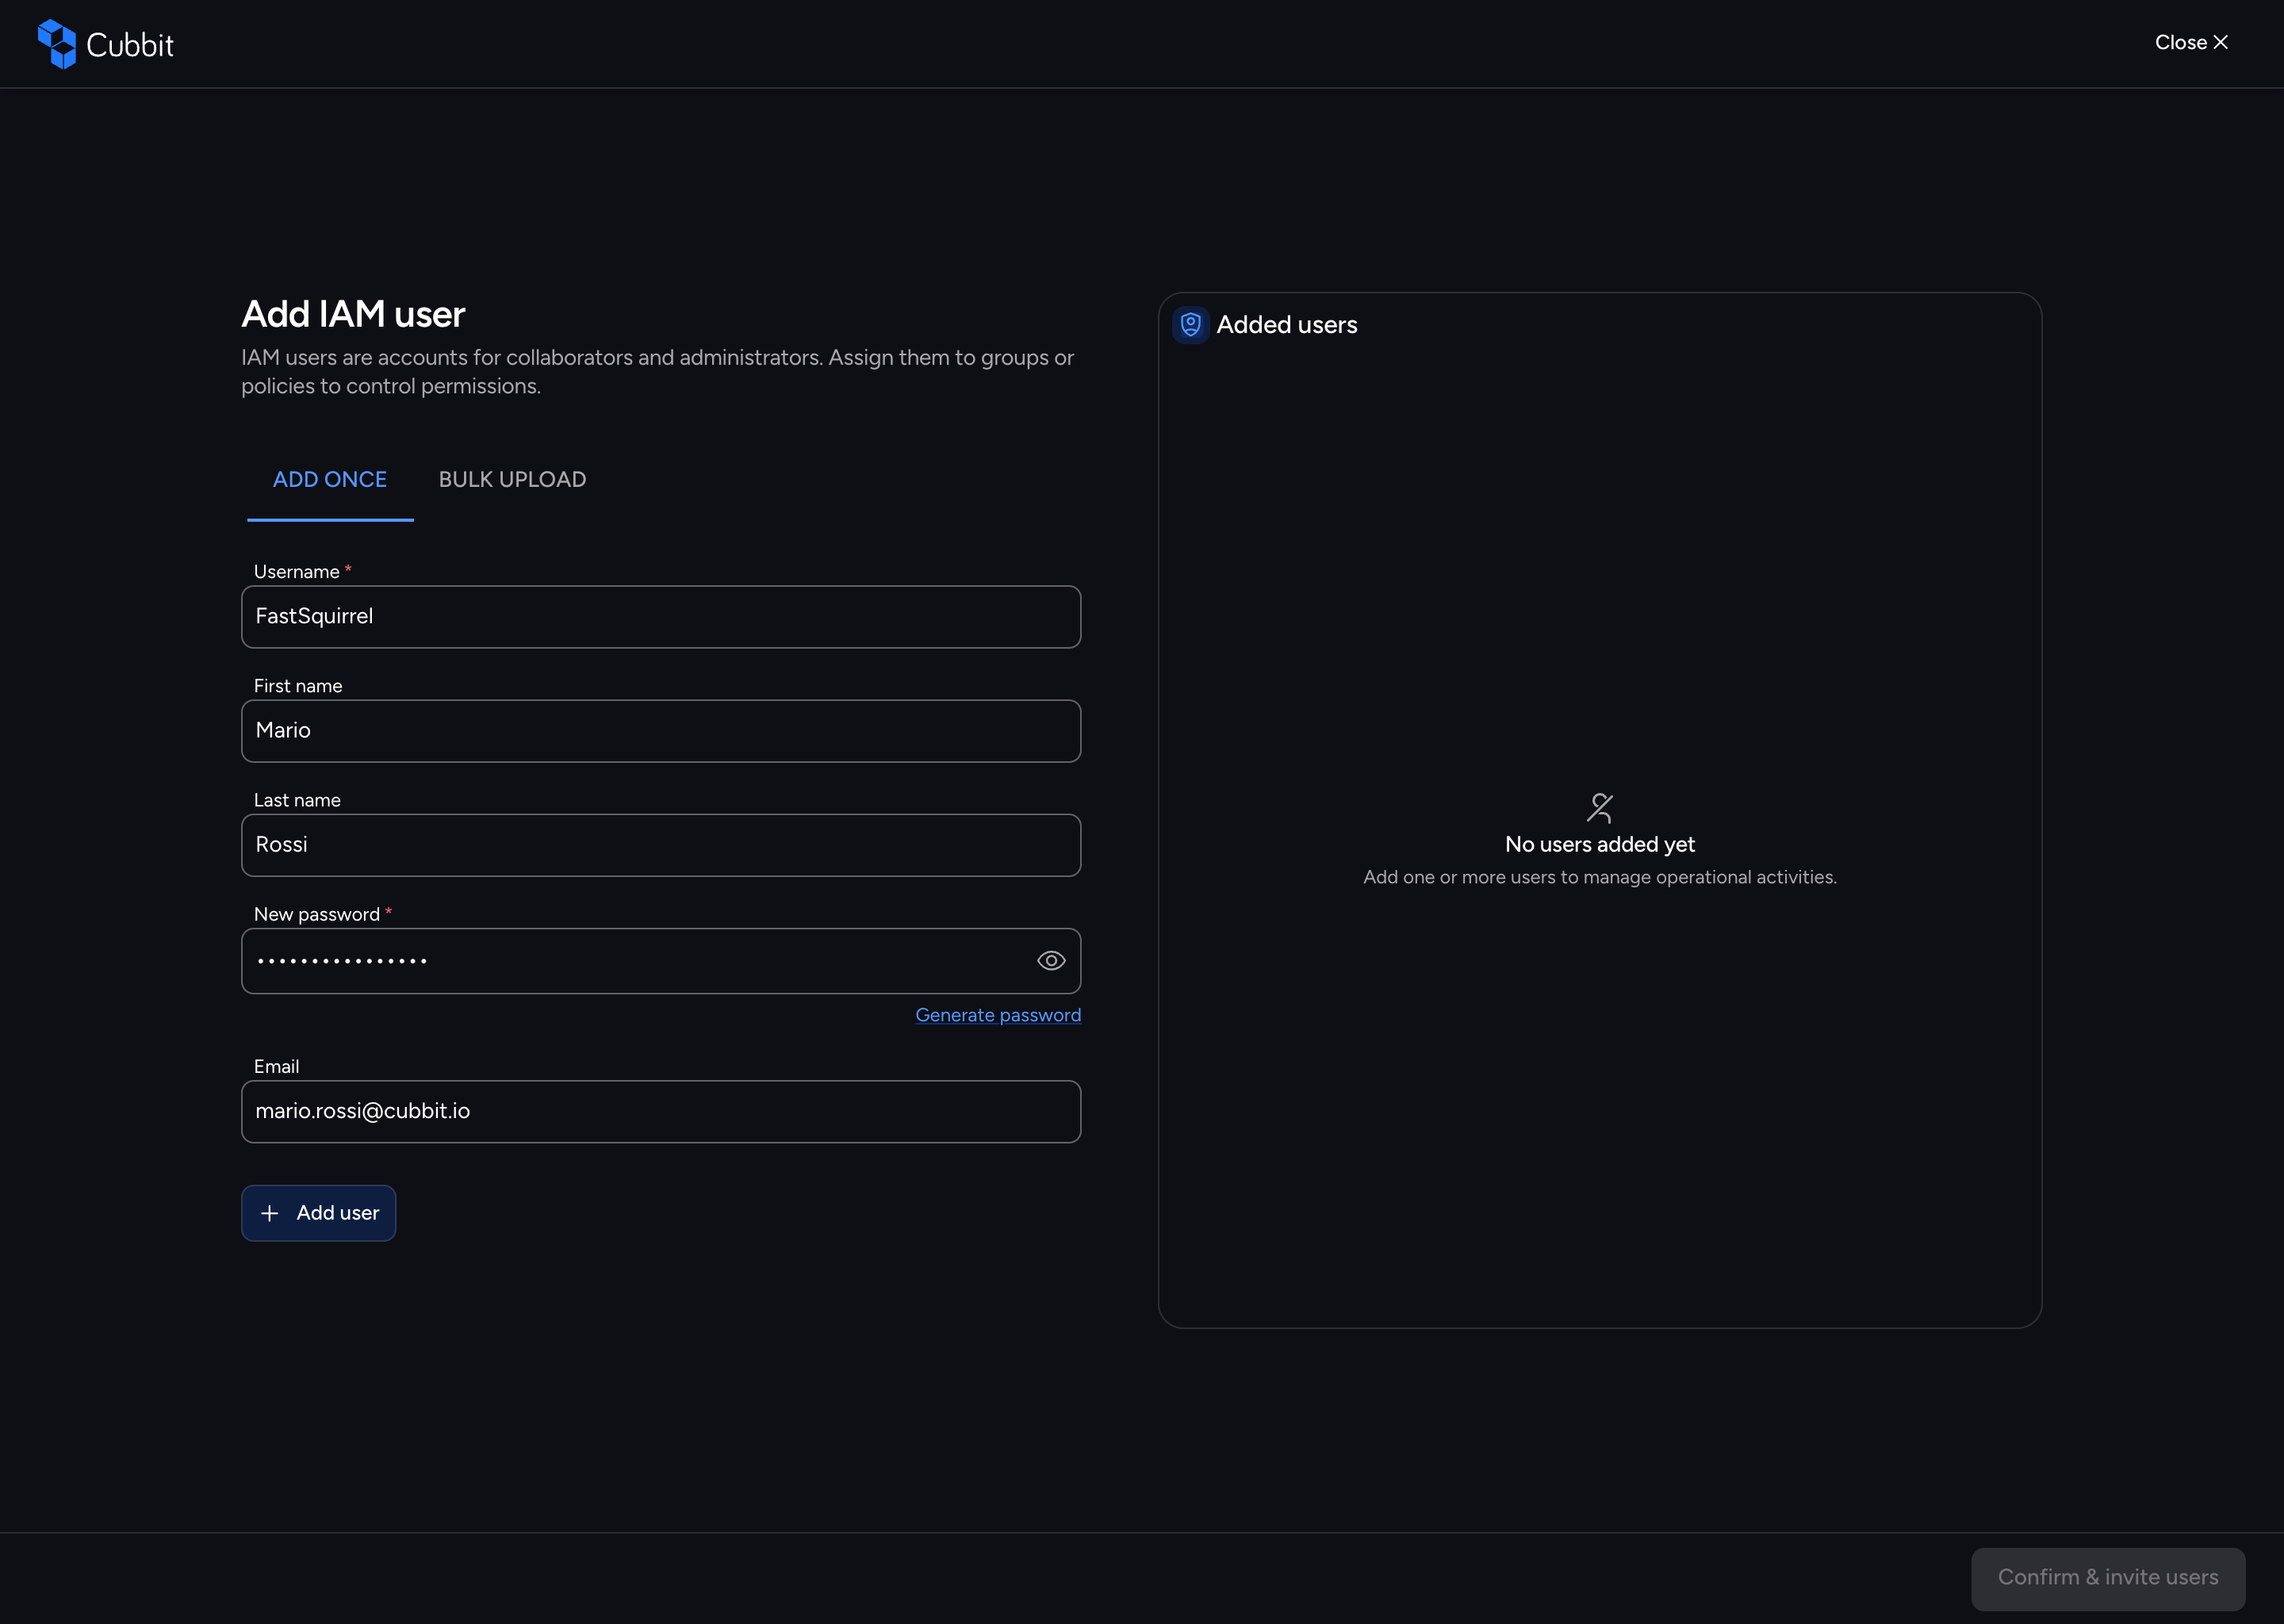
The overlay offers two methods for adding users: Add Once (single user) and Bulk Upload (multiple users via file).
Interactive Form (Add Once)
The ADD ONCE tab presents a form with the following fields:
| Field | Required | Validation |
|---|---|---|
| Username | Yes | 3-50 characters. Allowed characters: letters, digits, hyphens, dots, and underscores. Pattern: ^[a-zA-Z0-9\-._]+$ |
| First name | No | Optional text |
| Last name | No | Optional text |
| Password | Yes | Auto-generated on mount (16-character random string). Validated with zxcvbn: must score 2 or higher. Click Generate password to regenerate. |
| No | Validated as email format if provided |
The password is auto-generated for security. You can regenerate it at any time. The form also includes a copy button for easy retrieval.
After filling in the fields, click Add user to add the user to the staging area on the right side of the overlay.
Bulk Upload
The BULK UPLOAD tab allows you to create multiple users at once by uploading a CSV or JSON file.
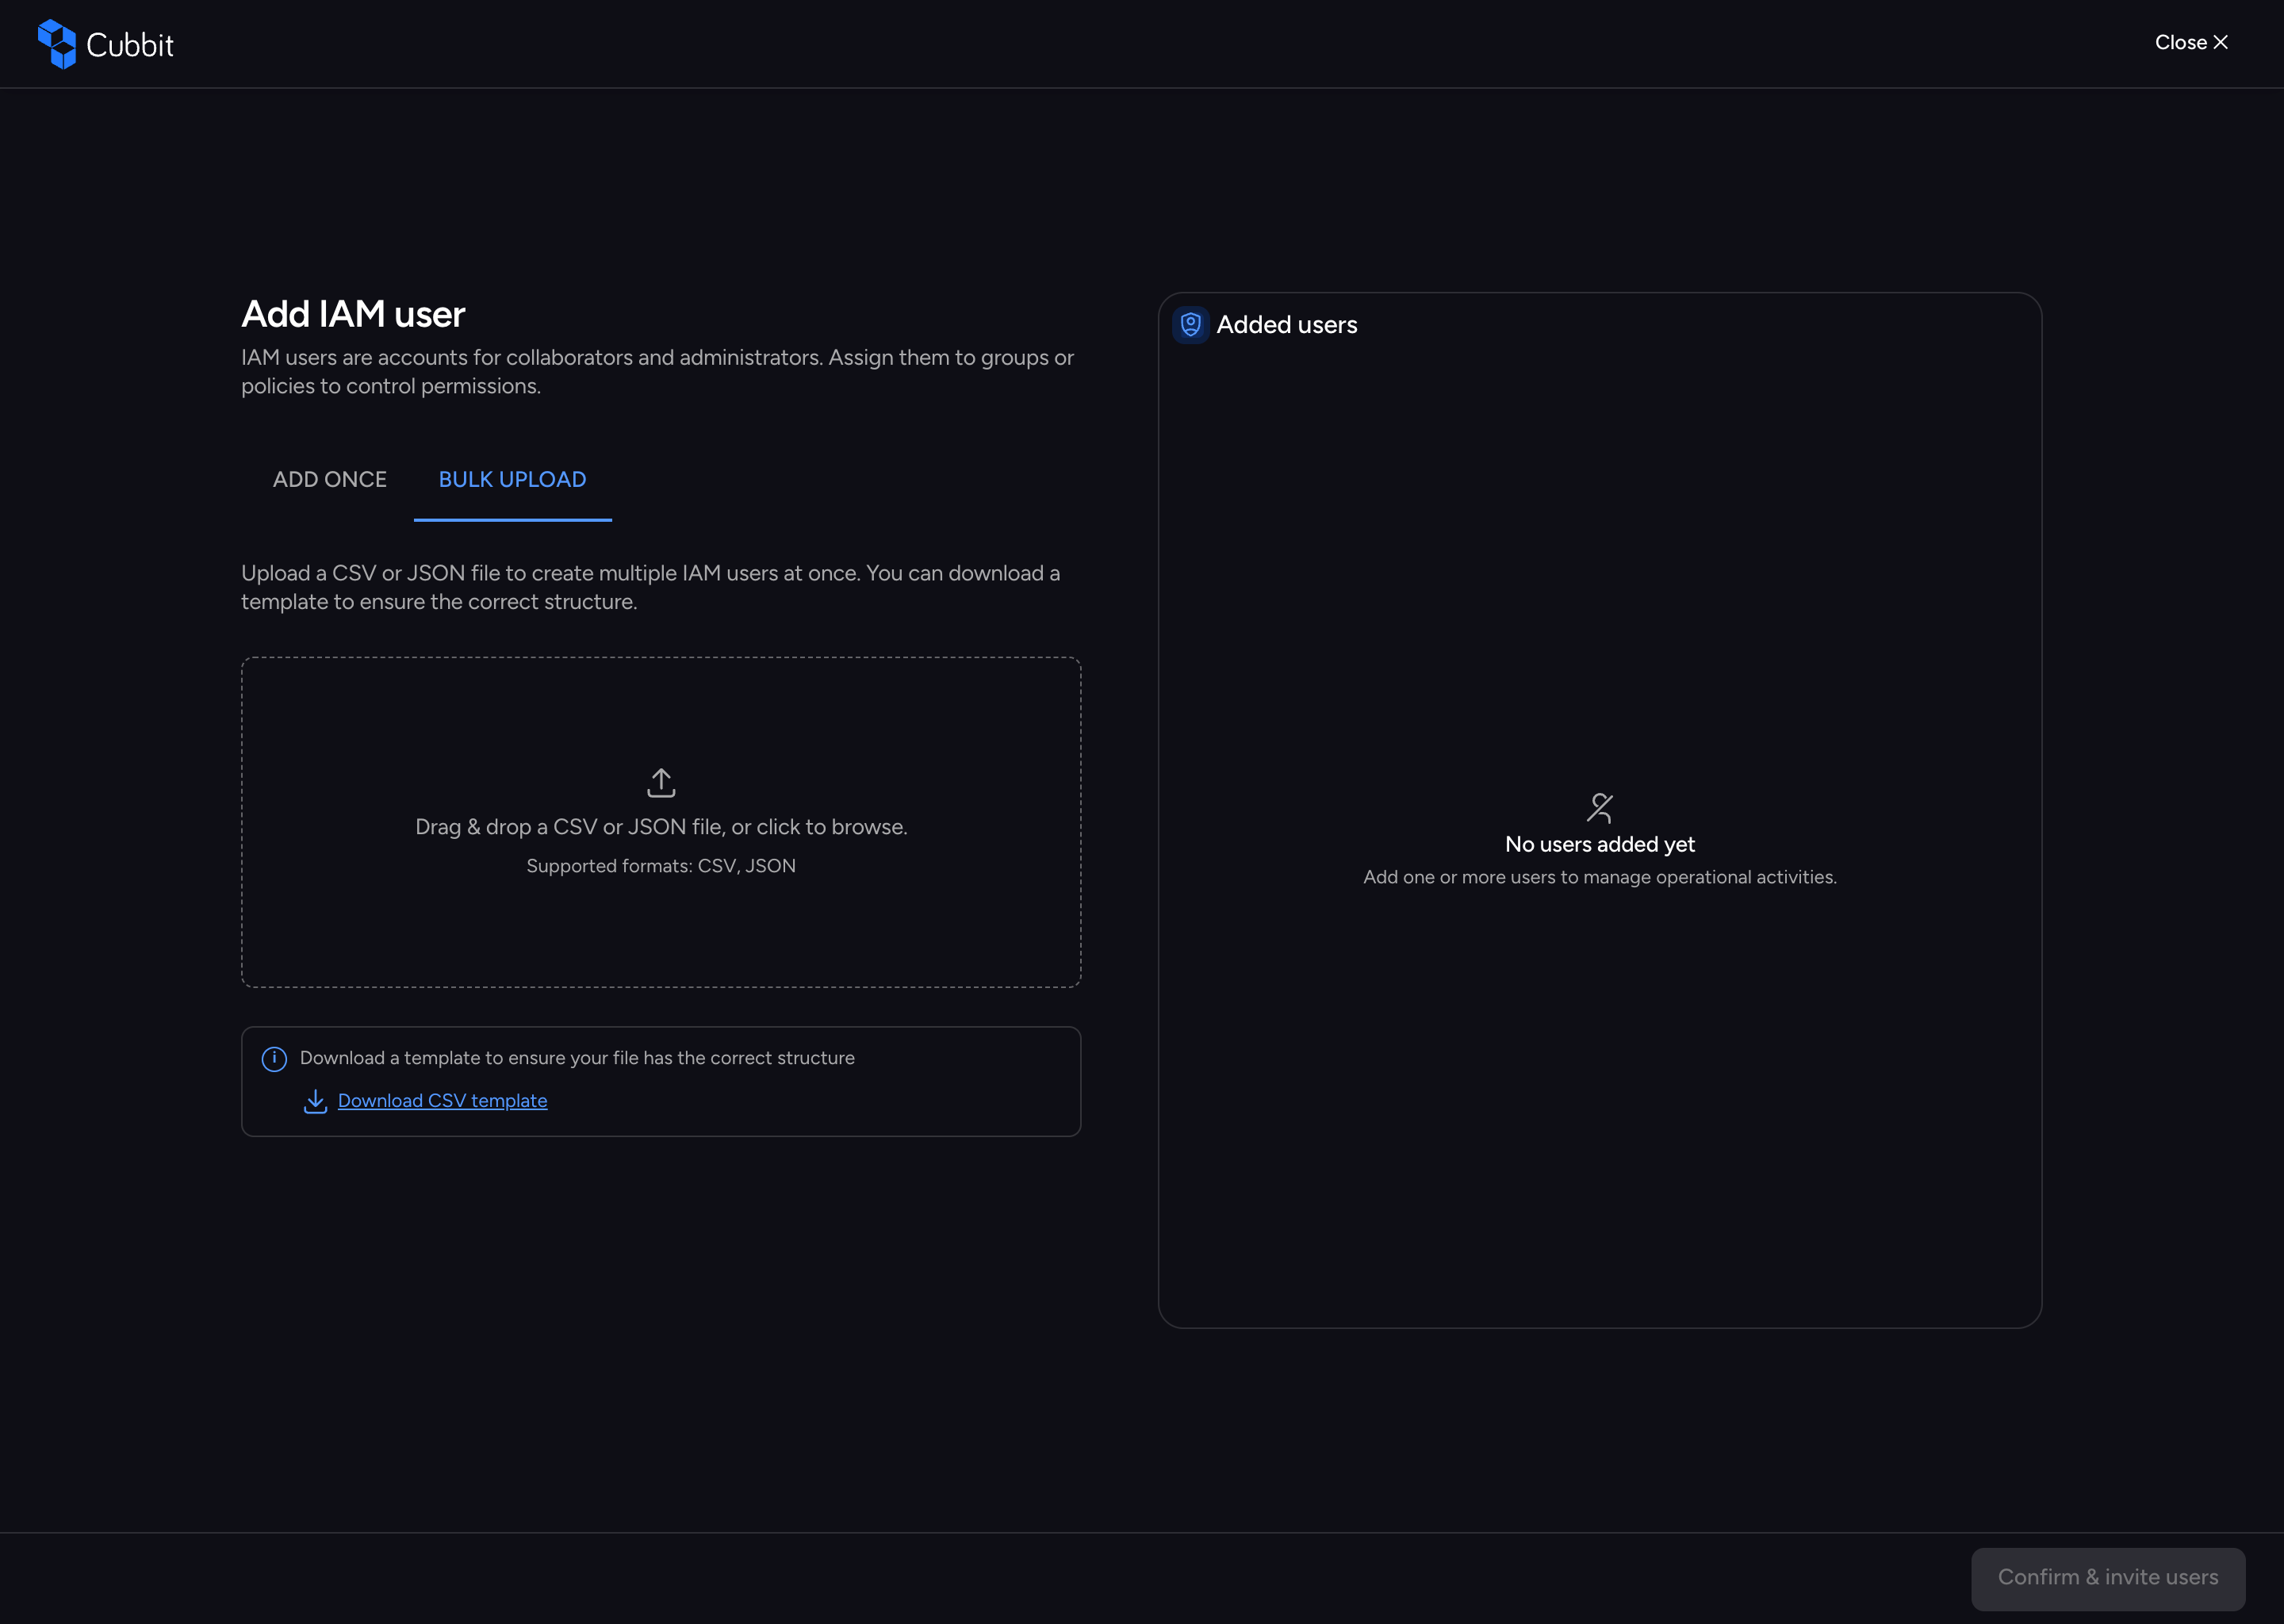
Steps:
- Download the CSV template (
cubbit-iam-users-template.csv) which includes the header:username,first_name,last_name,email. - Fill in your user data following the template format.
- Drop or select your CSV/JSON file in the upload area (max file size: 5 MB).
- Review the parsed data in the Bulk Upload Review dialog, which shows:
- A summary (e.g., "5 valid -- 2 errors")
- A table with the status of each row: Valid, Invalid, or Error
- Correct any errors by replacing the file, or proceed with Create N user(s).
Fields per row (CSV/JSON):
| Field | Required | Validation |
|---|---|---|
| username | Yes | Pattern: ^[a-zA-Z0-9\-._]+$ |
| first_name | No | Optional |
| last_name | No | Optional |
| No | Validated as email if provided |
The system detects duplicate entries within the file and duplicates that are already in the staging area.
Staging Area
The right side of the overlay displays a StagedUsersTable showing all users pending creation:
- Columns: Username/Email, Password (monospace), Remove (bin icon)
- Header: "Added users" + Download password button (generates
users_passwords.csv) - Pagination: 5, 10, 25 per page
- Empty state: "No users added yet"
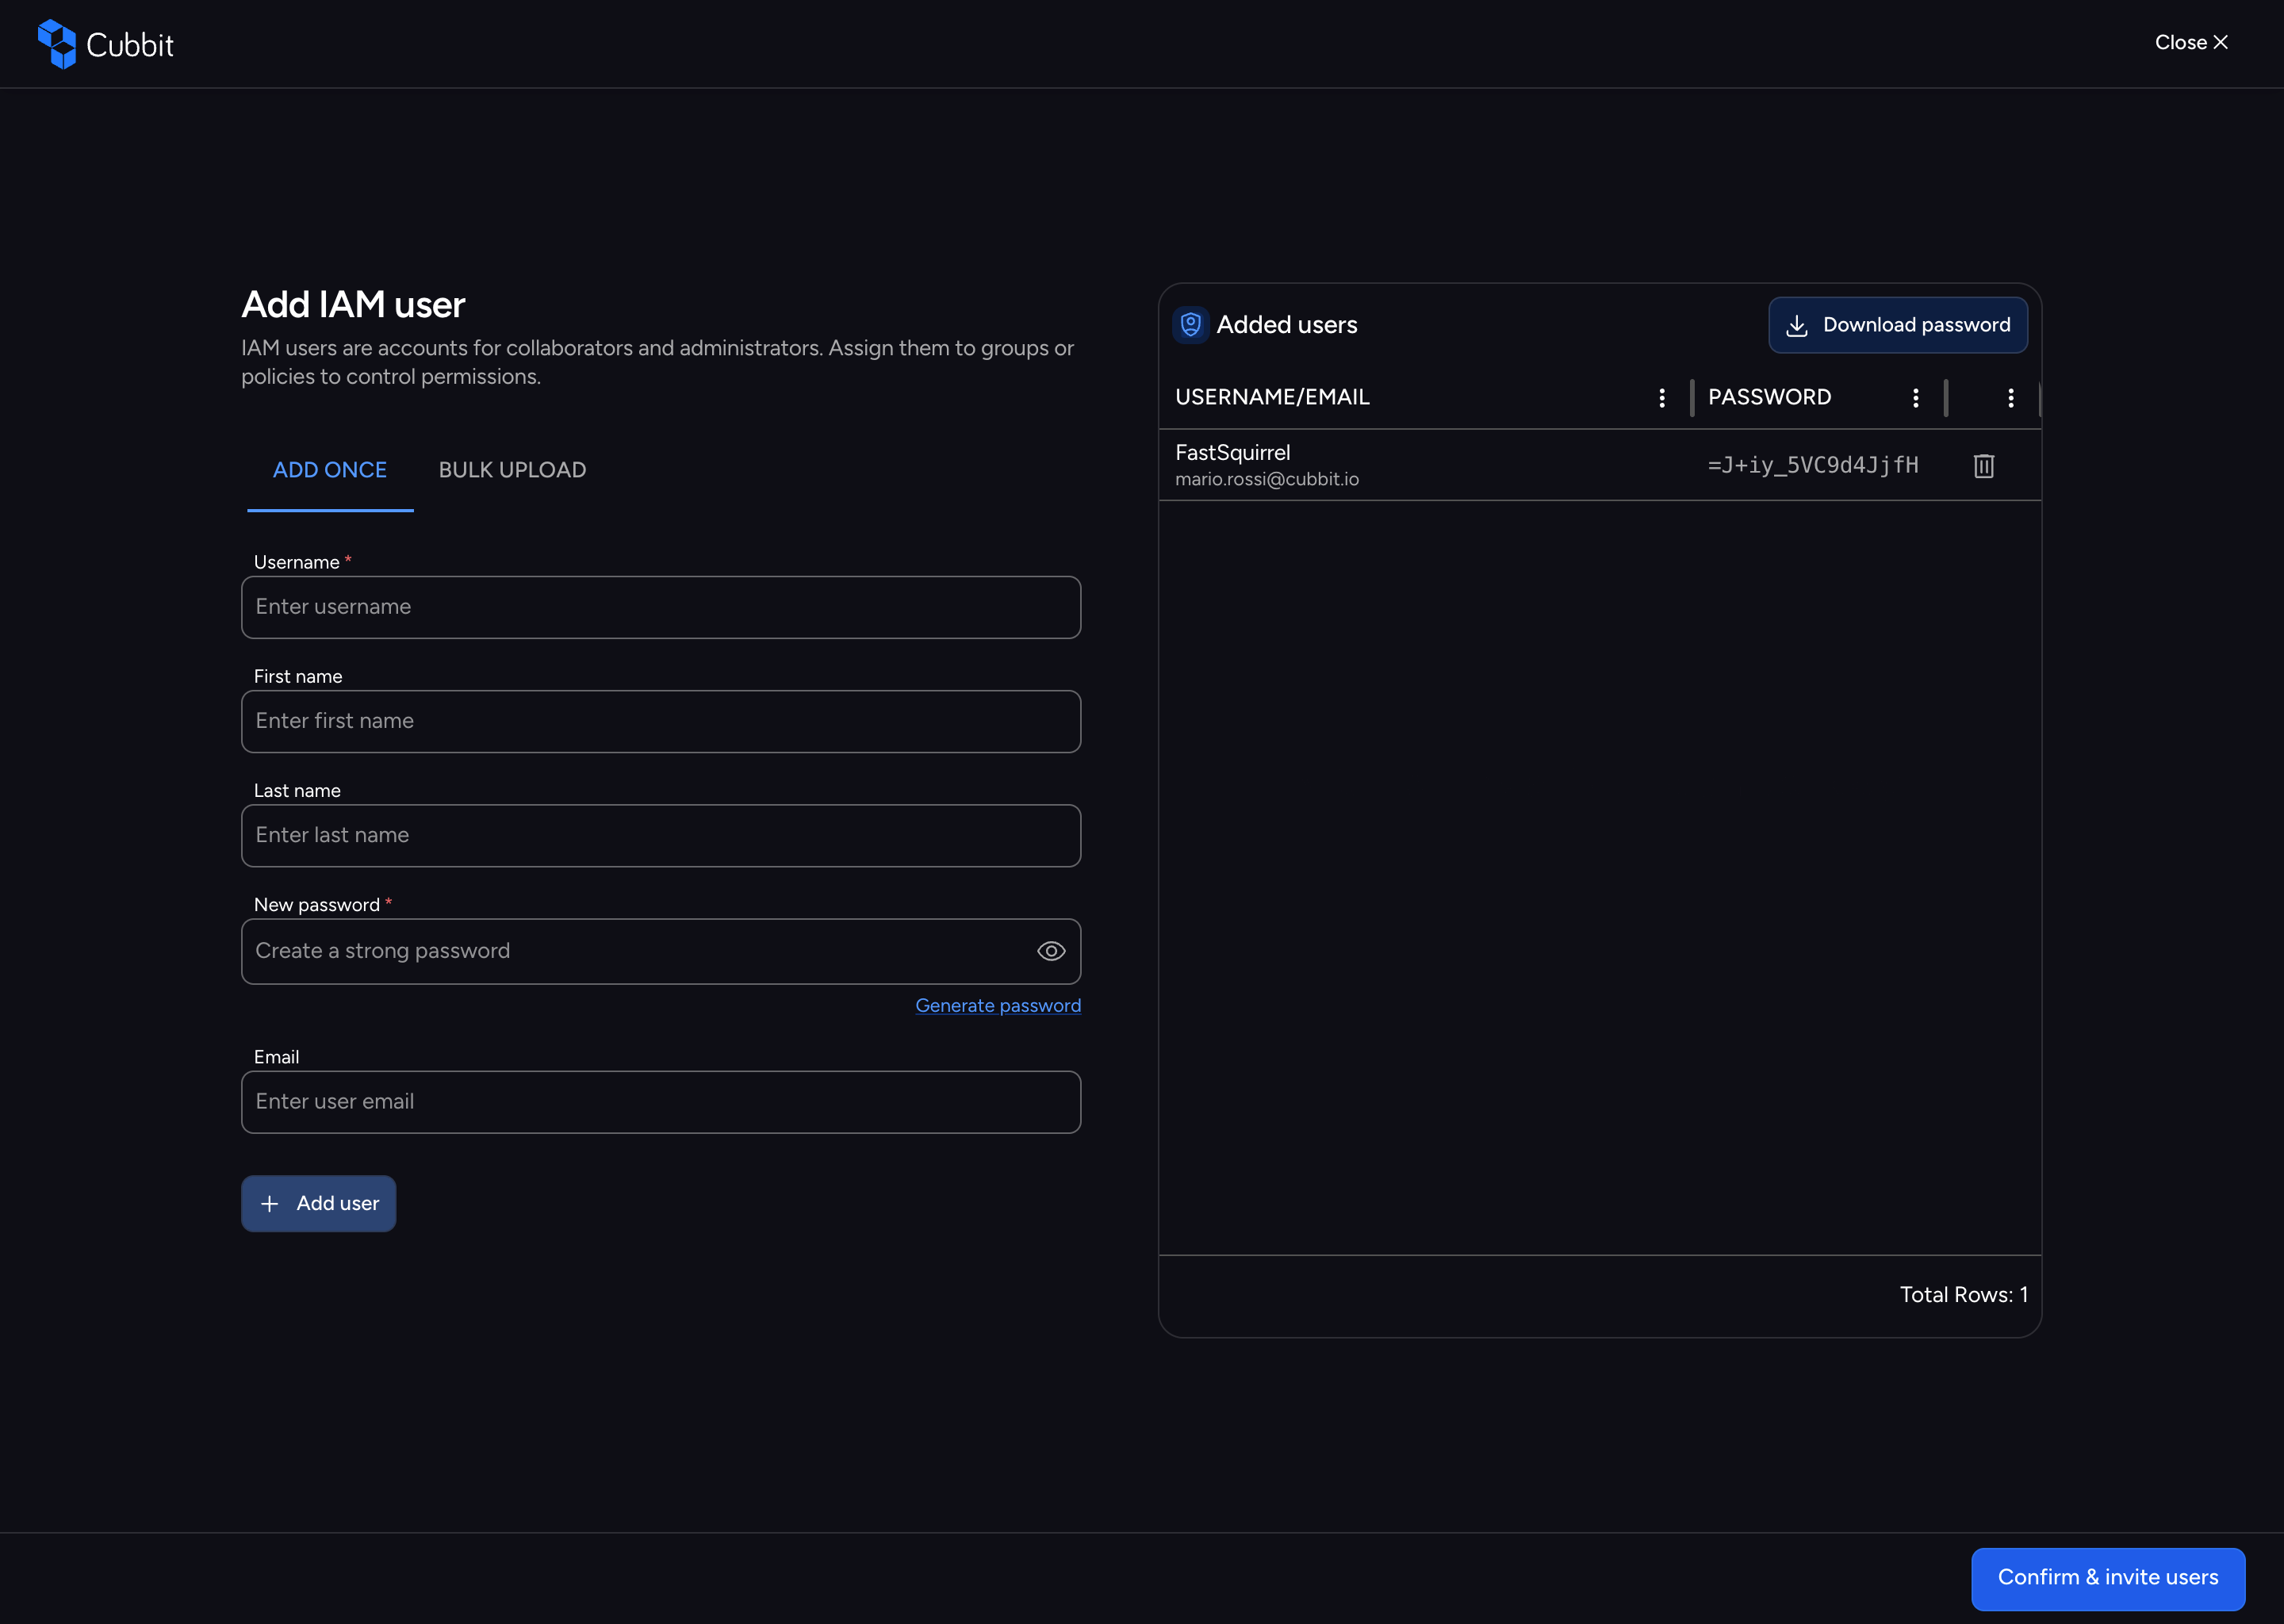
Confirming Creation
When you are ready, click Confirm & invite users at the bottom of the overlay. The system will:
- Generate cryptographic salts for each new user.
- Generate authentication public keys client-side.
- Create the users in the organization.
On success, a snackbar appears with the message "N user(s) created successfully" and the overlay closes.
User Details (Overview)
Click a username in the user list, or select Overview from the Actions menu, to navigate to the user's detail page at /users/[user_id].
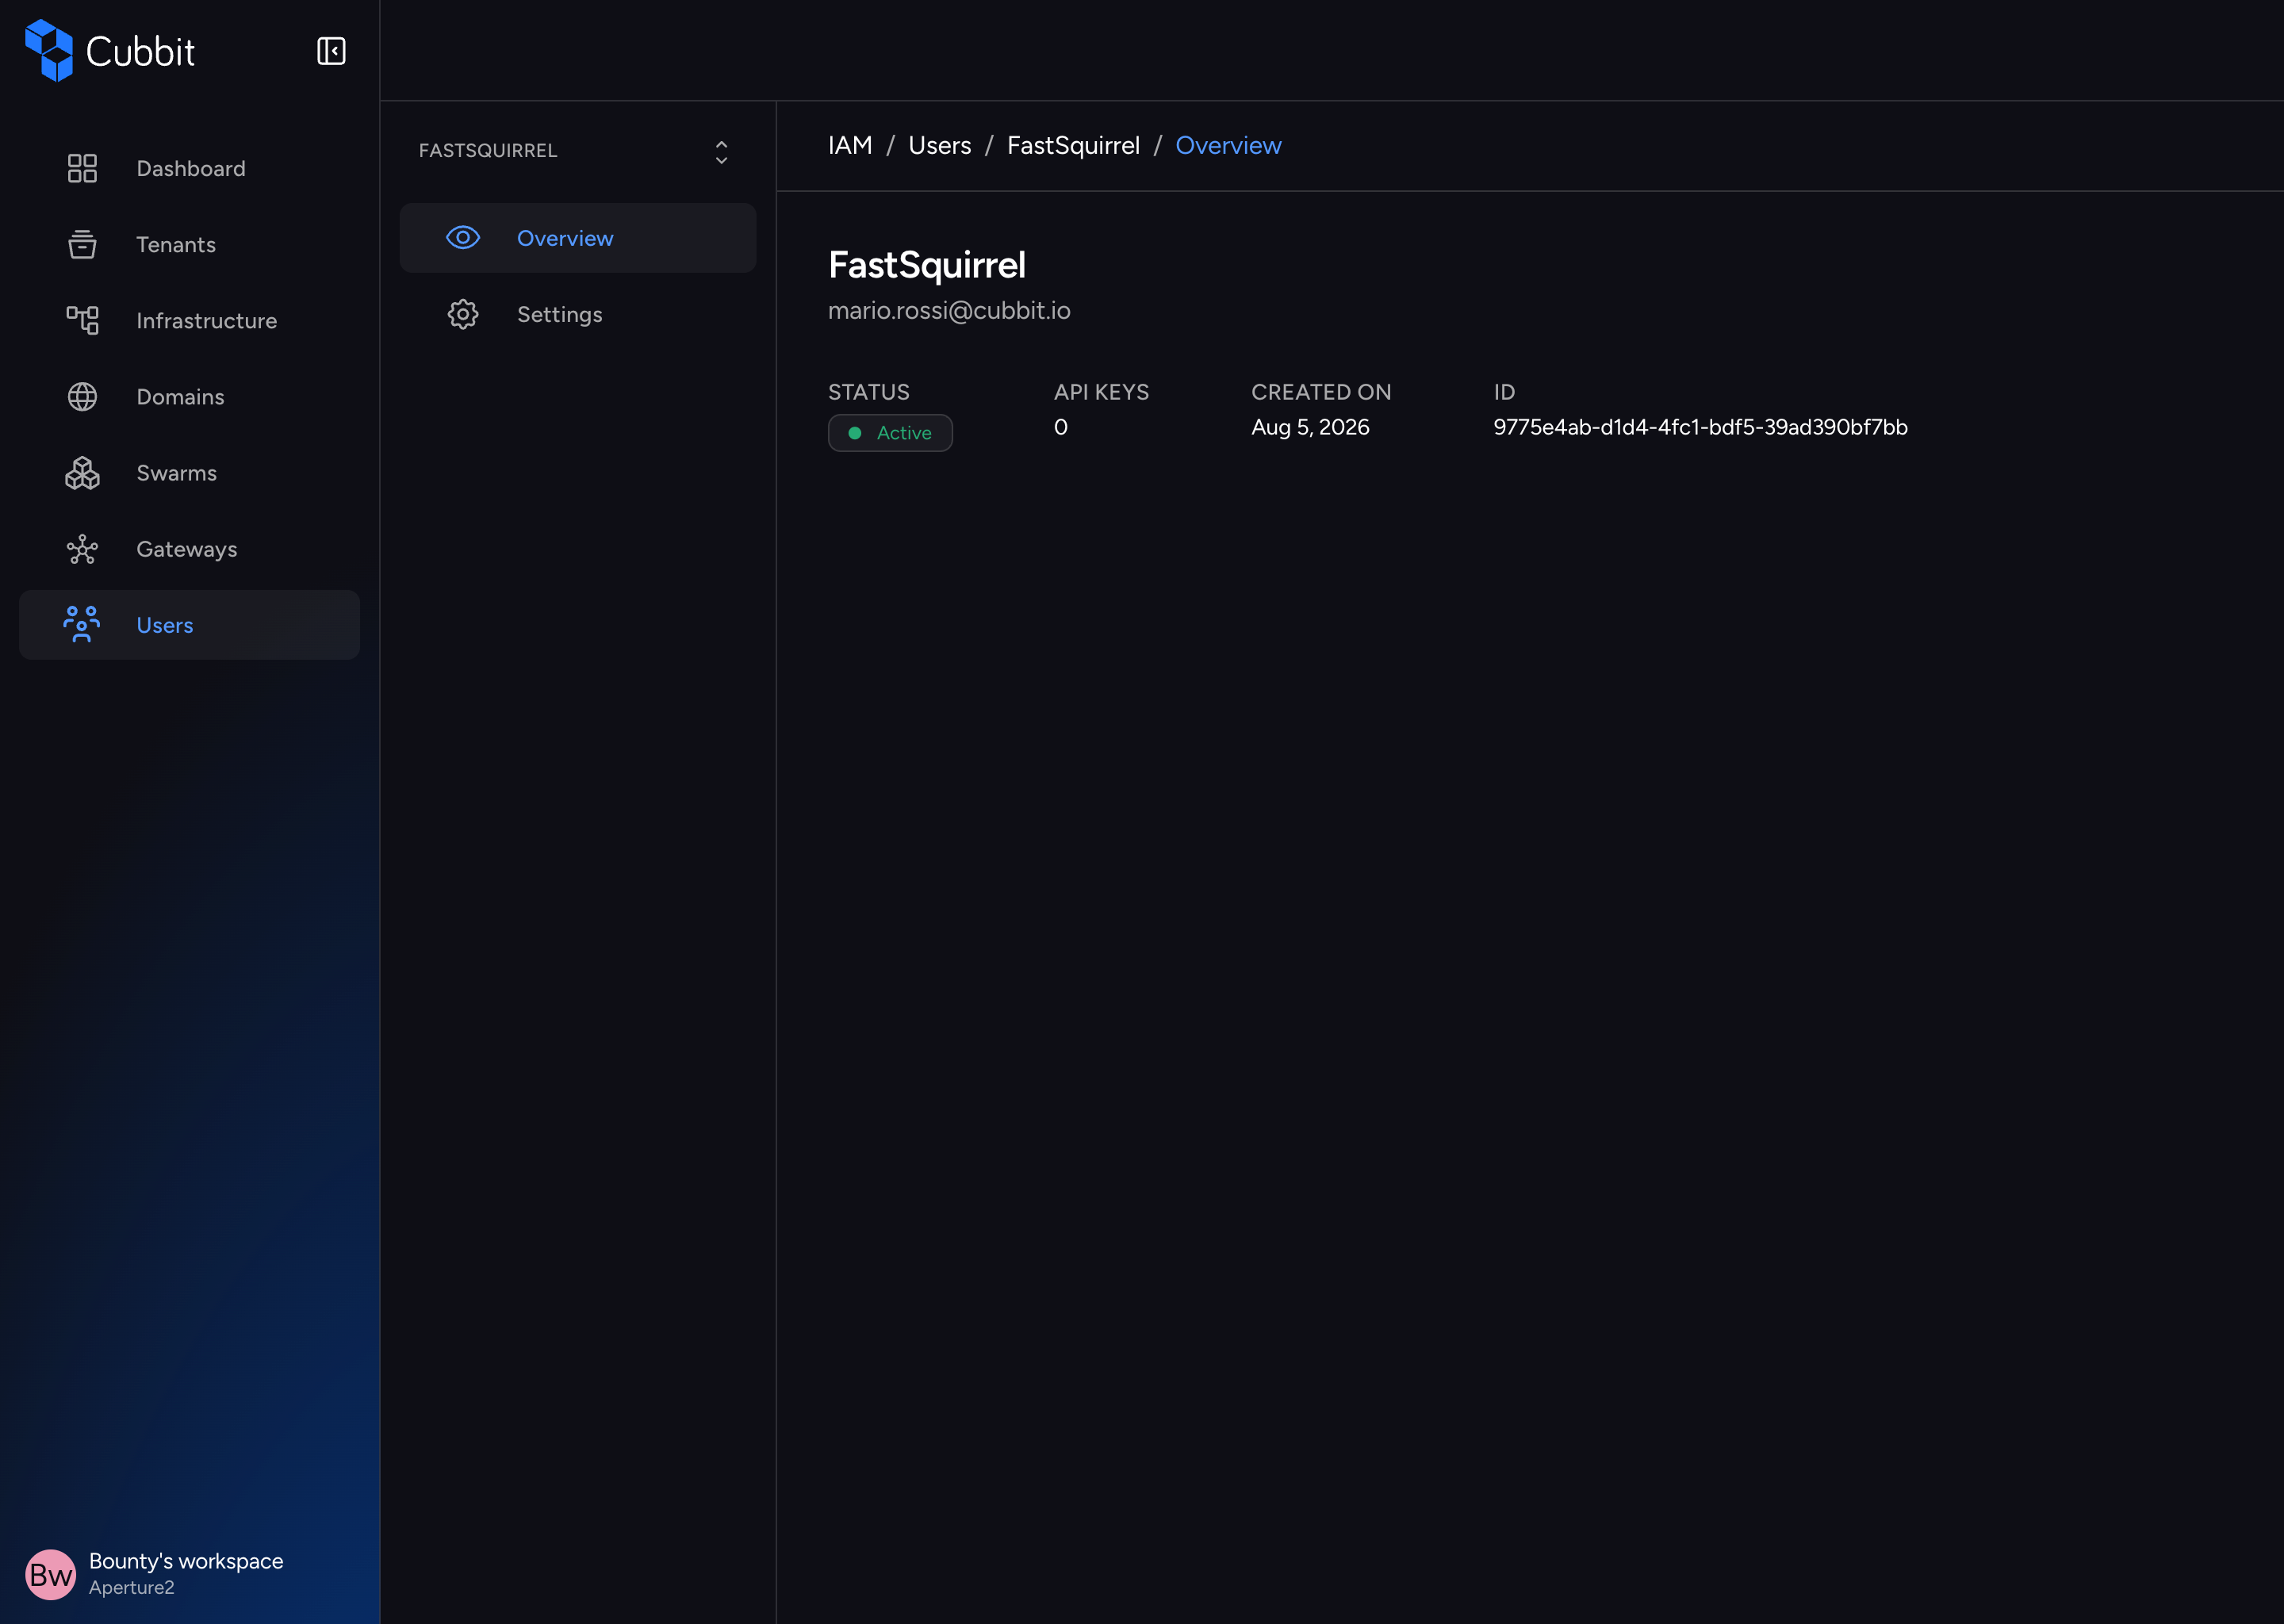
The overview page displays:
- Username — The user's display name
- Email — The user's email address (if set)
- Status — Colored status tag: Active (green), Inactive (red), Pending (yellow), Deleted (red)
- API Keys — The number of API keys associated with this user
- Created on — The date the user account was created (locale-formatted)
- ID — The user's unique identifier (UUID)
This page is read-only and provides a summary of user information.
User Settings
Navigate to a user's settings page by clicking Settings in the Actions menu, or by clicking the gear icon in the secondary sidebar from the user detail page. The URL is /users/[user_id]/settings.
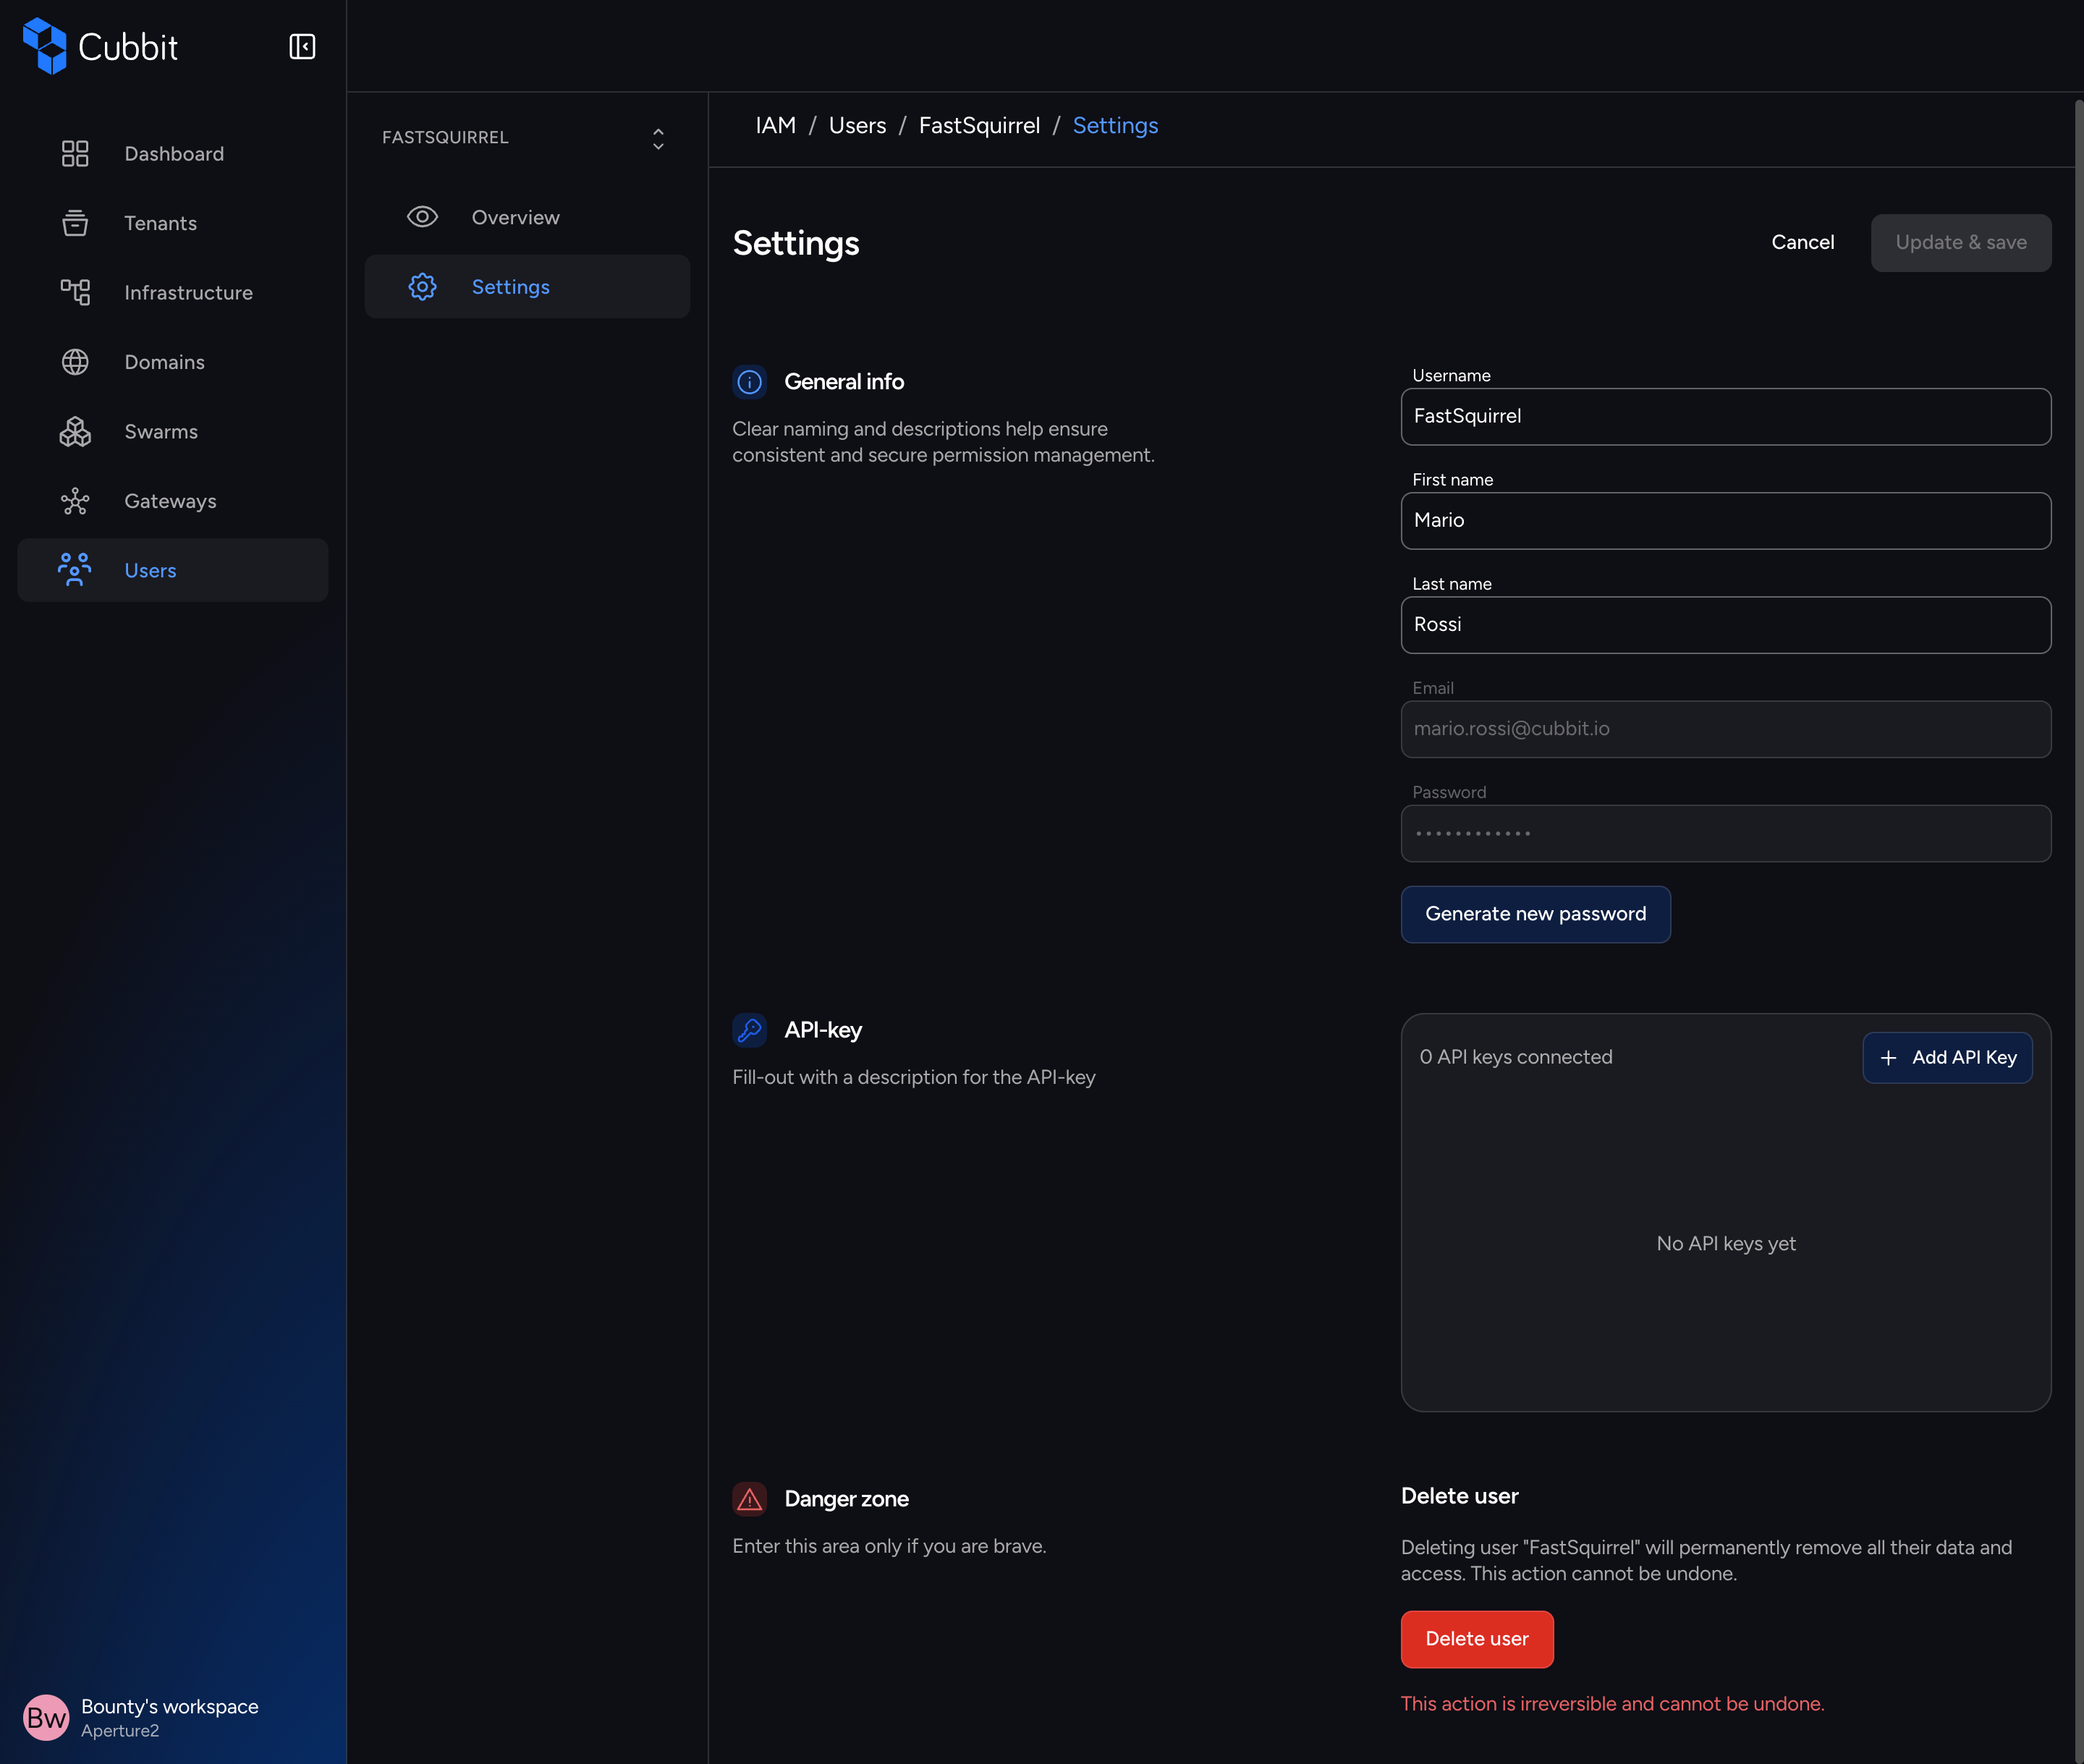
The settings page is organized into three sections.
General Info
In the General Info section, you can edit the following:
| Field | Editable | Notes |
|---|---|---|
| Username | Yes | Controlled by form input |
| First name | Yes | Controlled by form input |
| Last name | Yes | Controlled by form input |
| No | Read-only, shows the user's primary email | |
| Password | No | Displayed as •••••••••••• |
Click Generate new password to open the password reset modal (see below).
After making changes, click Update & save at the top of the page.
Managing API Keys
The API Keys section shows all API keys associated with the user.
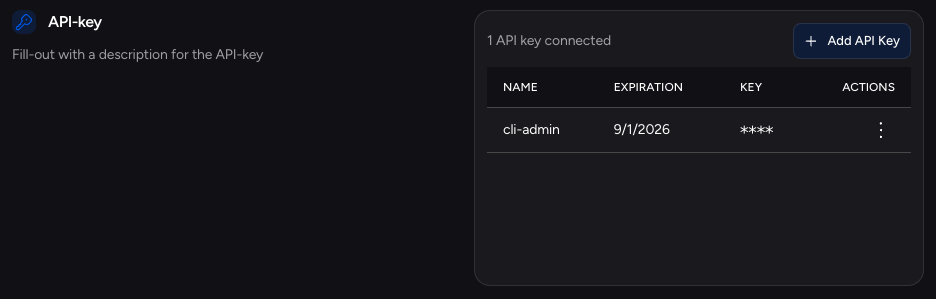
Header: "X API key(s) connected" + Add API Key button.
Table columns:
| Column | Description |
|---|---|
| Name | The API key name |
| Expiration | The expiration date, or - if no expiration is set |
| KEY | Masked as **** (the secret is shown only at creation) |
| Actions | Three-dot menu with Edit and Delete options |
Creating an API Key:
- Click Add API Key to open the creation dialog.
- Step 1 — Verify your identity: Enter your own (admin) password in the Verify your identity dialog. This generates a security token for the operation.
- Step 2 — Enter key details:
- Name (required): A descriptive name for the key.
- Expiring date (optional): A calendar picker with
minDateset to today. Leave blank for no expiration.
- Click Create to generate the API key.
Note: The API key secret is only displayed once at creation. Make sure to copy and store it securely.
Editing an API Key:
Follow the same two-step flow (identity verification + form) to update the key name or expiration date.
Deleting an API Key:
- Click Delete from the Actions menu.
- Step 1 — Verify your identity: Enter your admin password.
- Step 2 — Confirm deletion: A confirmation dialog asks "Are you sure you want to delete
{name}?" - Click the Delete button (error variant) to confirm.
Resetting a User's Password
You can reset a user's password from either:
- The Create new password option in the user list Actions menu.
- The Generate new password button in the General Info section of the settings page.
The password reset flow has three steps:
- Verify your identity: Enter your own (admin) password in the Verify your identity dialog.
- Set new password: A new 16-character password is auto-generated. You can regenerate it if needed. The password strength is validated (must score 2 or higher on zxcvbn). Click the copy button to copy it to the clipboard.
- Success: A confirmation screen with a green checkmark shows "New password saved!". Click Done to close.
Note: The new password is shown only once during this flow. Share it securely with the user.
Resending Email Verification
If the user has provided an email address but has not yet verified it, you can resend the verification email from the settings page.
Removing a User
The Danger Zone section at the bottom of the settings page allows you to permanently delete a user.
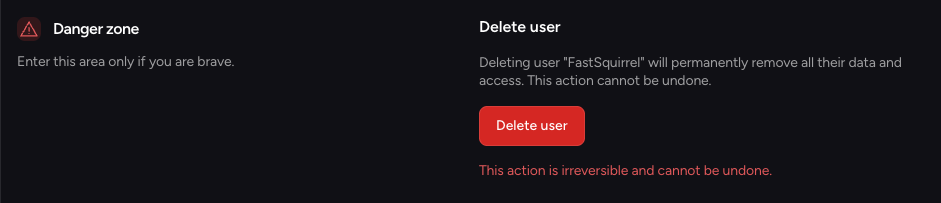
Warning: "Deleting user '{username}' will permanently remove all their data and access. This action cannot be undone."
Flow:
- Verify your identity by entering your admin password in the Verify your identity dialog.
- Type the username to confirm: Enter the target user's exact username to enable the delete button.
- Click the Delete button to permanently remove the user.
Note: The Organization owner cannot delete themselves. The Delete user button is disabled for the Organization owner with the tooltip "Root users cannot be deleted."
Troubleshooting
Common Errors
| Error | Cause | Fix |
|---|---|---|
| Username already exists | The username is taken by another user in the organization | Choose a different username |
| Password is too weak | The password scored 0 or 1 on zxcvbn | Generate a stronger password using the Generate password link. Aim for score 2 or higher. |
| Invalid username format | The username doesn't match the required pattern | Ensure the username is 3-50 characters and matches the pattern ^[a-zA-Z0-9\-._]+$ |
| Invalid email format | The email address is not valid | Check the email format and try again |
| CSV file exceeds size limit | The uploaded file is larger than 5 MB | Reduce the file size or split it into multiple uploads |
| Bulk upload has validation errors | Some rows in the file contain invalid data | Review the errors in the Bulk Upload Review dialog and correct the invalid rows |
| Failed to create users | A server error occurred during user creation | Check that the backend services are running and try again. If the issue persists, contact support. |
Password Strength
The system uses zxcvbn password strength estimation:
| Score | Label | Action |
|---|---|---|
| 0 | Risky — "Password is too common" | Regenerate a stronger password |
| 1 | Guessable — "Password is too simple" | Regenerate a stronger password |
| 2—4 | Acceptable | Can be used |
Passwords are automatically generated as 16-character strings containing uppercase letters, lowercase letters, digits, and special characters.
Identity Verification
All sensitive operations (password reset, API key management, user deletion) require the admin to re-enter their own password in the Verify your identity dialog. This is a security measure to prevent unauthorized actions. If the password is incorrect, the operation cannot proceed.